What Happens When You Overwrite a Folder on Mac
When you overwrite a folder on a Mac, the original folder is permanently deleted and replaced by the new folder. Overwriting doesn’t just rename or move the original folder – it completely removes it from your system. This happens because on macOS, overwriting a folder writes the new folder data over the same physical location on your hard drive where the original folder was stored. So the original bits representing the contents of the first folder are overwritten by the bits of the new folder you copied or moved into that location.
This is different from just deleting a folder on Mac, where the folder gets moved to the Trash and can potentially be recovered. An overwritten folder can’t be found in the Trash or anywhere else on your system after the overwrite occurs. The operating system has no way to get that original folder back, since its data has literally been erased from the hard drive and replaced with new data.
So when overwriting folders, it’s vital to be careful and ensure you have backups or don’t actually need the original. Otherwise, that folder and all its contained files will be permanently gone once replaced.
Check Trash Before Taking Further Action
When overwriting a folder on Mac, the original folder may have simply been dragged to the Trash rather than permanently deleted. Before taking more extreme measures to recover your files, first check the Trash to see if the original folder is still there.
On your Mac, click the Trash icon in your Dock or go to Finder > Trash. Look through the files and folders in Trash to see if the original folder you’re looking for is there. If you find it, simply drag it back to its original location to restore it.
Files and folders in the Trash are still recoverable until the Trash is emptied. So if you accidentally deleted the folder, moving it to Trash, you can get it back unharmed by rescuing it from there. Just be sure to do this before you empty the Trash.
Checking the Trash only takes a moment and could save you from trying more complicated file recovery methods. Often the simplest solution is the best first step. If the overwritten folder is not in the Trash, then move on to the next options for recovering deleted files on Mac.
Use Time Machine to Restore Folder
Time Machine is the built-in backup utility in macOS that can help restore overwritten folders, as long as backups were actively running before the folder was overwritten. Time Machine stores hourly backups for the past 24 hours, daily backups for the past month, and weekly backups until your backup drive is full. As long as the overwritten folder was backed up in one of those intervals before it was deleted, Time Machine should be able to restore it.
To use Time Machine to recover an overwritten folder:
- Open Finder and navigate to the location where the overwritten folder originally existed.
- Click on the Time Machine icon in the menu bar and select “Enter Time Machine”.
- Time Machine will open a window and navigate back in time through backups. Browse to when the overwritten folder still existed.
- Once you’ve located the overwritten folder, click the “Restore” button. This will restore the folder back to its original location.
Time Machine requires regularly running backups to be effective. If backups were not actively running before a folder was overwritten, Time Machine may not have the necessary data to restore it. Maintaining regular backups is crucial to protect against accidental overwrites.
For more details on restoring with Time Machine, see this Apple support article.
Recover Deleted Files with Data Recovery Software
Specialized data recovery software can scan your Mac’s hard drive and restore deleted files, even if you don’t have a backup. The software looks for file signatures and reconstructs deleted data that hasn’t yet been overwritten.
Some popular Mac data recovery software options include:
- Stellar Data Recovery – restores lost or deleted files, including documents, emails, photos, videos, and music
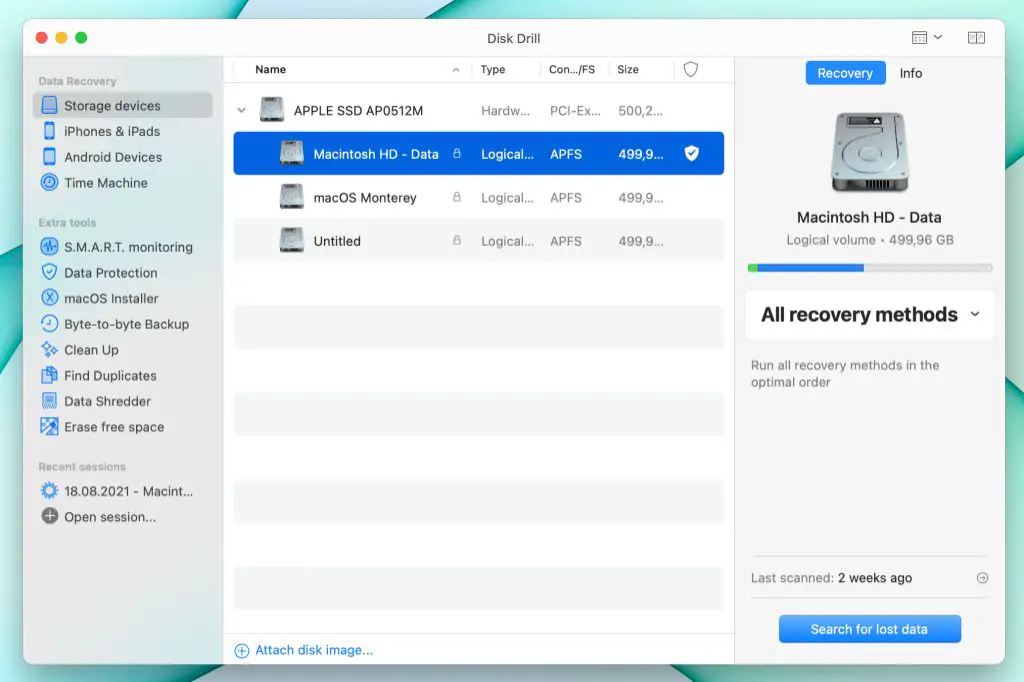
- Disk Drill – recovers data from internal and external drives, memory cards, iOS & Android
- Data Rescue – retrieves files from formatted, corrupted or deleted partitions
The sooner you run data recovery after a deletion, the better chance you have of getting your files back intact before they get overwritten.
Restore from a Bootable Backup
Booting from an external bootable backup disk is one of the most reliable ways to restore overwritten files and folders on your Mac. This requires having a complete bootable backup of your Mac created prior to the accidental overwriting.
To recover using a bootable backup:
- Connect the external drive containing the bootable backup to your Mac.
- Restart your Mac and hold down the Option key during bootup.
- Select the external backup drive to boot from it.
- Navigate to the folder that was overwritten and copy it back to your main startup drive.
- Restart your Mac from the main startup drive once the files are restored.
Booting from the backup drive loads a snapshot of your entire system before the overwrite occurred. This gives you full access to recover the accidentally overwritten files and folders. Just be sure to have a current bootable backup as this method relies on an up-to-date backup disk image.
Source: https://iboysoft.com/mac-data-recovery/recover-replaced-files-mac.html
Restore Previous Versions with a Snapshot
If you had file snapshot software enabled on your Mac, you may be able to restore a previous version of the overwritten folder. File snapshot tools like tmutil and Aptonic can maintain previous versions of folders and files at specified intervals.
To restore using a snapshot:
- Open the snapshot software and browse for the overwritten folder
- Look for a version from before the overwrite occurred and select Restore
- The previous version will be restored to its original location
With timely snapshots, you may be able to roll back the folder to right before it was accidentally overwritten. Just be aware that all changes in the time since the snapshot will be lost. But in most cases, restoring an old snapshot is preferable to losing the folder entirely.
Recover Files from Drive with File Carving
One advanced data recovery method for recovering overwritten files on a Mac is to use file carving to scan the drive and extract file fragments. File carving tools can analyze a drive sector-by-sector to find traces of deleted data. Even if a file was overwritten, parts of it may still exist in unallocated space on the drive.
File carving works by searching for specific file headers and footers that correspond to certain file types like JPG photos or Word documents. When the file carving software finds these headers and footers, it can rebuild the original file even if parts are missing or corrupted. This makes it possible to recover previously overwritten files.
There are many professional file carving tools available such as Kroll Ontrack and R-Studio that can scan Mac drives and recover overwritten documents, media, archives, and more. With file carving, overwritten files can often be salvaged unless the entire drive space has been overwritten.
Restore from a Clone or Disk Image
Clones and disk images act as full backups that you can restore your Mac from if you’ve accidentally overwritten a folder. A clone is an exact copy of your entire hard drive, while a disk image is a file that contains the contents of a drive. Both can be used to restore your Mac to an earlier state before the overwrite occurred.
To restore from a clone, you will need an external hard drive that you previously made a clone backup to. Boot your Mac from the clone drive and you will be able to access the overwritten folder again. Make sure to copy any important files from the clone back to your main drive.
For a disk image, you can mount and browse the image file like a drive on your Mac using Disk Utility. Navigate to the overwritten folder within the mounted disk image and copy the files back to your current system. Disk images take up less space than clones but won’t restore your whole system.
The key when restoring from a clone or disk image is that the backup must be from before the accidental overwrite took place. So as long as you have current clones or disk images, you should be able to retrieve your lost folder. Just be sure to regularly maintain backups.
For more details on creating and restoring from bootable clones and disk images, check out Apple’s support guides: https://support.apple.com/en-us/HT202796 and https://support.apple.com/guide/disk-utility/back-up-your-files-dskutl1010/mac.
Recover Deleted Files from Time Capsule
If you have an Apple Time Capsule connected to your Mac, you can use it to restore overwritten or deleted files.
Time Capsule provides versioned backups similar to Time Machine, allowing you to go back in time and recover previous versions of files and folders. So if you accidentally overwrite something, you can restore the deleted files from a Time Capsule backup.
To recover deleted files from Time Capsule:
- Open Finder and go to Time Machine in the menu bar.
- Click “Enter Time Machine”.
- Navigate back in time to a date before the files were overwritten.
- Locate the missing files and click the “Restore” button.
This will restore the overwritten files from your Time Capsule backup. Time Capsule keeps hourly backups for the past 24 hours, daily backups for the past month, and weekly backups for everything older than a month. So as long as the overwrite happened in that time range, you should be able to recover the files.
For more details, refer to Apple’s support guide on restoring files from Time Machine.
Prevent Accidental Overwriting in the Future
The best way to avoid issues with accidentally overwriting files in the future is to enable some of Mac’s built-in file versioning and backup tools.
One option is to turn on Time Machine backups (https://support.apple.com/en-us/HT201250). Time Machine will automatically create hourly backups of changed files, and allow you to restore previous versions if needed. Setting up regular Time Machine backups provides a safety net against accidental overwrites.
You can also enable Versions in System Preferences which will save hourly snapshots of files you can revert back to (https://discussions.apple.com/docs/DOC-8841). This lets you restore a previous version of a file if you accidentally save changes or overwrite it.
Making bootable clones or disk images of your startup drive is another precaution (https://www.macworld.com/article/1143435/software-utilities/data-and-disk-utilities.html). You can restore your entire system from a clone if needed after data loss.
Enabling these backup and versioning tools can prevent headaches from accidental overwriting in the future by giving you a way to revert files and folders to a previous state.