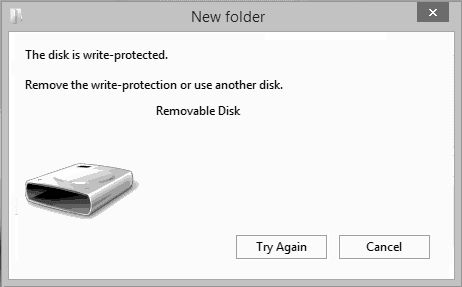
What is a Write-Protected Disk?
Write protection refers to methods of preventing modification or erasure of data on a storage device, such as a USB flash drive or external hard drive. When a disk is write-protected, new data cannot be written to it, existing data cannot be deleted from it, and often the disk’s formatting cannot be changed. Write protection helps ensure the integrity and preservation of data by preventing accidental or intentional changes.
There are a few key reasons why people enable write protection on a disk:
- Prevent viruses or malware from infecting the disk and corrupting files
- Avoid accidental deletion or overwriting of important data
- Safeguard integrity of archived data, documents, media files, etc.
- Protect against unintended changes on shared disks
Write protection gives users peace of mind that their valuable data cannot be altered once written to the disk. It provides a layer of security and stability for read-only disks.
Types of Write Protection
There are three main types of write protection:
Physical Write Protection
Physical write protection refers to a physical switch or tab on a storage device that prevents writing to it. For example, USB flash drives, SD cards, and some external hard drives have a sliding tab that toggles between a “locked” and “unlocked” position. When in the locked position, the drive is write-protected and data cannot be added, changed or deleted.[1]
Software Write Protection
Some operating systems like Windows provide the ability to enable software write protection on a drive. This uses permissions to restrict users from modifying files and folders on the drive.[2] Software write protection is applied logically and does not depend on any physical switch.
Firmware Write Protection
Some storage devices like SSDs use firmware commands to set write protection. The device’s firmware responds to write requests by rejecting any attempt to modify data. This makes the entire drive read-only until firmware write protection is disabled through a special command sequence.
Check If Your Disk is Write-Protected
There are a couple ways to check if a disk is write-protected:
Physical write protect tabs – Many external hard drives, SD cards, and other removable media come with a physical toggle or tab that switches between write-protected and writable modes. Check the exterior of the disk to see if there is a slider or tab in the “lock” position, which prevents writing data to the disk. If so, gently switch it to the unlocked position to disable write-protection. Some devices like SD cards may have a notch cut out instead of a slider; the notch indicates a locked write-protected state.
Check in Disk Utility/Device Manager – Open the Disk Utility program on Mac or Device Manager on Windows to view details about connected drives. Look for an external drive and check its status. If it says “Read Only” under the general information, then the disk is write-protected. This could be caused by software write-protection rather than a physical lock (source).
Unlock Physical Write Protection
Many SD cards and USB drives have a physical lock switch or tab that controls write protection. To remove write protection, you simply need to locate this physical switch and slide it to the unlocked position.
The write protect lock is usually labeled “LOCK” and is in the locked position when slid away from the contacts. Slide it back towards the contacts to unlock writing capabilities.
On microSD cards, the lock switch is tiny and you may need a small screwdriver or your fingernail to toggle it. Be gentle so as not to damage the card.[1]
USB flash drives also have a similar physical write protect switch. It’s usually on the end opposite the USB connector. Slide it to unlock write capabilities.
Once you’ve moved the physical lock into the unlocked position, the disk should allow files to be written to it again.
Disable Software Write Protection
Software write protection prevents you from modifying data on a disk by blocking write access at the software level. Here are some ways to disable software write protection on Windows, Mac, and Linux systems:
Windows
On Windows, some third-party antivirus or disk utilities may enable software write protection. To disable:
- Check any disk utilities you have installed for a setting to remove write protection.
- Try uninstalling or temporarily disabling your antivirus, then check if write access is restored. Re-enable it after.
- Use the ‘attrib’ command in Command Prompt to remove read-only attributes from files or folders if enabled. For example:
attrib -r C:\folder - Take ownership of the drive if needed with the ‘takeown’ command and grant yourself full control.
Be cautious when modifying permissions and attributes on system drives.
Source: https://www.alphr.com/how-to-remove-write-protection-from-a-usb/
Mac
On Mac OS:
- Open System Preferences > Security & Privacy and check if any software has enabled write protection.
- Try removing or disabling any security/antivirus utilities that may block writing.
- Check the drive format. Mac OS Extended format has a journaling feature that may prevent writes.
You can also try using the ‘sudo diskutil’ command in Terminal to disable journaling if enabled.
Source: https://www.tenorshare.com/data-recovery/best-write-protection-removal-software.html
Linux
On Linux, write protection can be enabled by:
- Setting a drive as read-only in your /etc/fstab file.
- Making a filesystem read-only with a remount.
- Setting restrictive file/folder permissions.
To disable software write protection on Linux:
- Check /etc/fstab and remove any ‘ro’ mount options.
- Remount the drive with read/write enabled using the ‘mount’ command.
- Modify permissions/ownership as needed with chmod and chown.
Take care when making changes to system drives and volumes.
Source: https://superuser.com/questions/1546607/how-to-remove-write-protection-from-oem-recovery-drive
Unlock Firmware-Based Write Protection
Some disks have firmware-based write protection enabled to prevent unauthorized changes to the data. This is common in devices like Chromebooks. Here are some ways to unlock firmware write protection:
You may need to update the firmware to a version that allows disabling write protection. For Chrome OS devices, updating to MrChromebox firmware can remove hardware write protect. See instructions here: https://wiki.mrchromebox.tech/Firmware_Write_Protect
If firmware update doesn’t work, you may need to open the device and disconnect the battery to temporarily disable write protection and flash the firmware. This physically bypasses the write protect hardware.
For certain chipsets like the Chromebook CR50, you can run “flashrom -p ec –wp-disable” to disable EC firmware write protection. See Chromium OS Docs for more details.
As a last resort, you may need to remove a physical write protect screw or jumper on the motherboard to disable hardware write protection.
Copy Data Off a Write-Protected Disk
If you need to copy data off a write-protected disk, there are a couple options:
Use disk imaging software: Tools like Macrium Reflect and AOMEI Partition Assistant allow you to create full disk images even from write-protected drives. You can then access the disk image as read/write and copy data off it.
Copy files directly if partial read access allowed: If the disk is not fully write-protected and you have at least read access, you may be able to directly copy files off the disk to another drive. However, this will not work if the disk is completely write-protected.
Write to a Write-Protected Disk
Writing to a disk that is write-protected carries certain risks, so proceed with caution. Any existing data on the disk could become corrupted or lost entirely if you attempt to write to it. Make sure you have backups of anything important before proceeding.
That said, there are tools available that can override the write protection on a disk. One popular option is a software tool called jbODI. This utility is designed specifically for overriding write protection and restoring full read/write access to a disk.
To use jbODI to remove write protection:
- Download and install jbODI.
- Connect the write-protected disk to your computer.
- Launch jbODI and select the disk from the list.
- Click “Clear Read Only Flag” to remove write protection.
Keep in mind this completely disables all forms of write protection, so be careful when writing to the disk to avoid corruption. Only use this method if you absolutely need to write to the disk and have backups available.
Recover Data from a Corrupted Write-Protected Disk
If your write-protected disk becomes corrupted or damaged, recovering the data can be challenging since you can’t directly write to the disk. However, there are a couple options to try and recover your files:
Professional data recovery services are equipped to handle corrupted write-protected media. They use specialized tools and techniques like imaging the drive sectors and extracting data at the forensic level. This gives the best chance of recovering data from even severely damaged drives. However, these services can be expensive.
DIY data recovery software provides an affordable option to restore data yourself. Programs like Stellar Windows Data Recovery can scan corrupted drives and recover lost files. But the success rate may be lower than professional services for severely damaged media.
With both options, it’s important not to further modify the disk to avoid overwriting data. The best approach is to remove the disk and connect it to another system as an external drive for read-only access.
Summary
In summary, there are a few main ways your disk can become write-protected. Physical write protection can be enabled via a physical lock or notch on the disk. Software write protection can be enabled within your operating system or other programs. Firmware write protection is enabled at the hardware level.
To remove write protection, you’ll need to disable physical locks, change software write protection settings, or update firmware depending on what is causing the write protection on your specific disk. If you need to access data on a write-protected disk, you may be able to copy the data off or use data recovery software.
Write protecting disks can be useful for preventing accidental changes or corruption on important disks. But sometimes write protection gets enabled unintentionally or prevents you from modifying disks when desired. Understanding the main ways disks get write protected and how to remove write protection gives you the knowledge to troubleshoot and resolve the issue.
Additional resources for learning more about write-protected disks:
– Disk management software help documentation
– Hardware vendor technical specifications
– IT administrator forums and communities
In closing, write protection serves an important purpose, but it’s good to know how to disable it when needed. With the right tools and knowledge, you can gain access to write-protected disks.