Updating your iPad’s software is an important part of keeping your device running smoothly and ensuring you have the latest features. However, sometimes an error can occur during the update process that prevents your iPad from updating successfully. Don’t worry – in most cases, these errors can be easily fixed with a few simple troubleshooting steps.
What are the common update error messages?
Some of the most common error messages you may encounter when trying to update your iPad include:
- “Unable to Check for Update”
- “Unable to Download Update”
- “Unable to Verify Update”
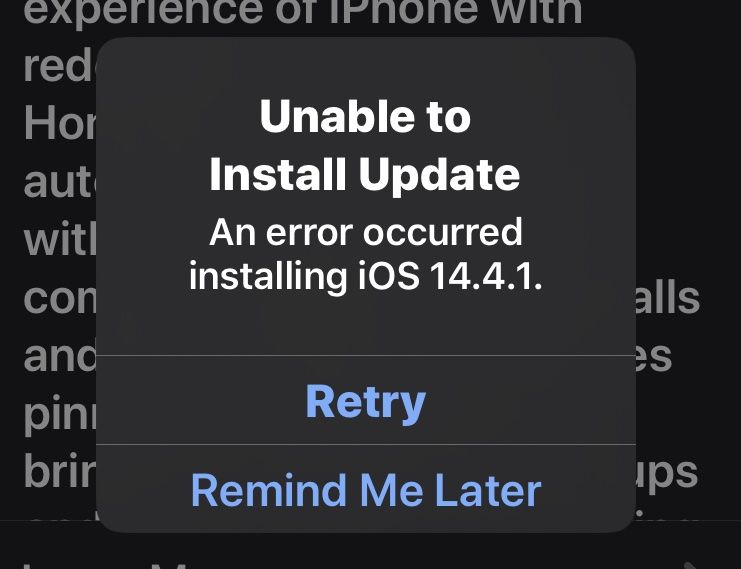
- “An error occurred installing iOS”
These errors typically occur due to issues connecting to the update server, problems downloading the update file, or corruption of the installation files. The good news is that they can usually be resolved without too much hassle.
Step 1: Check your internet connection
The first step is to ensure your iPad is connected to a stable, high-speed internet connection when you attempt the update. Updating requires your device to download the latest iOS software files from Apple’s servers, which can be hundreds of megabytes in size. Try these tips:
- If using Wi-Fi, move closer to your router or connect to a different network.
- Disable any VPN or proxy connections that could interfere with your access.
- If using cellular data, try moving to an area with a stronger signal.
- Toggle airplane mode on and off to reset your network connection.
After verifying you have a strong internet connection, attempt the update again. This alone could resolve many common iPad update errors.
Step 2: Restart your iPad
If you still get an error when trying to update, the next step is to restart your iPad. A simple restart will clear out any temporary glitches or bugs that could be interfering with the update process. Here’s how to safely restart your iPad:
- Hold down the power button until the “Slide to Power Off” prompt appears.
- Drag the on-screen slider to turn your iPad completely off.
- After 30 seconds, hold down the power button again to turn your iPad back on.
Once your iPad has restarted, try checking for the iOS update again. Restarting your device will clear any corrupt temporary files or RAM issues that may prevent the update from being installed correctly.
Step 3: Update your iPad using a computer
If you still get an error when trying to update wirelessly, you can update your iPad by connecting it directly to a computer. Updating your iPad through iTunes (PC) or Finder (Mac) provides a wired connection that can often resolve errors encountered with wireless updates.
To update your iPad using a computer, follow these steps:
- Install the latest version of iTunes (PC) or update your Mac to the latest macOS (Mac).
- Connect your iPad to your computer using the USB cable that came with your device.
- Open iTunes / Finder on your computer. Your iPad should appear in the sidebar.
- Click on your iPad’s icon, then click “Summary” or “General”.
- Click “Check for Update” (PC) or “Check for Updates” (Mac).
- Follow the on-screen prompts to download and install the latest iOS software update.
Updating via USB often resolves errors caused by Wi-Fi connectivity problems. Be sure to keep your computer and iTunes/Finder up-to-date for the best results.
Step 4: Reset your network settings
Resetting your iPad’s network settings to factory defaults can help clear out any issues connecting to update servers. To do this:
- Go to Settings > General on your iPad.
- Scroll down and tap Reset.
- Select “Reset Network Settings” in the menu.
This will erase all saved Wi-Fi networks and other network-related settings, so you’ll need to reconnect to your Wi-Fi afterwards. However, it often resolves persistent wireless update errors in one simple step.
Step 5: Delete and reinstall the update
If your iPad has partially downloaded the update but you continually get errors trying to install it, deleting the update file and redownloading it can help. Follow these steps:
- Go to Settings > General > Storage & iCloud Usage > Manage Storage on your iPad.
- Under Recommendations, look for iOS update and tap on it.
- Tap Delete Update to remove any downloaded files.
- Restart your iPad.
- Check for the iOS update again.
Deleting the corrupted update files forces your iPad to fully redownload the latest iOS software, often resolving any installation issues. Just be patient as the file will need to download completely again.
Step 6: Verify your iPad has enough storage space
iOS updates require at least 2-3 GB of available storage space on your iPad. If your storage space is completely full, update installation errors can occur. Check your available space:
- Go to Settings > General > Storage & iCloud Usage.
- Under Storage, check the amount of Available space.
If space is low, you’ll need to free up room for the update to install properly. Options include:
- Offloading unused apps
- Deleting old text messages
- Removing songs/videos from your device
- Storing photos on iCloud instead of locally
Clearing even a gigabyte or two of space can make room for the iOS update to install correctly.
Step 7: Contact Apple Support
If you still get an error when trying to update your iPad after trying all the above steps, your last resort is to contact Apple Support. An Apple Support advisor can troubleshoot your specific error code and provide customized solutions to get your device updated.
To contact Apple Support, you can:
- Use the Apple Support app on your device
- Call 1-800-APL-CARE (1-800-275-2273)
- Schedule a support call at getsupport.apple.com
Apple Support can request diagnostic information from your iPad, and run tests to identify the specific cause of the update error. This gives them the best chance of finding a fix for your problem.
Conclusion
Update errors on iPad can be annoying, but are usually fixable with some simple troubleshooting. Check your internet connection, restart your device, update via computer, reset network settings, delete/redownload the update, clear storage space, or contact Apple Support. With patience and working through these solutions, you should be able to successfully get your iPad updated once again.