What is an SD Card?
SD cards, or Secure Digital cards, are small removable flash memory cards used for storing photos, videos, music, and other files on devices like digital cameras, smartphones, tablets, and computers. The SD standard was introduced in 1999 by Panasonic, SanDisk, and Toshiba as an improvement over MultiMediaCards (MMC).
SD cards come in three main physical sizes – standard, mini, and micro. The standard cards are the largest in size at 32 x 24 x 2.1 mm. Mini SD cards are about half the size at 21.5 x 20 x 1.4 mm, while micro SD cards are the smallest at 15 x 11 x 1 mm. Despite the physical size differences, micro SD cards can be used in larger SD card slots with an adapter.
Today, SD cards are commonly used in digital cameras, camcorders, mobile phones, tablets, gaming consoles, GPS devices, media players, and more. Their small size, durability, capacity, and transfer speeds make them ideal for portable storage. SD cards are available in capacities ranging from 1 GB to 1 TB for storing everything from photos to 4K video.
According to Persistence Market Research, the global SD card market is expected to reach $10.3 billion by 2033 due to increasing demand for digital storage across consumer electronics.
Why View SD Card Contents on a Laptop?
There are several advantages to viewing the contents of your SD card on a laptop rather than on your camera or phone:
With a laptop you get a much bigger screen which makes it easier to preview and select photos and videos. The larger display allows you to see more detail and makes editing easier.
It’s faster and easier to copy, move, organize and manage a large number of files on a laptop compared to doing this on a small camera screen. You can create folders, rename files, delete unwanted content, etc. Laptops provide more storage options for backing up your files.
You have more powerful editing software options on a laptop. You can use professional tools like Photoshop and Premiere to edit your high-resolution photos and videos before sharing them.
For security reasons, it’s safer to view sensitive files on your personal laptop rather than on a public computer or kiosk. When doing work, it’s more comfortable to use a laptop’s keyboard and trackpad than a camera or phone screen.
With card readers, laptops allow easy access to various memory card formats like SD, microSD, CompactFlash, etc. Overall, laptops provide a full-featured environment for managing your media effectively.
Requirements
To view and access the contents of an SD card on your laptop, the first requirement is having a laptop that is equipped with a built-in SD card reader. Many modern Windows and Mac laptops have SD card slots, but some lower-end and ultraportable models may not. Refer to your laptop’s spec sheet or manual to confirm there is an integrated SD card reader.
If your laptop does not have a built-in SD card slot, you can get an external USB card reader that plugs into a USB port. There are inexpensive USB 3.0 SD card readers available from companies like Anker and AmazonBasics that provide read and write speeds comparable to built-in readers.
The laptop will also need an operating system that supports accessing SD card contents, such as Windows 10 or macOS. Instructions for both Windows and Mac are provided in the sections below.
Finally, you’ll need the actual SD card that contains the files and data you want to access. SD cards come in different sizes and speeds, but most consumer laptops support the common SD, SDHC and SDXC card types used in many consumer cameras.
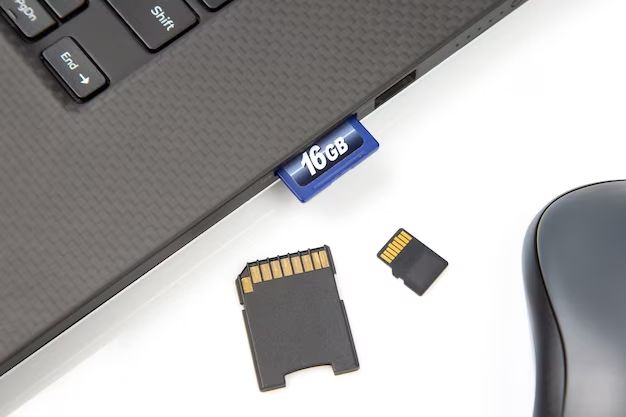
Insert the SD Card
To view the contents of your SD card on a laptop, you’ll first need to insert the card into your computer’s SD card reader. Most modern laptops have built-in SD card slots, typically located along one of the sides of the computer. Older laptops may require an external USB card reader to connect via USB port. Refer to your laptop’s user manual if you’re unsure of the location.
Once you’ve located the SD card reader, gently insert the SD card with the label facing upward and the connector end going into the slot first. Push the card into the slot until it clicks into place and is fully inserted. Avoid forcing the card into the slot and only apply gentle and even pressure. Physically damaging the card reader or connectors can lead to data loss or corruption.
Many laptops will automatically detect and mount newly inserted cards. If your computer does not, you may need to initialize and format the card through your operating system before it becomes accessible, covered in the next sections.
Accessing SD Card on Windows
To access the files and folders on your SD card in Windows, you’ll need to open File Explorer. Here are the steps:
1. Insert the SD card into your laptop’s SD card reader.
2. Open File Explorer by clicking on the folder icon in your taskbar or pressing Windows Key + E on your keyboard.
3. In the left pane of File Explorer, you should see a list of folders and drives. Look for the removable drive labeled with the name of your SD card (for example, “SD Card (D:)”) and click on it.
4. The contents of your SD card will now display in the right pane of File Explorer. You can now view photos, videos, documents and other files stored on the SD card.
5. To access a specific folder, double-click on it to open it and view its contents.[1]
That covers the basics of accessing and viewing files on your SD card through File Explorer in Windows. Let me know if you need any clarification or have additional questions!
Accessing SD Card on Mac
Once the SD card is inserted into your Mac’s SD card slot or external reader, you can access the contents through the Finder app. Here are the steps:
-
Open Finder – Click the Finder icon in your dock or select Finder from the Applications folder.
-
Locate the external drive – In the Finder sidebar, under Devices, you should see the name of your external SD card drive. Click on it.
-
View files and folders – The contents of the SD card will display in the Finder window. You can now access your files and folders on the SD card.
The SD card will appear as an external drive, allowing you to view photos, videos, documents and any other files saved on the card. You can also copy files back and forth between your SD card and Mac.
Remember to properly eject the SD card before removing it physically from your Mac. To eject, right click on the SD card name in Finder and select Eject. This ensures all data is written before disconnecting the drive.
Copy Files from SD Card
Once the SD card is accessible on your laptop, you can copy files such as photos, videos, documents, etc. from the SD card to your laptop for editing, storage, or sharing.
There are a couple ways to copy files from the SD card to your laptop:
- Select the files you want to copy – You can browse the folders and files on the SD card, then select the specific files you want to copy over. On Windows, select the files then right-click and choose “Copy”. On Mac, select the files and press Command+C to copy.
- Copy/paste files – Browse to the destination folder on your laptop where you want to copy the files. Right-click and select “Paste” on Windows or press Command+V on Mac to paste the copied files from the SD card.
- Drag and drop files – Click and drag the selected files from the SD card window over to the destination folder window on your laptop. Then release to drop the files into the folder.
Copying files allows you to transfer photos, videos, and other data off the SD card onto your laptop for safekeeping and easy access. Be sure to copy any important files off the SD card before reformatting it or recording new content on your camera.
Edit Photos
Once the SD card contents have been accessed on a laptop, it is easy to edit any photos that were taken with the camera. The most common photo edits include cropping, rotating, and adjusting the brightness, contrast, saturation, etc. To edit photos on a laptop:
1. Open your preferred image editing software. Some top options include Adobe Photoshop, GIMP, and Adobe Lightroom.
2. Locate the photos on your SD card and open the image you want to edit.
3. Use the editing tools to crop or rotate the image as needed. Adjust settings like brightness, contrast, highlights, shadows, white balance, and vibrance to improve the look of the photo.
4. Apply any other desired edits, like removing blemishes, enhancing colors, sharpening, etc.
5. Save the edited photo, either overwriting the original or saving as a new file.
With the right editing software, you can turn lackluster photos into stunning images by cropping, rotating, and adjusting the photo after transferring from an SD card to a laptop.
Edit Videos
After transferring video files from your SD card to your laptop, you may want to edit them before sharing or uploading online. There are a few free, beginner-friendly video editing programs you can use:
- OpenShot Video Editor – An open source, cross-platform video editor with easy-to-use timeline editing, effects, and transitions. Great for basic trimming, splitting, and concatenating clips.
- DaVinci Resolve – A more advanced free editor with robust tools for color correction, audio editing, effects, and more. Excellent for polishing professional looking videos.
- VSDC Free Video Editor – Windows only software with a straightforward interface and options for visual effects, green screening, stabilization, and filters.
These programs allow you to import video clips from your SD card, trim unwanted footage, rearrange clips, add transitions, apply visual effects, overlay text, and export the final edited video. Most also provide options for correcting color, adjusting audio, and more advanced edits. Review each program’s features to decide which best suits your video editing needs.
For example, to quickly trim footage and concatenate clips, OpenShot provides an intuitive timeline editor. For more complex edits like color grading and audio mixing, DaVinci Resolve offers pro-level tools. Take advantage of free software like these to edit and enhance videos from your SD card before sharing them.
Safely Remove the SD Card
It’s important to always safely remove your SD card from your laptop to avoid data corruption or loss. When you remove an SD card while files are still being written to it, the card can become corrupted and unreadable. To safely remove your SD card on Windows:
1. Locate the “Safely Remove Hardware and Eject Media” icon in your system tray. This is usually in the bottom right corner of your screen.
2. Click on the icon and select your SD card’s drive letter from the menu.
3. A message will appear notifying you that it is safe to remove the hardware device. At this point, you can physically remove the SD card from your laptop.
On Mac OS, you can eject an SD card by right-clicking on its icon on the desktop and selecting “Eject”. Or drag the icon to the Trash. This ensures all data has been written before removing the card.
Following this easy protocol every time prevents errors, data loss, and corruption when transferring files back and forth from your SD card. The “Safely Remove Hardware” feature is an important tool for external media to be used properly.
