Wiping and formatting a hard drive in Windows 10 is an effective way to completely erase all data on the drive and start fresh. This can be useful if you are selling or giving away your computer, want to wipe sensitive information before recycling a hard drive, or just want to reinstall Windows 10 with a clean slate.
When Should I Wipe and Format a Hard Drive?
Here are some common situations when you may want to wipe and format a hard drive in Windows 10:
- Before selling or giving away your computer – Wiping the drive erases all personal files and accounts.
- Reinstalling Windows 10 – Formatting the drive provides a clean slate for the OS installation.
- Removing sensitive data – Wiping thoroughly deletes sensitive business or personal data.
- Removing viruses – Formatting helps eliminate persistent malware.
- Fixing hard drive problems – Wiping can resolve some corruption or performance issues.
- Recycling a computer – Data should be wiped before disposing of old PCs.
How to Back Up Data Before Wiping a Hard Drive
Before wiping your hard drive, be sure to back up any important data you want to keep. Here are some options for backing up your data:
- Copy files to an external hard drive, USB flash drive or cloud storage.
- Use the Windows 10 File History tool to automatically back up files.
- Use the Windows 10 system image backup utility.
- Use the built-in Windows 10 “Backup and Restore” tools.
- Use third party backup software to make backups.
Be sure to verify your backups were created properly before wiping the drive. Storing backups externally or in the cloud provides protection in case the hard drive fails.
How to Wipe a Hard Drive in Windows 10
Here are the steps to wipe a hard drive completely in Windows 10:
- Type “Create and format hard disk partitions” in the Windows search bar and open the tool.
- Right-click on the drive you want to wipe and select “Delete volume…”.
- Check the box to “Perform a quick format” and click “OK”.
- Right-click on the now “Unallocated” space and select “New Simple Volume”.
- Go through the prompts to initialize the disk again as desired.
This will delete all data on the drive by resetting the format and partition table. However, it only does a quick wipe of the data, not a secure erase.
How to Securely Wipe a Hard Drive with Diskpart
For more secure data deletion, you can use the Diskpart command line utility:
- Type “diskpart” in the Windows search or Run box and open it.
- Type “list disk” to show disks. Identify the disk number of the one you want to wipe.
- Type “select disk X” where X is the disk number.
- Type “clean” to perform a quick wipe, or “clean all” for a secure wipe.
- Exit Diskpart when done and initialize the disk in the Windows utility.
The “clean all” command will securely overwrite all sectors of the drive to make data recovery as difficult as possible.
Using Third Party Disk Wiping Software
For enhanced wiping and erasing capabilities, you can use third party disk utility software. Some popular options include:
| Software | Details |
|---|---|
| DBAN | Data wipe utility approved for DoD data sanitization. |
| Active@ KillDisk | Comprehensive disk erasure tools for home users. |
| Eraser | Open source data destruction tool for Windows. |
| Acronis Drive Erase | Wiping utility included in Acronis disk management suites. |
These tools support a variety of advanced wiping methods like DoD 5220.22-M or Gutmann wiping patterns. They offer options like securely erasing free disk space.
DBAN
DBAN (Darik’s Boot and Nuke) is a very popular free data destruction utility bootable from a USB or CD. It can securely wipe hard drives with a variety of methods. It’s a good option when you need to wipe a drive before recycling a computer.
Active@ KillDisk
Active@ KillDisk is a shareware program with a free trial available. It supports a wide range of secure erase methods and options. You can schedule wipe jobs and customize the number of overwrite passes.
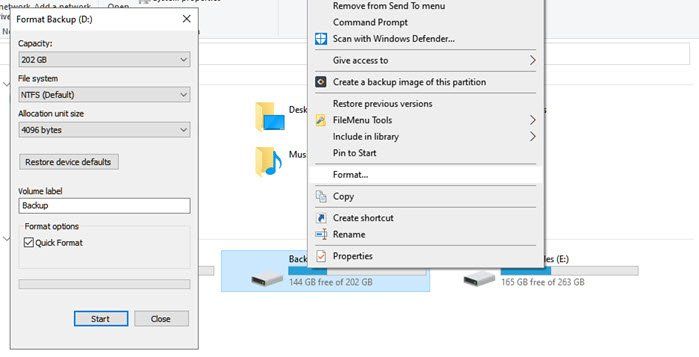
How to Format a Hard Drive in Windows 10
Once your drive is wiped, you will want to reformat it before using it again. Here are the general steps to format a drive in Windows 10:
- Open the Create and Format Hard Disk Partitions tool.
- Right-click the disk and choose New Simple Volume.
- Go through the quick prompts to initialize the disk.
- Select desired file system – NTFS is recommended for Windows 10.
- Give the volume a drive letter and path.
This will freshly format the disk so you can start storing data on it again or install Windows 10 cleanly.
Formatting Options
When formatting a drive, you’ll be able to choose basic formatting or creating a volume with a file system. Here are the key options:
- NTFS – The preferred file system for Windows 10. Provides security features and modern capabilities.
- exFAT – Compatible for Windows and Mac. Limits file size to 16TB.
- FAT32 – Legacy file system. Limits files size to 4GB.
- Quick Format – Only clears file tables. Faster but less secure than full format.
In most cases, choose NTFS and perform a Full format, not Quick. This will thoroughly clear all file system data from the drive.
How to Securely Wipe Solid State Drives (SSDs)
Solid state drives (SSDs) store data differently than traditional hard disk drives (HDDs). Their performance benefits come from advanced handling of how data is written, cached, and erased. This means securely wiping an SSD requires specialized techniques.
SSD Wiping Challenges
Here are some key ways SSDs make secure data wiping more difficult than HDDs:
- Wear leveling spreads data fragments across all NAND cells.
- Garbage collection erases data actively in the background.
- TRIM command can make previously deleted data unrecoverable.
- Native encryption scrambles data until the SSD fails or is wiped.
These optimizations provide SSD’s great performance. But they also make simply overwriting data ineffective for secure deletion.
Methods of Wiping an SSD
Given those challenges, here are a few options to securely wipe an SSD:
- Use ATA Secure Erase – Resets all data on the SSD.
- Use disk utility software with SSD specific tools.
- Encrypt entire SSD, delete keys to render data unreadable.
- Perform a full disk overwrite, skipping SSD optimization commands.
The ideal method depends on your specific SSD model and manufacturer instructions. The software method gives you the most control to implement secure deletion.
How to Reinstall Windows 10 After Wiping a Drive
Once your drive is wiped and formatted, here is a typical process to freshly install Windows 10:
- Boot from the Windows 10 installation media (USB or DVD).
- Choose your language settings and click Install Now.
- Enter your product key if you have one.
- Accept the licensing terms.
- Select Custom: Install Windows Only.
- Select the wiped hard drive to install Windows to.
- Follow the on-screen prompts to finish installing Windows.
After completing the OS installation, Windows will boot up normally to a fresh desktop. You can then reinstall your applications and restore your data from backups.
Tips for Reinstalling Windows 10
Here are some useful tips when reinstalling Windows after wiping a hard drive:
- Choose custom installation, not just “Upgrade” to freshly format.
- Delete all existing partitions during setup to remove leftovers.
- Unplug other drives to avoid accidentally installing to them.
- Have your license key, Microsoft account, or previous digital entitlement ready.
- Download the latest Windows updates during installation for best results.
Conclusion
Wiping and formatting a hard drive in Windows 10 before reinstallation is good practice for a fresh system. Make sure to backup wanted data, use a secure wipe method, and properly format the drive before reinstalling. Following these best practices will give you maximum privacy and security while also letting you start from scratch with a cleanly installed operating system.