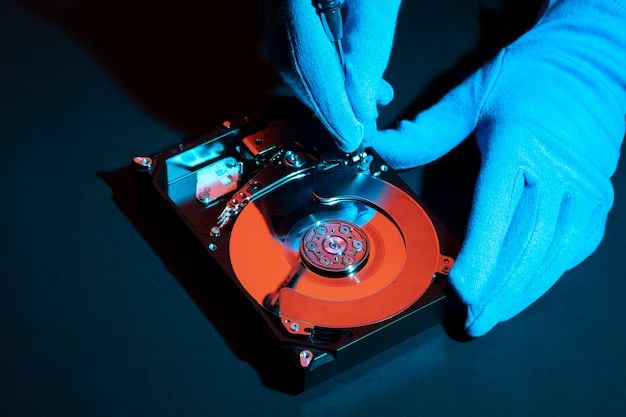
Wiping a hard drive allows you to completely erase and reformat the drive, removing all data and allowing you to start fresh. If you have multiple hard drives in your computer, you may only want to wipe one drive while leaving the others intact with data still on them. Wiping a single drive is possible by carefully selecting the correct drive to wipe and using disk utility software.
Why Would You Want to Wipe a Single Hard Drive?
There are a few common reasons why you may want to wipe just one hard drive and not all the drives in your system:
- Upgrading to a new hard drive: When replacing an old hard drive with a new, larger capacity drive, you’ll want to wipe the new drive to format it before migrating data over.
- Removing sensitive data: If one of your hard drives contains sensitive documents or information you want to permanently erase, wiping that specific drive prevents exposing data on other drives.
- Troubleshooting drive issues: A corrupted or damaged drive may need a complete wipe and reformat to fix problems and make it usable again.
- Reinstalling operating system: Wiping the drive with the OS only allows fresh install while keeping other drives and data intact.
In situations like these, wiping the entire computer and all drives would be unnecessary and result in data loss. Wiping individual drives gives more control over what gets erased.
Identifying the Hard Drive to Wipe
Before wiping a hard drive, you need to first identify which physical drive you want to wipe, especially if your computer has multiple drives. Here are some ways to determine which is the correct hard drive to select:
- Drive letters: In Windows, open up File Explorer and look at the different drive letters assigned to volumes. Typically the main C: drive contains the operating system.
- Drive labels: Volumes are usually given labels that identify the drive, like “Operating System” or “Data”. These can help distinguish drives.
- Size: The capacity of the drive in GB or TB can help pick out a particular drive to wipe.
- External vs. internal: External drives can be disconnected from the computer to be wiped separately.
It’s essential to verify you are wiping the correct drive before proceeding. Wiping the wrong drive could result in permanent data loss.
Using Disk Management to Wipe a Hard Drive
The Windows Disk Management utility provides a simple way to wipe and reformat a hard drive with just a few clicks. Here is how to use Disk Management to securely erase a single hard drive:
- Open the Disk Management utility. On Windows 10 and 11, right-click the Start menu and select “Disk Management”.
- Locate the hard drive you want to wipe in the Volume list. Note the drive letter, label, file system, and capacity to verify it is the correct one.
- Right-click on the volume and select “Delete Volume” to delete the existing partitions on the drive.
- Right-click the disk itself (not the volume) and choose “Clean” to perform a quick wipe of the drive.
- Right-click the “Unallocated” space on the drive and select “New Simple Volume” to create a new partition formatted with the file system you choose.
Following these steps allows you to selectively wipe and reformat just one drive while leaving other drives untouched. The Disk Management wipe overwrites all data to make it unrecoverable.
Using Third-Party Disk Utility Software
While Disk Management can quickly wipe a drive, more advanced disk utilities provide additional options and features for securely erasing drives. Popular third-party disk utilities include:
- DBAN (Darik’s Boot and Nuke): Free tool designed specifically for disk wiping. Supports multiple wipe algorithms.
- Eraser: Securely overwrites files and folders as well as wiping full drives. Works on Windows.
- KillDisk: Wipes drives and overwrites data multiple times. Has paid and free versions.
- HDShredder: Wipe tool focused on safety and simplicity. Just select a drive and wipe method.
The advantages of third-party disk wiping software include:
- More wipe options: Choose from multiple data sanitization standards like DoD 5220.22-M for secure wiping.
- Added security: Some wipe files or entire drives repeatedly to make data unrecoverable.
- Portability: Many boot from CD/DVD or USB drive so you don’t have to wipe the active system drive.
- Ease of use: Simple, wizard-driven interfaces make drive wiping straightforward.
Make sure to research the wiping program thoroughly before use as some freeware has bugs and risks partial wipes. Paid programs like KillDisk offer technical support as well.
Steps for Wiping a Drive with Third-Party Software
- Download and install the disk wipe utility based on your needs and operating system.
- Disconnect any drives you don’t want wiped to be extra safe.
- Locate the drive to wipe in the utility interface and verify it is the correct one.
- Choose a wipe method based on your security requirements. More wipes provide more security.
- Start the wiping process. This can take hours depending on drive size and wipe method.
- When finished, the drive can be formatted with a new file system.
Follow any additional steps required by the specific utility you are using. Most will walk you through the entire process once launched.
How Wiping Works
Wiping a hard drive works by overwriting the data stored on the drive with new meaningless data, effectively erasing the original information. Here is a more technical look at different methods drives can be wiped:
- Quick wipe: Overwrites drive once with all zeros, ones, or random data. Offers limited security but is fast.
- Full wipe: Overwrites all data areas on an entire drive 2-3 times meeting DoD 5220.22-M standards.
- Multipass wipe: Writes patterns over a drive 5-20 times using complex algorithms. Highly secure method.
- Secure erase:Utilizes drive firmware commands to reset all data. Not as thorough as full wipes.
The more wipes performed, the less likely data can ever be recovered from magnetic remnants on the drive platters. Multipass wipes provide maximum data sanitization to protect sensitive information.
Considerations Before Wiping a Hard Drive
There are a few important factors to consider before wiping a hard drive:
- Backup important data: Ensure data on the drive has been backed up elsewhere if you need to keep it.
- Wipe tool limitations: Not all tools can wipe the active boot drive. Use bootable CD/DVD versions.
- Damage to drive: Wiping writes a lot of data quickly and can degrade drive health over time.
- Time required: Multipass wipes can take many hours to complete depending on drive size.
Double check that wiping the selected drive will not result in the loss of data you want to keep. Also be prepared for the wipe process to potentially take all day depending on your chosen tool and number of overwrite passes.
How to Wipe a Hard Drive on Mac
Macs also give you a couple different options to securely wipe a hard drive:
- Disk Utility: Apple’s built-in disk management tool can erase volumes with a single-pass zero write.
- Terminal: Use the
diskutil secureErasecommand withdiskutil listto identify drives. - Third-party software: Tools like KillDisk and HDShredder work on MacOS as well as Windows.
Make sure to back up the Mac drive first before wiping, and disconnect any external drives you don’t want erased. Then use one of the above wiping options, selecting the appropriate drive and Secure Erase method.
Securely Erasing Solid State Drives (SSDs)
Normal drive wiping methods like DBAN are ineffective on newer solid state drives (SSDs). This is because SSDs spread data across memory chips and don’t store data magnetically like traditional platter-based hard disk drives.
To reliably erase an SSD, use one of these methods:
- ATA Secure Erase: Sends a special firmware command to reset all data on the SSD.
- Parted Magic: Free tool with SSD Erase option that leverages encryption to wipe SSDs.
- Manufacturer software: Some SSD makers like Samsung provide drive erasure utilities.
If these are not available, a multipass wipe may still render much of the data unrecoverable. But SSDs should be physically destroyed to be absolutely certain the data is gone.
Can Wiped Files Be Recovered?
After wiping a hard drive, can any files be recovered? The answer depends on the method used:
- Quick wipes: Files may be partially recovered with advanced forensics.
- Full wipes: Only traces potentially recoverable with NSA-level tools.
- Multipass wipes: Virtually impossible to recover wiped files.
With an SSD, data remnants may persist through wipes but would be difficult to reconstruct meaningful files.
Wiping files disables normal software recovery tools from undeleting files. But with specialized disk forensics, wiped file fragments can sometimes be reconstructed from drive platters. Using a multipass wipe provides maximum assurance the data is truly gone.
Best Practices for Securely Wiping Drives
Follow these best practices when wiping a hard drive:
- Use a multipass random wipe to thoroughly overwrite sensitive data.
- Wipe unused space to clean deleted file remnants still on the drive.
- Verify the tool can wipe the full drive including boot sectors and host-protected areas.
- Check that the utility wipes unallocated space to avoid data remanence issues.
- For SSDs use ATA Secure Erase or encryption wiping if available.
Taking these extra precautions helps prevent any possibility of deleted files being forensically recovered after wiping the drive. It provides peace of mind your data is completely removed.
How to Check If a Wipe Was Successful
To verify a drive wipe was successful, you can:
- Use wipe tool logs to confirm process completion and check for any errors.
- Scan wiped disks with a forensic tool to ensure no readable data remains.
- Open the newly formatted volume and verify unused space shows no files present.
- Check the S.M.A.R.T. drive status for excessive read/write or impending failure.
An extended scan using data recovery software on the wiped drive should find zero recoverable files if the wipe was successful. If any residual data is found, another wipe pass may be required.
Conclusion
Wiping a single hard drive allows selectively eliminating data without disturbing other drives. Carefully identify which physical drive to wipe using the volume label, size, or other characteristics. On Windows the Disk Management utility can wipe a volume after deleting all partitions. Third-party tools like DBAN provide more advanced drive erasure functionality.
Be sure to backup wanted data on the drive before wiping. Then use a multipass random wipe for maximum security against forensic data recovery attempts. For SSDs, use ATA Secure Erase or encryption wiping tools for the best results. Following these steps will securely wipe your chosen hard drive while keeping the rest of the system data intact.
