When it’s time to retire an old computer, it’s important to properly destroy the hard drive before disposing of it. Simply deleting files or formatting the hard drive isn’t enough to prevent data recovery. To completely destroy a hard drive, you’ll need to deliberately damage the drive platters and electronics. There are a few different methods you can use to physically destroy a hard drive once it’s been removed from a computer.
Why Destroy a Hard Drive?
There are a few key reasons why you may want to destroy an old hard drive rather than simply recycling or reusing it:
- Protect sensitive data – If the drive contains private, confidential, or sensitive information, physical destruction ensures no one can recover the data later.
- Prevent identity theft – Destroying the drive protects personal information like social security numbers, bank accounts, etc. that identity thieves could otherwise access.
- Remove viruses/malware – Physical destruction eliminates any malicious software that may be lurking on the drive.
- Deter data recovery – Government agencies and skilled data recovery pros likely can’t recover data from a physically damaged drive.
While deleting files and formatting seem to remove data, it can often be recovered by those with the right tools and skills. The only way to reliably prevent data being recovered from an old drive is to destroy it.
How Hard Drives Store Data
To understand how to destroy a hard drive, it helps to know the basic physical components and how data is written.
Hard drives consist of:
- Platters – Circular disks made of glass or aluminum that store data magnetically.
- Read/write heads – Hover above the platters to read and write data.
- Spindle – Spins the platters at high speed.
- Actuator arm – Moves the heads across the platters.
- Electronics board – Contains chips that control the drive and interface with the computer.
Data gets written by magnetizing tiny areas of the platter surface as they spin. The read/write heads move to access different platter locations. All of your files and folders ultimately translate to these magnetic polarities on the platters. When destroyed, data recovery involves attempting to reconstruct these magnetic regions.
Steps to Physically Destroy a Hard Drive
Here are some recommended methods to demolish and damage the platters and electronics of a hard drive you’ve removed from a computer:
- Drill holes through the platters – Using a power drill, bore multiple holes through each platter. This damages a large area across each platter surface, severely compromising magnetic regions.
- Shred the platters – A cross-cut or micro-cut shredder tears platters into small, jagged pieces. Opt for micro-cut for smaller particles.
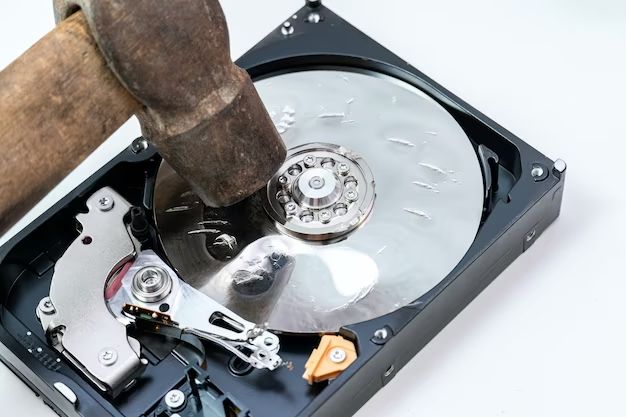
- Smash with hammer – Firmly striking the top or side of each platter can crack and warp it. This approach takes some force.
- Grind/scratch – Coarse materials like sandpaper or a rough grinder messes up the flat platter surface and data layers.
- Incinerate – Burning the drive demolishes the platters and electronic components entirely.
- Electro-magnetic pulse – A strong pulse can disrupt platters and electronics, corrupting data.
Don’t forget to damage the circuit board and chips too. Removing the board and crushing the components under a heavy object works. You want to disable the electronic control over the platters and heads.
Combining multiple methods like drilling and shredding or hammering and grinding helps ensure maximum platter destruction and damage for total data loss.
Drilling Holes through Hard Drive Platters
One of the most popular DIY ways to destroy a hard drive is to drill holes through the platters inside. This technique only requires a common power drill and drill bits. Here are some tips to drill out drive platters effectively:
- Use carbide or cobalt bits – They’re strong enough for drilling through rigid glass and aluminum platters.
- Variable speed is helpful – Start slow and increase drill speed once the bit contacts the platter.
- Drill straight down through each platter – Holes should penetrate fully through each one to reach the spindle.
- Aim for center of platters – Drilling near the edge risks missing outer areas, so center over spindle is best.
- Multiple holes per platter – Drill as many holes as possible across each platter to destroy larger regions.
Wear eye protection as shattered platter bits and metal shavings will fly. It can take practice to get the drilling angle and pressure right. Drill damage makes data recovery exponentially harder.
pros and cons of drilling
Drilling holes to destroy hard drives has some notable advantages:
- Simple and accessible — Requires only a basic drill anyone can purchase. No special tools or skills needed.
- Visual confirmation — You can see the physical holes bored into platters as proof of destruction.
- Low cost — Drill bits are cheap and the drill itself is a common household tool.
Some potential cons to consider:
- Slow — It takes time to clamp drive, carefully drill holes in each platter, and repeat.
- Messy —metallic shavings and platter debris will fly. Eye protection is a must.
- Labor intensive —Manual drilling each hole and platter yourself becomes tiring.
- Imperfect destruction — It’s possible to miss platter sections between holes if not thorough.
But the visibility and low cost make platter drilling one of the better options if done meticulously. Just be ready for the physical effort and mess involved.
Hard Drive Shredding and Destruction Services
For those who don’t have the tools or want to spare the labor, professional hard drive shredding services are available. Specialized companies offer secure drive destruction using industrial shredders and degaussing equipment. Here’s an overview of your shredding service options:
Drive Shredding
High-powered shredders literally shred apart hard drives into tiny pieces. They fragment and demolish the physical platter discs and components. Cross-cut and micro-cut shredders offer different particle sizes:
- Cross-cut – Cuts into 1/2-inch x 1-inch pieces or smaller.
- Micro-cut – Reduces drive to 1/8-inch x 5/16-inch particles.
Micro-cut shredding into very tiny bits helps prevent data being stitched back together. Shredded drive pieces get recycled once destroyed.
Degaussing
Degaussers use strong magnetic fields to disrupt and erase data stored on platters and tape drives. The magnets effectively scramble and randomize magnetic regions across the entire drive surface:
- GarnerProducts NSA/CSS EPL-listed degaussers
- VS Security Proton 3000 gauss pulse degausser
- Data Devices RASV-120 rotary degausser
Garner continuous duty degaussers also permanently disable the drive’s write mechanism. Degaussing renders recovery virtually impossible.
Physical Destruction
Some companies literally demolish the entire drive and components using methods like:
- Hydraulic crushing/compacting
- Punching holes through drive
- Melting platters
- Disintegration
- Incineration/thermal destruction
Physical demolition provides visible proof the drive has been mangled beyond any possible data recovery.
Certificates of Destruction
Reputable providers issue certificates of destruction once drives get shredded, degaussed, or demolished. The certificate confirms complete sanitization and include details like:
- Drive serial numbers
- Destruction method used
- Company and technician who performed destruction
- Signed statement drive can’t be read
- Date and time destroyed
Certificates help document proper drive disposal for auditing and regulatory compliance.
Other Methods to Destroy a Hard Drive
In addition to drilling and professional shredding, some other common DIY methods can demolish and damage hard drives. Here are a few more options:
Smashing with Hammer
Using brute striking force, a hammer can crack, split, and warp platters. Strike repeatedly across each platter surface. Aim along the sides and center axis for maximum fracturing. Wear eye and hand protection.
Grinding
Coarse grinding tools like an angle grinder mar and scratch up the smooth platter surface. The grinding action can smear and tear up the magnetic medium. Watch for debris and metal particles.
Sanding
Similarly, rough sandpaper grits like 60 to 100 can scratch and scour the platters. Rub vigorously across all regions of each platter face. This abrades and damages the data layers.
Incineration
Setting fire to a drive will burn and melt the platters and internal components entirely. Use caution if attempting. Little evidence remains afterward.
Electro-magnetic Pulse
Exposing the drive chassis and platters to a powerful electromagnetic pulse can scramble and corrupt data. However, it requires an EMI generator or pulse device.
Caution About Older Platters
On vintage hard drives with fragile aluminum platters, physical destruction becomes trickier. Methods like shredding and drilling can bend and warp the soft, thin platters without fully destroying them. Degaussing or total incineration are more reliable options in that case.
Disposal of Destroyed Hard Drive
Once satisfied the drive is completely destroyed, you’ll need to properly dispose of the remains. Here are some guidelines for getting rid of the destroyed drive and debris:
- Remove any intact circuit boards first if still recognizable.
- Separate different materials – plastics, metal pieces, circuit boards, etc.
- Check local e-waste disposal regulations in your area.
- Take destroyed drive pieces and debris to approved e-waste facility.
- Recycle ferrous/non-ferrous metals for scrap value.
- Never throw drive pieces in normal garbage cans.
Responsible recycling of the destroyed drive components keeps the materials safely out of landfills. Be sure to research e-waste disposal requirements based on the regulations in your region.
Conlcusion
When retiring an old computer, taking time to physically destroy the hard drive protects your data from prying eyes. Drilling holes through the platters and damaging components works for basic DIY destruction. For hassle-free professional destruction, utilize a shredder service equipped with industrial shredders and degaussers. Be absolutely certain the drive is demolished beyond any chance of data recovery before disposal.