What are the Common Causes of a Broken Flash Drive?
There are several reasons why a flash drive may become corrupted or stop working properly:
- Physical damage – Dropping the drive, getting it wet, or exposing it to extreme temperatures can physically damage the drive and its components.
- File system corruption – Unexpectedly unplugging the drive while files are still being written can corrupt the file system and make data inaccessible.
- Virus infection – Viruses and malware can infect the flash drive and cause damage to data and drive components.
- Bad sectors – Over time, bad sectors can develop on the drive, making it unable to reliably store data in those areas.
- Formatting errors – Improper formatting of the drive or interrupted formatting can make the data on the drive inaccessible.
The most common causes of a broken flash drive are physical damage, file system corruption, and the development of bad sectors over time. Using the drive improperly by not safely ejecting it before removal can easily lead to corruption issues.
How to Troubleshoot a Broken Flash Drive
When your flash drive stops working properly, there are a few basic troubleshooting steps you can take:
- Try plugging the drive into another USB port, computer, or operating system. This helps determine whether the issue is with the drive or something on your computer.
- Look for physical damage like broken/bent pins or water exposure. Physical damage usually requires drive replacement.
- Check Disk Management in Windows or Disk Utility on Mac to see if the drive is recognized. This can help identify corruption issues.
- Try a new USB cable if you suspect the connection is faulty.
- Scan for errors. Run chkdsk in Windows or First Aid on Mac to check and repair file system errors.
Following these steps helps isolate the cause and determine if the drive can be repaired or if data recovery is needed. Beyond DIY troubleshooting, you may need professional data recovery help.
Methods to Attempt Recovery of a Broken Flash Drive
If troubleshooting confirms your flash drive is corrupted or damaged, there are some DIY recovery methods you can try before seeking professional help:
Use Data Recovery Software
Data recovery software looks for intact files on a failed drive and recovers them. Popular free options include:
– Recuva
– TestDisk
– PhotoRec
This software scans the drive and pulls recoverable files off it without overwriting them. It’s important not to save any new files onto the drive before recovery.
Check the Device in Linux
Because Linux handles drives differently than Windows, a corrupted drive may show up and work in Linux even if it doesn’t in Windows. Booting from a Linux live CD/USB and checking the drive can allow you to recover data in some cases.
Try a Quick Format
If the drive format is damaged, doing a quick format of the drive can repair the file system without overwriting data. This can restore function while preserving recoverable files. Third-party software can read these files.
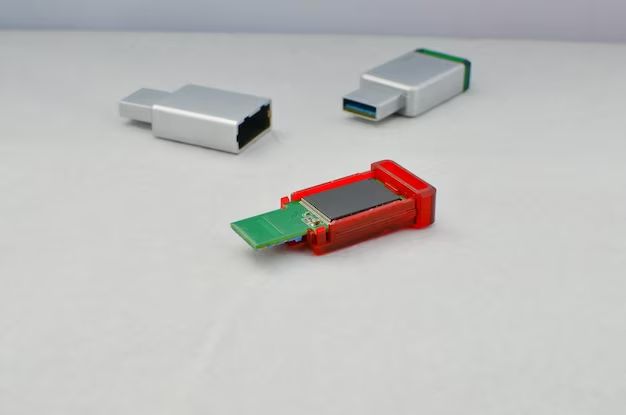
Look for Physical Damage
Disassembling the drive enclosure and removing the memory chips allows you to access them directly or put them in another enclosure. This works if the problem is with the enclosure but not the chips.
When to Send Your Drive to a Professional Service
If you’ve exhausted DIY methods with no success, your best option is to contact a professional data recovery service. They have specialized tools and clean room facilities to recover data from failed drives. Professional recovery should be sought if:
- The drive has physical damage that prevented DIY recovery.
- The drive makes unusual noises indicating a mechanical issue.
- The drive shows evidence of degraded memory chips or components.
- The drive has severe file system corruption that prevent access.
- Multiple recovery attempts with software/Linux were unsuccessful.
Don’t open up the drive or continue using software fixes that overwrite data once you decide to pursue professional recovery. This can reduce the chances of success. Professional services have the highest likelihood of salvaging data from even severely damaged drives.
Best Practices to Avoid Broken Flash Drives
You can avoid many flash drive issues by following best practices:
- Eject the drive safely before removing it.
- Don’t expose drives to water or extreme heat/cold.
- Avoid excessive physical shocks, drops, or vibrations.
- Don’t remove drives during writes or file transfers.
- Keep drives away from magnets which can corrupt data.
- Install security software to prevent viruses.
- Replace deteriorating drives that develop bad sectors.
- Store drives properly in cases when not in use.
- Back up important data regularly.
Following best practices reduces the chances of failure and data loss. But no drives last forever, so also be prepared with recovery options when problems do occur.
Software Options for Data Recovery
Here is an overview of some of the best free and paid software options for attempting DIY data recovery from a broken flash drive:
| Software | Free/Paid | Key Features |
|---|---|---|
| TestDisk | Free Open Source | Recovers lost partitions; repairs boot sectors; undeletes files |
| Recuva | Free | Deep scan; recovers files in Windows; undeletes and repairs files |
| Stellar | Paid | Robust advanced recovery features; repairs corrupt drives |
| R-Studio | Paid | Full recovery toolkit for Windows and Mac; RAID recovery |
| Disk Drill | Free or Paid | Scans for lost partitions; has “recovery vault” feature to restore data |
| EaseUS | Free or Paid | Wizard interface for simplified recovery; recovers deleted files |
The free options like Recuva and TestDisk are good starting points for basic NTFS file recovery. Paid software offers more advanced features and better support for heavily corrupted drives.
What Happens Inside a USB Flash Drive?
USB flash drives may seem simple, but they are remarkable feats of engineering. Here are some key things happening inside the drive:
- Memory Chips – Flash memory chips store data electronically without power. Popular types include NOR, NAND, and CFast.
- Controller – This chip manages the memory and interfaces with the computer via the USB port.
- Firmware – The controller chip runs this software that allows it to operate and process instructions.
- PCB – A printed circuit board connects all components and provides electrical connections.
- Interface – The physical USB connector plugs into the computer’s USB port.
- Casing – The plastic or metal case around the drive protects and houses the components.
When plugged in, the controller sends and receives data by writing or reading the flash memory chips through electrical signals across the PCB. The interface enables this communication via the USB protocol.
Physical Anatomy of a Flash Drive
Let’s look at the components inside a typical USB flash drive:
1. USB Connector – Plugs into USB port to allow communication between the drive and computer.
2. Printed Circuit Board (PCB) – Houses and connects all the components using copper traces etched into the board.
3. Controller Chip – Receives instructions from computer and manages the memory chips.
4. NAND Flash Memory Chips – Stores data electronically in a grid-like structure without needing power.
5. Crystal Oscillator – Generates electrical signal that sets the clock timing for the controller chip.
6. LED Light – Indicates when the drive is plugged in and active.
7. Jumper Wires – Connects individual components together.
8. Resistor – Limits the current flowing to LED.
9. Capacitor – Helps smooth out the power supplied to the circuit.
10. Casing – Protective plastic or metal covering that houses the components.
Common File System Formats
Flash drives can be formatted with different file systems tailored to specific needs:
FAT32 – Simple format usable on all operating systems. Max individual file size 4GB.
exFAT – Optimized for flash drives. Supports very large file sizes.
NTFS – Default Windows format. Supports advanced features like encryption.
HFS+ – macOS default format. Implements permissions and metadata.
EXT4 – Linux default format. Fast performance and journaling benefits.
UDF – Optimized for optical drives and media storage. Cross-platform.
Flash drives are typically formatted with FAT32 or exFAT for maximum compatibility. NTFS can sometimes cause issues when moving drives between OSes.
Factors That Affect Flash Drive Lifespan
A flash drive’s lifespan is affected by several factors:
– Number of write/erase cycles – Flash memory cells degrade with use. Cells wear out after 10k-100k cycles.
– Drive technology – SLC chips last longer than MLC and TLC chips which store more bits per cell.
– Manufacturing quality – Quality drives with error correction have better endurance.
– Usage conditions – High temps, shocks, vibration, magnets reduce lifespan.
– File system – Journaling file systems like EXT4 improve consistency and durability.
– Wear leveling – Controller distributes writes across cells to reduce wear on any one cell.
– Overprovisioning – Reserving extra memory cells for when others fail extends life.
– Encryption – Full disk encryption can degrade performance and lifespan.
Higher quality drives with SLC chips, good wear leveling, and extra overprovisioning last the longest. But all drives eventually fail and need replacement.
How to Disinfect a Flash Drive from Viruses and Malware
If a flash drive becomes infected with viruses or malware, here are steps to disinfect it:
1. Use antivirus software to scan the drive and quarantine or delete infected files.
2. Uninstall hidden auto-run malware using a clean computer.
3. Format the drive to wipe malicious partitions and file systems.
4. Clear the flash drive firmware of hidden malware components.
5. Perform a secure erase using software like Parted Magic to overwrite all data.
6. Physically destroy and replace severely infected drives.
7. Use a new flash drive and practice safe computing to avoid reinfection.
Thoroughly scanning with multiple updated antivirus programs can remove many infections. But severe malware may require formatting or destruction to fully disinfect the drive.
How to Securely Wipe and Dispose of Flash Drives
To securely wipe sensitive data off a flash drive before disposal:
1. Use drive erase software that overwrites all data with zeros or random data. Multiple overwrite passes are more secure.
2. Encrypt the drive before wiping to scramble data. Encryption makes recovery difficult.
3. Do a full format of the drive instead of a quick format to fully overwrite file tables.
4. Physically destroy the drive if it contains highly sensitive information. Use methods like smashing or shredding.
5. Remove the flash memory chips and physically destroy them if concerned about hardware hacking.
Simply deleting files or reformatting does NOT fully erase data. Use software like Parted Magic or Darik’s Boot and Nuke (DBAN) to securely wipe drives before disposal.
Conclusion
While flash drives are reliable, they can still break down over time. Following best practices around physical handling, proper ejection, virus protection, and drive maintenance can maximize lifespan and avoid data loss when problems do occur. If a drive stops working, systematic troubleshooting and data recovery methods often allow recovering the data. In cases of severe physical or logical damage, professional recovery services provide the best chance to salvage the contents. Understanding flash drive technology helps you use them more effectively and recover data when they fail.