Assess the Damage
The first step after a spill on your keyboard is to quickly assess the severity of the damage. Determine what type of liquid was spilled and approximately how much – was it a few drops or an entire glass? According to a Reddit user, most keyboard manufacturers don’t cover liquid damage since it’s not a product defect, so you’ll likely need to fix it yourself [1]. Next, check if the keyboard still functions properly by typing on it. Look for key inputs registering correctly and watch for any error messages. Finally, visually inspect the keyboard for external signs of liquid damage like moisture under the keys or between cracks [2]. This initial damage assessment will help determine your next steps for cleaning and repairing the keyboard.
Unplug Immediately
The first step after a liquid spill on a keyboard is to immediately unplug the keyboard from the computer. This prevents any further damage from occurring by cutting off power to the keyboard. As this article explains, “Unplugging your keyboard will prevent shorts and further damage to your keyboard and computer.” Leaving the keyboard plugged in risks electrical shorts and corrosion, so it’s critical to disconnect it right away.
Some liquid spills may trigger keyboard keys to continuously repeat or activate erroneously. Unplugging stops these faulty signals from reaching the computer. It also protects the computer’s own circuitry from any moisture that has seeped down into the keyboard connection. Overall, promptly unplugging a liquid-damaged keyboard is an essential first response to limit the extent of the damage.
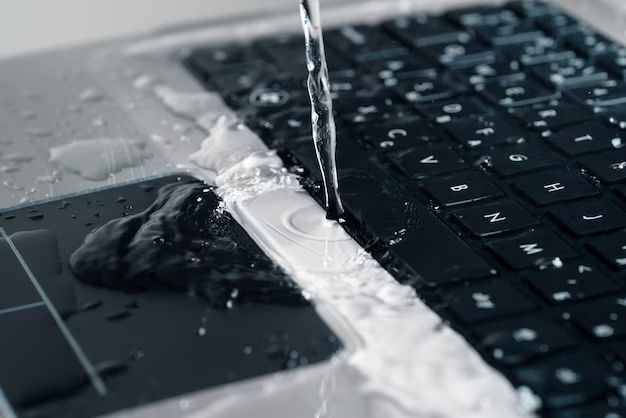
Drain Excess Liquid
After unplugging the keyboard, the next step is to drain out as much of the spilled liquid as possible. Hold the keyboard upside down over a sink or tub to allow gravity to pull the liquid out of the keyboard. Tilt and shake the keyboard gently to help the liquid flow out, but avoid shaking it vigorously as that may further dislodge internal components.
Use a clean, absorbent towel to dab and blot up any pooling liquid on the surface of the keyboard. Focus on mopping up standing liquid rather than rubbing, which may push the liquid further into the keyboard. Change towels as needed if they become oversaturated. According to SteelSeries, leaving the keyboard upside down for 24 hours allows time for the liquid to fully drain out before attempting to power it on again.
Disassemble the Keyboard
Before cleaning the internal components, you’ll need to take the keyboard apart. Refer to your keyboard’s manufacturer guide for instructions on how to disassemble it properly and safely. Many keyboards require removing screws from the back and then separating the top panel to gain access to the internal parts.
As recommended in the Instructable guide, use a small pair of pliers to gently push the plastic tabs in to release the individual keys if possible https://www.instructables.com/How_to_clean_a_keyboard_2/. Removing the keys allows much better access to clean between them. For keyboards without removable keys, focus on tilting the keyboard vertically and blowing out debris between the keys.
Taking the keyboard fully apart separates the membrane sheet, circuits, and wiring from the casing. This exposes all components for thorough cleaning and drying.
Clean Internal Components
After disassembling the keyboard, use isopropyl alcohol and cotton swabs to gently clean the internal components and circuit boards. Be very thorough to remove any residual sticky liquid that could cause damage or malfunctions. According to experts on Reddit, you should “use soap and hot water to clean the exterior. Soak the key caps in warm soapy water while you clean the keyboard itself.”
When cleaning circuit boards, be very gentle and careful not to damage any small components. Use a soft bristle toothbrush and cotton swabs dampened with isopropyl alcohol to scrub away dried liquid. Take your time and check from multiple angles to ensure you remove all stickiness from the crevices and connections.
According to iFixOmaha, “Use a lint-free cloth. That will allow you to sop up moisture efficiently and avoid leaving behind lint or paper residue.” Only dampen your cleaning cloths slightly to prevent excess moisture damage.
Dry Thoroughly
After cleaning the internal components, it is crucial to dry them thoroughly before reassembling and powering on the keyboard. Any remaining moisture can lead to electrical shorts and corrosion over time.
Use a hair dryer on a cool setting to accelerate the drying process. Hold the dryer several inches away and blow air over all surfaces, crevices, and connectors until no visible moisture remains. Take care not to overheat any components with the dryer.
You may also need to let the parts air dry for 24-48 hours or more to allow any trapped moisture to fully evaporate. Place components on a dry towel in a warm, dry area during this time. Check for any remaining damp spots before reassembling.
Thorough drying protects against both immediate electrical shorts and potential long-term corrosion damage. Take your time with this step for the best chance of restoring your keyboard’s functionality.
Sources:
https://www.reddit.com/r/MechanicalKeyboards/comments/733b0i/wet_keyboardhow_long_do_i_dry_it_until_i_plug_it/
Check for Functionality
After allowing the keyboard to dry thoroughly, the next step is to reassemble it and plug it back in to check if the keys are functioning properly after drying. Carefully put all the keys back in place and screw the keyboard casing back together. Reconnect the keyboard to your computer or device. Press down on every key, including special function keys like Shift and Ctrl, to verify they are responding.
If some keys still do not work or feel sticky, you may need to disassemble the keyboard again for more cleaning. Keys with reduced downward travel compared to neighboring keys could indicate lingering moisture damage. Testing thoroughly after drying is the only way to confirm all keys are back in good working order before continuing to use your keyboard.
According to Reddit user adrianmonk on r/AskElectronics, “If a key isn’t working, that could mean…that specific switch got corroded.” So be prepared to potentially replace individual key switches that are permanently damaged by the spill.
Replace Damaged Parts
If certain keys or other components of the keyboard are still not functioning properly after cleaning, you may need to replace them. Replacement keyboards and individual keys can be ordered online or purchased at electronics stores.
For standard keyboard designs, individual keycaps can easily be popped off and replaced by hand. This just requires finding the right replacement keycap for your keyboard model. Expect to pay $1-5 per keycap.
Replacing defective switches or other internal mechanisms is more complex and requires desoldering/soldering skills. If multiple keys are damaged, it’s often easier to replace the entire keyboard rather than attempt component-level repairs. According to sources, a new replacement laptop keyboard typically costs $50-200 depending on the make and model.
Before replacing the keyboard, try cleaning it thoroughly as described in the previous sections. However, if you find that many components remain faulty after cleaning, or that damage is too extensive, replacing the entire keyboard may be the most pragmatic option.
Clean Exterior
After cleaning the internal components and letting the keyboard dry thoroughly, the next step is to clean the exterior. Use disinfecting wipes containing at least 70% isopropyl alcohol (Source) to thoroughly wipe down all exterior surfaces of the keyboard. Pay close attention to areas where liquid may have seeped between keys or crevices.
Disinfecting wipes will help sanitize the keyboard, removing any bacteria or stickiness left behind after the spill. Thoroughly scrub any sticky areas and let the exterior dry completely. The disinfectant properties will help prevent future buildup as well. Once dry, the keyboard exterior should be clean and free of any residual stickiness or bacteria from the initial liquid spill.
Prevent Future Spills
One of the best ways to prevent liquid damage to your keyboard in the future is to use a waterproof keyboard cover or silicone protective layer. A waterproof cover creates a barrier between your keyboard and any liquids, protecting the internal components from short circuiting or corrosion. Look for a thin, flexible cover that allows you to still use your keyboard normally. Some options like the Topoint keyboard cover are transparent so you can still see the keys. The silicon material seals out all moisture and liquids.
You should also be very careful to never eat or drink around your computer equipment again. It’s tempting to enjoy your morning coffee or water bottle while working on your laptop, but one small spill can mean the end for your keyboard. Only keep drinks in sealable containers and on a separate table from your electronics. Avoid snacking around your computer as well, since crumbs can also damage your keyboard’s internals. Be diligent about keeping all food and drinks safely away from your laptop.