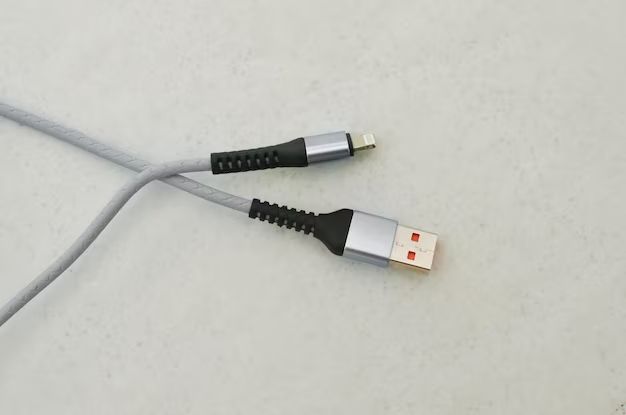
What causes a loose USB connector?
There are a few common reasons why a USB connector may become loose:
- Normal wear and tear from repeated plugging and unplugging can loosen the port over time.
- Damage from accidental drops or impacts can bend or break internal components.
- Buildup of dust, dirt and debris in the port can prevent a tight connection.
- Manufacturing defects or low quality materials can lead to premature looseness.
USB ports are designed for frequent connections and disconnections, but like any hardware, they can degrade with regular use. The more you plug and unplug a device, the more likely the port is to develop looseness from the strain. Dropping your computer or peripheral with a USB cable attached can also damage the physical integrity of the port. Dirty or contaminated ports may not allow the connector to properly seat inside, while cheaply made ports may fail quicker than higher quality ones.
How can you tell if a USB port is loose?
There are a few signs that indicate a loose or malfunctioning USB port:
- Devices disconnect, fail to connect, or frequently reconnect spontaneously.
- Cables and devices fall out too easily without pressing the release tab.
- Ports move or shift when attempting to plug in a cable.
- You see damaged or bent pins inside the port.
- Devices connect intermittently or stop working in certain positions.
- A loose port may feel wobbly, spongy or loose when inserting a cable.
If you notice any of these issues, it likely means the USB port has become physically loose and is failing to maintain a solid connection with inserted devices. The problem will progressively get worse over time as the port continues to degrade. Leaving it unaddressed can make the port completely unusable.
First steps for diagnosis
Before attempting any repairs, it’s a good idea to first diagnose the exact problem. Try these steps:
- Visually inspect the port for damage like bent/broken pins, cracks or looseness.
- Try connecting different cables and devices to determine if the issue is with the port or a particular device/cable.
- For computers, try connecting to different USB ports to isolate the problem.
- Carefully clean out any debris buildup in the port with compressed air.
- Update device drivers and system software in case outdated code is causing connection issues.
This will help narrow down whether the looseness stems from physical port damage, a faulty cable, software problems or other issues. If it’s isolated to one USB port that physically moves when plugging in devices, physical looseness is likely the root cause.
Tightening a loose USB port
If you confirm the USB port itself is loose, there are some DIY methods to attempt tightening it:
Carefully reseat the port
On some devices like phones and tablets, the USB port is soldered to the motherboard and may just need reseating:
- Power off and unplug the device.
- Use a spudger tool carefully lift the port off the motherboard.
- Check for any damage to solder points or pins underneath.
- Realign the port and firmly press it back into place so it sits flush with the housing.
- Turn on the device and test if the connection is tight again.
If it’s still loose, the solder joints likely need reflowing for a proper connection.
Reflow the solder
For attached ports, refreshing the solder can restore a solid hold:
- Disconnect power and disassemble the device to access the motherboard.
- Use soldering wick or a solder sucker to desolder the USB port.
- Thoroughly clean the port and motherboard holes.
- Apply flux paste to help the solder adhere and reflow.
- Resolder each pin with fresh solder to create solid joints.
- Avoid overheating and let it fully cool before reassembling.
Take care not to damage the motherboard or port during desoldering. Use a multi-meter to check for shorts just in case.
Shim or pad the port
You can DIY shim the port with paper, tape or other shims:
- Fold paper or tape until it fits snugly behind the port.
- Power down, unplug cables and remove any screws to access the port.
- Carefully insert paper/tape into gaps behind the port for a tighter fit.
- Avoid pushing debris into the port or motherboard.
- Reattach and test connection snugness.
The shim method mechanically stiffens the port housing but doesn’t fix solder issues. Use multiple shims if needed to eliminate wobble.
Apply epoxy or glue
For some damaged USB ports, applying epoxy around the edges of the port can add structural stability:
- Thoroughly clean the area around the USB port.
- Mask off any nearby components to avoid accidental spillage.
- Mix a small batch of quick-set epoxy or super glue.
- Use a toothpick to carefully apply a thin layer around the port.
- Allow the glue to fully cure for a few hours before reconnecting anything.
Avoid dripping any globs of glue into the port itself as this can prevent cable insertion. Apply only to outer housing.
Soldering in a replacement USB port
If DIY fixes don’t work, a damaged USB port may need total replacement. This requires soldering skills and related equipment.
Parts and tools needed
- Replacement USB port that matches the original.
- Soldering iron and solder.
- Flux, solder wick, wire cutters.
- Spudger tools to remove old port.
- Masking tape, isopropyl alcohol, tweezers.
Carefully check port polarity and pin alignment when purchasing a replacement.
Desoldering the old connector
- Power down, unplug all cables and remove device covers.
- Tape down any loose internal components.
- Using spudgers, carefully lift the USB port free of the motherboard.
- Thoroughly desolder all port pins from the PCB.
- Remove remaining solder with wick and flush with isopropyl alcohol.
Avoid ripping out pins forcefully as this can damage circuits. Desolder one pin at a time for best results.
Soldering in new port
- Check new port alignment and make any needed adjustments.
- Insert the port pins through motherboard holes.
- Apply flux paste to pins and pads.
- Carefully solder each pin, allowing time to cool.
- Inspect all joints visually for good flow and adhesion.
- Clean flux residue with isopropyl alcohol.
Take care not to create solder bridges or cold joints when installing the new USB port.
Testing and reassembly
After completing port repairs, always double check your work:
- Visually inspect solder connections for problems.
- Use a multimeter to check for shorts.
- Test fit cables and devices in the port for snugness.
- Reattach any internal components and reassemble the device.
- Plug in and test power-on functionality.
If devices still fail to connect or anything seems electrically shorted, recheck solder joints under magnification. Failing to properly install an exact port replacement can permanently damage the motherboard.
Getting professional USB port repairs
For major physical damage or soldering issues beyond DIY abilities, seek professional USB port repairs:
- Computer and phone repair shops offer reliable USB port fixes.
- Mail-in electronics repair services are available to replace faulty ports.
- Computer manufacturers can perform warranty covered USB repairs.
- Local makerspaces or hackerspaces may help troubleshoot flaws.
Diagnostic fees typically apply even for minor soldering repairs. But this guarantees proper USB functionality restoration by qualified technicians.
Preventing loose USB ports
To help avoid loose USB ports in the future:
- Handle cables gently when plugging and unplugging.
- Don’t force connectors into ports at awkward angles.
- Use cables with strain relief to reduce port stress.
- Regularly clean out dust buildup with compressed air.
- Plug in desk peripherals only when needed.
- Limit plugging/unplugging frequency for portable devices.
- Consider DIY-reinforcing unstable ports.
Avoid bending or coiling cables tightly to minimize wire fatigue. Rotate frequently used ports if possible. Added care when handling electronics with USB connections can extend hardware lifespan.
Conclusion
Loose, damaged USB ports are a common electronics issue. But various DIY fixes like shimming, epoxy reinforcement and soldering can often restore a solid connection. For complicated soldering jobs, seek professional repairs to avoid damaging the motherboard. With care and maintenance, USB ports can remain stable and withstand frequent use.