What causes water damage to a keyboard?
Water can damage a keyboard in a few different ways. The most common causes of water damage to a keyboard include:
- Spilling a drink directly onto the keyboard – This is probably the most common cause of water damage. Accidentally knocking over a glass of water or spillage from a cup of coffee can very quickly flow down between the keys and into the inner workings of the keyboard.
- Using the keyboard near a sink or other source of water – Keyboards placed close to a sink or water source like in a kitchen or bathroom can get splashed or dripped on over time. Water can splash up from the sink or condensation from a nearby window can drip onto the keyboard.
- Exposing the keyboard to rain/storms – Using electronics outside or leaving a keyboard near an open window during a rain storm can definitely cause water damage as rain gets into the inner circuits.
- High humidity environments – Over time, using a keyboard in an environment with high humidity can potentially lead to condensation forming on or within the keyboard which leads to water damage over time.
The common factor is that water is able to get inside the keyboard casing and come into contact with the PCB (printed circuit board) and electrical components powering the keyboard. Even a small amount of water can cause shorts, corrosion, or failure of electronic components.
How can you tell if your keyboard has water damage?
There are a few clear signs that indicate your keyboard has suffered water damage:
- Some or all keys don’t work – If you find certain keys like the spacebar or letters/numbers are not typing, it’s likely water has reached the electrical contacts for those keys.
- Keys feel sticky/mushy – Water damage can cause the mechanisms under the keys to stick and stop springing back up as you press them.
- Visual water damage – You may see water droplets, mineral deposits or corrosion around individual keys.
- Flickering/unresponsive lights on the keyboard – If your keyboard has backlights for keys or other indicator lights, water damage can cause these lights to flicker or stop working.
- Computer detects errors with the keyboard – Check if your computer is showing errors like “USB device not recognized” that may indicate keyboard connection issues.
- Strange smells from keyboard – If you notice odd smells like something burning from your keyboard, water may have reached components that are now shorting out.
If you notice any of these warning signs, it’s very likely your keyboard has suffered water damage at some point.
Can you fix a water damaged keyboard or key?
While water damage is never a good thing for electronics, not all hope is lost. Here are a few factors that determine if a water damaged keyboard or key can be fixed:
- Amount of water exposure – The more water that got into the keyboard, the lower the chances of salvaging it. Just a minor spill in one area may only cause localized damage, while a soaked keyboard may be beyond repair.
- Speed of drying – If the keyboard was able to fully dry out within a day or two of the water damage, this greatly improves the chances of it working. Leaving a wet keyboard for weeks allows corrosion to take hold.
- Age of the keyboard – Older, worn out keyboards have a lower change of surviving water damage versus a newer keyboard.
- Type of keyboard – Water resistant keyboards or fully mechanical keyboards tend to survive water better than cheap or low-end keyboards.
If the water damage was minor and immediately dealt with, there’s a solid chance of salvaging the keyboard or just replacing one or two affected keys. But extensive water damage that was left untreated has a very low chance of being fixed.
How to dry out a wet keyboard
If your keyboard gets exposed to a spill or other water damage, it’s important to try and dry it as quickly as possible to give it the best chance of survival. Here are some tips for properly drying a wet keyboard:
- Unplug immediately – As soon as you notice water on the keyboard, unplug it from power and computer. This stops electrical shorts as it dries.
- Drain excess water – Tilt the keyboard to allow as much excess water as possible to drain out through the sides or between keys.
- Absorb remaining water – Use a dry towel, cloth or paper towels to pat down and soak up any visible external water.
- Let air dry – Allow the keyboard to completely air dry before powering it on again, usually 24-48 hours.
- Use a fan – Directing a fan breeze across the keyboard can help speed up drying time.
- Try dry rice – Burying the keyboard in a sealed bag of dry rice can sometimes absorb leftover moisture.
Patience is key – don’t rush to dry the keyboard too quickly. Letting it air dry fully gives electronics the best chance of drying out before corrosion sets in.
Taking apart a keyboard after water damage
If the previous drying methods don’t restore your keyboard functionality, more extensive disassembly may be required. Taking apart a water damaged keyboard can help clean out any remaining water or assess internal damage.
Here are the general steps for taking apart a water damaged keyboard:
- Unplug the keyboard and remove any external screws from the bottom.
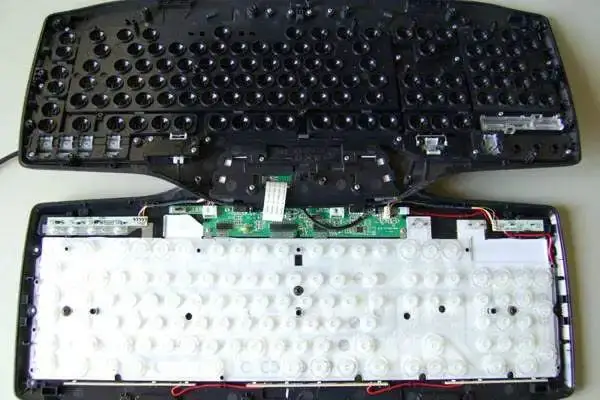
- Carefully pry apart the outer case, usually starting from a seam or split on the underside.
- Once opened, disconnect the keyboard ribbon cable from the PCB.
- Clean out any water, dirt or corrosion from the PCB with isopropyl alcohol.
- Remove keycaps and clean remaining water/debris from under keys.
- Let the keyboard fully dry 1-2 days before reassembly.
Be very careful when opening a keyboard case, go slowly and don’t force anything. Look for keyboard disassembly videos specific to your model for detailed visual guidance.
Thoroughly cleaning the PCB and letting components fully dry goes a long way toward restoring keyboard function after taking apart.
Fixing an individual water damaged key
If water damage is isolated to just a few keys not working, it’s often possible to fix just those affected keys rather than the entire keyboard. Here are some possible fixes for an individual water damaged key:
- Use isopropyl alcohol to clean corrosion – Swab any visible corrosion on the key contacts.
- Reseat key connector – Remove the keycap and reseat the delicate underlying membrane connector.
- Replace key membrane – On laptop keyboards, the rubber membrane beneath keys is replaceable.
- Replace keyswitch – For mechanical keyboards, replace only the affected keyswitch.
- Solder/bridge contacts – Carefully repair damaged solder points or bridge contacts.
- Replace scissor clips – For laptops, tiny scissor clips under keys can be replaced.
Fixing individual keys requires precision work but costs far less than a full keyboard replacement. Look for videos or repair guides specific to your keyboard brand and model.
Drying out and cleaning under keyboard keys
Since water can seep under keyboard keys and not be fully visible, it’s important to remove keycaps and clean beneath keys in addition to drying and cleaning the keyboard surface after water damage.
Here are some tips for effectively drying and cleaning under keyboard keys:
- Remove keycaps – Use a keycap puller tool or thin pry tool to gently pop off keycaps from the top.
- Wipe down key area – Swab any moisture residue from the exposed switch/membrane underneath.
- Clean with isopropyl alcohol – Dip cotton swabs in rubbing alcohol to sanitize the key mechanisms.
- Absorb with dry cloth – Lightly pat or press a dry microfiber cloth beneath each key to absorb moisture.
- Use compressed air – Spray compressed air under each keycap to dislodge any remaining droplets.
- Let dry 48 hours – Allow sufficient time for all liquid to fully evaporate before replacing keys.
Taking the time to properly clean and dry under every single key can prevent future keyboard issues after water damage.
Replacing a water damaged laptop keyboard
For laptops with severe keyboard water damage that doesn’t respond to cleaning and drying, full keyboard replacement may be required. Here are some tips for replacing a water damaged laptop keyboard:
- Determine laptop brand/model – Keyboards are designed for specific laptop models.
- Purchase replacement keyboard – Order a new, compatible OEM or aftermarket keyboard.
- Follow disassembly guide – Use visual instructions specific to your laptop.
- Disconnect ribbon cable – Detach the thin keyboard connector cable from motherboard.
- Remove screws – Remove any brackets or screws securing keyboard.
- Install new keyboard – Carefully connect ribbon cable and attach new keyboard.
- Reassemble laptop – Put back any screws or covers removed earlier.
- Update drivers – Install latest keyboard drivers for your laptop.
- Test key function – Verify all keys are responsive before daily use.
While replacing a laptop keyboard has a reputation for being tricky, carefully following a visual guide can make the process very manageable.
Can you replace just one key on a laptop keyboard?
Many people wonder – if just one laptop key stops working after water damage, can you replace only that key instead of the entire keyboard? The answer depends on the keyboard design:
- Traditional laptop keyboards have individual key housings and scissor mechanisms that can sometimes be pried off and replaced one at a time.
- Newer ultrabook or Macbook style keyboards have keys etched into one solid keyboard surface with thin membranes underneath. Individual keys cannot be replaced.
- Some manufacturers like Lenovo provide special tools and kits for replacing individual laptop keys. Other brands do not.
So for many modern laptop keyboards, no – individual keys are very difficult or impossible to replace. Entire top case/keyboard replacements must be done instead. But for older style models, individual key replacement may be an option with care and proper tools.
Drying out a desktop keyboard
Cleaning up a spilled drink or other water damage is slightly easier for desktop keyboards than laptops. Here are tips for drying out a water damaged desktop keyboard:
- Unplug immediately – Stop power to prevent electrical shorts.
- Shake excess water – Hold upside down and gently shake to drain droplets.
- Remove keycaps – Use a key puller to take off all keycaps and expose switches.
- Dry with compressed air – Invert keyboard and spray air under keys to dry.
- Absorb moisture with cloth – Wipe down keyboard plate under keys with microfiber cloth.
- Allow 48 hours drying – Let keyboard fully dry before reassembly.
- Clean with isopropyl alcohol – Dip cotton swabs in alcohol to clean switch contacts.
- Consider switch replacements – Individual mechanical switches can be replaced.
For superficial spills, cleaning and thorough drying can restore many desktop keyboards. But direct water exposure may require switch or full keyboard replacement.
Can you fix water damage on a mechanical keyboard?
Mechanical keyboards have become very popular for gaming and heavy typing. But their exposed switches also make them prone to water damage. The good news is that water damaged mechanical keyboards can often be repaired with cleaning and replacement parts. Fix options include:
- Open the keyboard case and clean PCB with isopropyl alcohol. Allow to fully dry 48-72 hours.
- Remove keycaps and clean/dry switches and plate. Lubricate sticky switches.
- Use replacement mechanical switches only for non-functioning keys.
- Some companies sell replacement switch kits for water damaged boards.
- In some cases, the damaged keyboard PCB may need replacement.
Because mechanical keyboards are modular, individual switches, keyscaps, and components can be swapped out unlike traditional keyboards. With some effort, water damaged mechanical keyboards can be cleaned, repaired, and restored to full functionality.
Fixing water damaged wireless keyboard
Water exposure can happen to any keyboard, including wireless models. Luckily, the same general principles apply for drying out and fixing a water damaged wireless keyboard:
- Remove batteries immediately after noticing water spillage or leakage.
- Open keyboard casing and disconnect internal battery/electronics.
- Dry casing interior with microfiber cloth. Absorb moisture with dry rice.
- Carefully dry the circuit board and allow 48-72 hours to fully air dry.
- Check for shorts or damage to the wireless transmitter chip/antenna.
- Once fully dry, test components like batteries and wireless connectivity.
- Clean electrical contacts with isopropyl alcohol and cotton swabs.
- Consider replacement batteries or internal wireless parts if needed.
Water can reach the transmitters for wireless connectivity so take precautions when drying interior components. But wireless keyboards can bounce back well if dried properly.
Signs of water damage on a keyboard
To assess water damage on a keyboard and determine necessary repairs, look for these common signs:
- Hazy/blurry keys – Moisture condenses under keys and blurs the lettering.
- Mineral deposits – White powdery residue around keys from mineral buildup when water dries.
- Corrosion – Greenish oxidation on the keyboard plate or electronic contacts.
- Key sticks/repeats – Keys become sticky or activate repeatedly from water damage.
- Some keys unresponsive – Select keys no longer register or input characters.
- Backlight issues – Keyboard backlight acting erratic or cutting out from shorts.
- Keyboard error messages – Drivers detecting input errors or connection issues.
- Visible water leakage – External case damage or interior water marks on circuitry.
- Strange smell – Odor from the keyboard of something burnt from electrical shorts.
The severity of these water indicators determines if basic cleaning fixes, replacement keys/switches or a full keyboard replacement is required.
How to Prevent Water Damage to Your Keyboard
While fixing a water damaged keyboard is possible, prevention is always preferable. Here are some tips to help avoid water damage to your keyboard:
- Avoid placing drinks near the keyboard. Use a separate drink coaster.
- Install an aquarium/screen protector cover that seals across keys.
- Position keyboard away from sink splashes or high humidity areas.
- Dry hands before use and avoid eating over the keys.
- Shut windows during rain storms or severe weather.
- Select a water resistant keyboard model for accident prone users.
- Keep young children or pets who may spill away from keyboard area.
- Store keyboard in a protective case when not in use.
Following basic precautions can go a long way toward preventing costly liquid damage to your keyboard. Reduce risk by limiting exposure to moisture with smart setup habits.
Conclusion
Water damaged keyboards can often be repaired with rapid response. For light spills, simply unplugging, draining excess liquid and thorough drying can restore functionality. But more serious water exposure may require disassembly for cleaning, key switch/membrane replacement or installation of an entirely new keyboard. Understanding the options for reviving a water damaged keyboard key can save both money and hassle. Just be sure to focus on cautious habits moving forward to avoid repeat keyboard water damage.
