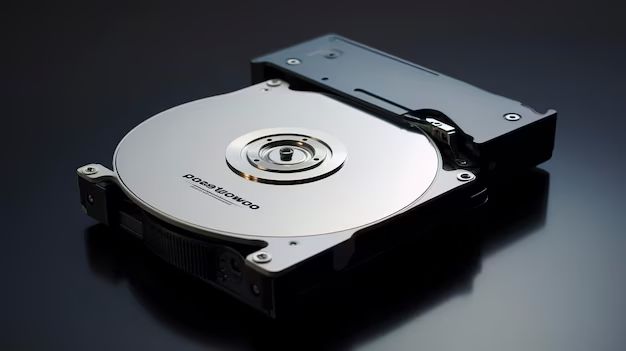
Formatting a hard drive can sometimes feel like it takes forever, but there are a few tricks to speed up the process significantly. In this 5000 word guide, we’ll go over the quickest methods for formatting a hard drive on both Windows and Mac operating systems.
Why Format a Hard Drive?
There are a few key reasons you may want to format a hard drive:
- To securely wipe all data from the drive before selling or disposing of a computer
- To resolve performance issues or errors caused by file system corruption
- To reorganize the drive’s file system for optimal performance
- When installing a new operating system or reinstalling the OS
Formatting completely erases all files on a drive and reinitializes the file system. This clears out any latent malware or corrupted data left behind. It also gives you a fresh start for installing an operating system and organizing new files.
How to Quickly Format a Hard Drive on Windows
On a Windows PC, there are a couple methods to quickly format a hard drive.
Using Disk Management
Disk Management is a built-in Windows administrative tool that allows you to manage storage devices. Here’s how to use it to format a drive:
- Open the Start menu and search for “Disk Management” and click on the result to open it.
- Right-click on the disk drive you want to format and select “Format…”
- Under File System, choose NTFS or exFAT. Leave Allocation unit size as default.
- Check the “Perform a quick format” box.
- Click OK to begin the format. This should only take a few minutes.
Using Disk Management and selecting “quick format” skips scanning the disk for bad sectors, making it much faster than a full format.
Using DiskPart
DiskPart is a command line disk partitioning utility built into Windows. Here are the steps to use it to quick format a drive:
- Open the Start menu and search for “DiskPart” and select it.
- Type “list disk” and hit enter. Make note of the disk number of the drive you want to format.
- Type “select disk X” where X is the disk number. Hit enter.
- Type “clean”. This will remove all partitions and data from the drive.
- Type “create partition primary”. Hit enter.
- Type “format quick fs=ntfs” to do a quick format, or “format fs=ntfs” for a full format.
This process with DiskPart can format a drive in just a minute or two with the quick format option.
How to Quickly Format a Hard Drive on Mac
On a Mac, you can use Disk Utility to quickly erase and format a hard drive.
- Open Finder and go to Applications > Utilities and double click on Disk Utility.
- Select the hard drive you want to format from the sidebar.
- Click on the Erase tab.
- Under Format, select APFS or Mac OS Extended (Journaled).
- Make sure Scheme is set to GUID Partition Map.
- Click Erase. This will quickly format the drive in just a minute or two.
Using the Erase feature in Disk Utility is the fastest way to format a drive on MacOS. Make sure to select Erase rather than Partition when you want to do a quick format.
Tips for Faster Formatting
Beyond using the quick format options in Windows and MacOS, here are some other tips to help speed up formatting drives:
- Use a USB 3.0 or USB-C port if available – These newer ports have much higher data transfer speeds over USB 2.0.
- Disconnect other storage devices – Having multiple external drives connected can slow things down.
- Use a native file system like NTFS or APFS rather than FAT32 or exFAT for better performance.
- Close other programs – Running other intensive apps like video editors during formatting can bog things down.
- Perform a full wipe on an SSD – SSDs reset cells for optimal performance, improving write speeds.
Additionally, when reinstalling Windows or MacOS, you can elect to just format the system drive rather than the entire hard disk to save time.
What Happens When You Format a Hard Drive
Formatting a disk drive erases all of the existing data by resetting the file system and reorganizing the logical structures used to access data. Here is an overview of what happens under the hood:
- The master boot record (MBR) is overwritten and partition data erased. This removes all traces of partitions on the drive.
- A new MBR and empty partition table is written, creating available free space for new partitions.
- A new file system structure is created to organize the space for storing files and folders logically.
- On a quick format, the disk space is marked as empty without scanning for bad sectors. A full format scans the drive.
- A backup of critical file system metadata is stored in case of corruption.
Essentially, formatting removes file system fragmentation and clears out the MBR and partition tables to create clean free space for new data to be written.
File System Differences
When formatting, you can choose between file systems like NTFS, exFAT, FAT32, and APFS. Here’s a quick comparison:
| File System | Max Individual File Size | Max Volume Size | OS Compatibility |
|---|---|---|---|
| NTFS | 16 TB | 256 TB | Windows |
| exFAT | 16 EB | 256 TB | Windows, MacOS, Linux |
| FAT32 | 4 GB | 32 GB | Windows, MacOS, Linux |
| APFS | 16 EB | 256 TB | MacOS, iOS, etc. |
As you can see, each file system has advantages and disadvantages in terms of compatibility, maximum file sizes, and volume sizes they support.
Steps to Format a Hard Drive
Although the quick formatting options we covered skip a few steps, here is a full overview of what happens during a traditional format:
- Connecting the hard drive – The drive must be connected to the computer via internal SATA, external USB, etc.
- Selecting the drive – Identify the correct physical drive to format in the management utility.
- Choose a file system – Select a file system like NTFS, FAT32, exFAT, or APFS depending on your needs.
- Start the format process – The management utility initiates the low-level format.
- Erase master boot record – The MBR containing partition data is overwritten.
- Scan drive for bad sectors – Every sector is checked for reliability during a full format.
- Create an empty partition – A new blank partition table is written to the MBR.
- Write file system structures – The logical file system framework is generated.
- Create core directories – Essential system folders like Program Files are initialized.
- Finalize and close format – Final file system data is committed and the format is completed.
The quick formats skip straight to creating an empty partition table and file system structures, greatly reducing the time it takes compared to a full format.
How Long Does It Take to Format a Hard Drive?
The time it takes to format a hard drive depends on several factors:
- Drive size – Larger capacity hard drives take longer to format.
- Interface type – SATA, SSD, USB 2.0, 3.0, etc. have different maximum throughputs.
- File system – Some file systems take longer than others to generate.
- Quick vs full format – Quick formatting can be 5x faster or more.
- Drive errors – A full format scan to identify bad sectors adds quite a bit of time.
Under ideal circumstances, formatting a hard drive takes just a minute or two for a quick format. Large external USB hard drives may take 5-10 minutes on a full format. Damaged drives with a high number of bad sectors can take hours to fully format.
Average Format Times
Here are some estimates for average format times for different drive types and connections:
| Drive Type | Interface | Quick Format Time | Full Format Time |
|---|---|---|---|
| 2.5″ SATA SSD | Internal SATA 6Gbps | 1 minute | 2-3 minutes |
| 3.5″ HDD 5400 RPM | Internal SATA 3Gbps | 2-3 minutes | 10-15 minutes |
| External HDD 5400 RPM | USB 3.0 | 2-4 minutes | 15-20 minutes |
| External HDD 5400 RPM | USB 2.0 | 5-10 minutes | 30-45 minutes |
SSDs and fast internal SATA connections provide the quickest format times, while large external hard drives on older USB 2.0 can take significantly longer.
Maximizing Format Speed
If you need to shave more time off the formatting process, here are some advanced tips:
- Use multiple smaller drives instead of one large one to distribute the workload.
- Connect drives to USB 3.1 Gen 2 ports for peak throughput up to 10Gbps.
- Upgrade to SATA 6Gbps or SAS internal drive interfaces.
- Use RAID 0 striping for parallel formatting across multiple drives.
- Enable write-caching on the disk controller for faster writes.
- Use a drive eraser utility if you need to wipe sensitive data.
IT professionals working with high volumes of disks can employ tools like disk arrays, SAS expanders, RAID controllers, and other infrastructure to facilitate rapid parallel formatting, erasing, and rebuilding of drives.
Safely Erasing Drives
When donating, recycling, or selling your used hard drives, you want to make sure personal files are completely erased. However, a standard quick format only marks the disk space as empty rather than overwriting the data. Here are a couple options for safely wiping drives before disposal:
Use Drive Eraser Software
Drive eraser utilities like Darik’s Boot and Nuke (DBAN) allow you to completely overwrite the drive with zeroes, ones, or random data to safely scrub your personal information.
Perform a Full Format
A full format that scans for bad sectors will go through and overwrite all disk sectors, providing a fairly secure erase. Just be aware it is still possible data could be recovered with forensic tools.
For maximum security, go with a multi-pass overwrite utility like DBAN coupled with physical destruction of the drive platters to guarantee the data is unrecoverable.
Downsides of Formatting Drives
While formatting a hard drive is often necessary, there are a couple downsides to be aware of:
- All data will be erased – Make sure to back up your files first.
- Possible performance impact – Frequent formatting may shorten some SSD lifespan.
- Risk of drive damage – This is very low but power loss could corrupt the drive.
- Time consuming – It takes time for both quick and full formats to complete.
For these reasons, you generally want to avoid repeatedly formatting your system hard drive unless absolutely necessary. But periodic formatting is useful for external media or repurposed disks.
When Should You Format a Hard Drive?
Here are some common scenarios that call for formatting your hard drive:
- You’re donating, recycling or selling your computer and want to scrub personal data.
- You’re noticing degraded drive performance or frequent file system errors.
- You want to reinstall your operating system with a clean slate.
- Converting a drive from a Mac to Windows file system, or vice versa.
- Removing a secondary data drive from one computer to use on a new computer.
- Switching a boot drive from MBR/BIOS to GPT/UEFI mode.
Whenever you need to completely clean the slate on a drive, formatting is the way to go. Just be sure to back up your data first.
Conclusion
Formatting a hard drive is a quick yet effective way to wipe a disk clean and resolve many performance issues. With the quick format options on both Windows and Mac, it takes just minutes to get a fresh start. Just be judicious and avoid over-formatting your primary system drive. By following these formatting best practices, you can easily manage modern high capacity storage.