Undoing changes in Excel can be incredibly useful for recovering from mistakes or walking back unintentional edits. Excel provides some basic undo/redo functionality out of the box, allowing you to reverse your most recent actions. However, this only allows you to step backwards one action at a time, and is limited to the current editing session – once you close the file, any unsaved changes are lost.
Fortunately, there are ways to revert Excel files even after saving and closing. Techniques like AutoRecover, Version History, and VBA macros enable more robust undo capabilities. This guide will explore the various methods for undoing changes in Excel, recovering unsaved work, and restoring previous versions of a file.
Enabling AutoRecover
Excel’s AutoRecover feature automatically saves versions of your workbook as you work. AutoRecover kicks in after a certain time interval has passed since your last manual save. The default interval is 10 minutes, but you can adjust this in Excel’s options. AutoRecover saves can help you recover lost data if your workbook closes unexpectedly before you save.
To enable AutoRecover in Excel:
- Go to File > Options > Save.
- Check the box next to “Save AutoRecover information every” and adjust the minutes as desired.
- Click OK to save the change.
With AutoRecover enabled, Excel will now automatically save a version of your open workbooks ever so often. You’ll then be able to access these AutoRecover files to restore lost changes if needed. Just make sure to save your workbook manually on a regular basis as well.
Reverting to an AutoRecovered Version
Excel automatically saves versions of your file while you’re working on it. You can revert back to one of these AutoRecovered versions if you want to undo changes after saving and closing the file.
Here are the steps to access and revert to an AutoRecovered version:
- Open Excel and go to the File menu.
- Click on Info then Manage Versions.
- In the Versions pane on the right, you will see a list of AutoRecovered versions, with the date and time they were saved.
- Click on the version you want to restore.
- Click Restore to replace your current version with the AutoRecovered one.
This will undo any changes made after the point of the AutoRecovered version you reverted to. It’s a handy way to roll back changes if you realize you made a mistake after saving and closing the file.
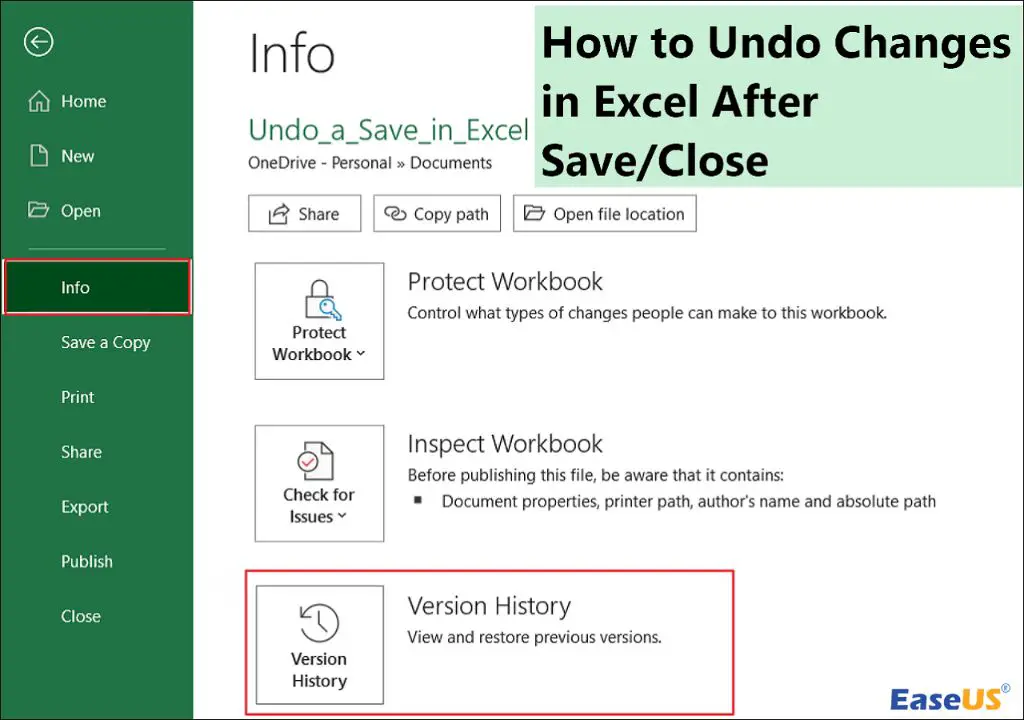
Using Version History
Version History is an Excel feature that automatically saves previous versions of a workbook as you make changes. This allows you to view or restore older versions if needed.
To use Version History in Excel:
- Go to the File tab and click Info > Version History. This will open a sidebar showing previous versions.
- Click on a version’s date and time to preview it. The current workbook will be replaced with the previous version.
- To restore an older version, click Restore next to it. This will replace the current version with the selected older version.
Version History is enabled by default in modern versions of Excel, such as Office 365. You can access up to the last 25 versions of a workbook (Microsoft). Older versions are saved for up to 30 days before being deleted.
If Version History has been disabled, you can re-enable it by going to File > Options > Save and checking “Keep the last autosaved version if I close without saving.”
Reverting a File Manually
If you need to revert to the last saved version of an Excel file after making changes, you can do so manually without relying on version history. Here are the steps:
- Open the modified Excel file that you want to revert.
- Click on the File tab and select Info.
- In the Info pane, click the Manage Workbook button and then Revert.
- In the Revert dialog box, click on Last Saved to revert to the last saved version. Click Revert to confirm.
- The file will revert to the last saved state, undoing any changes made since it was last saved. You will lose any edits made since the last save.
This allows you to manually revert an Excel file to its previously saved state. However, this only works if you have not saved the file again after making edits. Once an Excel file is saved, reverting manually will only take you back to the last saved version, not earlier versions.
For recovering unsaved earlier versions, refer to the Recovering Unsaved Versions section.
Undoing Changes Before Closing
If you’ve made changes to your Excel file that you want to discard, you can undo them before closing the file and avoid saving the changes.
Use Ctrl+Z (or the Edit > Undo command) to step backwards through your recent edits and undo changes. Keep using Ctrl+Z to go back as far as you need to discard unwanted changes.
You can also click the arrow next to the Undo button on the Quick Access Toolbar to select and undo multiple changes at once.
When you are ready to close the file without saving changes, make sure to clear your change history first. Go to File > Options > General and click “Clear all changes” under Changes history. This deletes any lingeringUndo steps so all edits are discarded upon closing.
With the change history clear, you can close the file and will receive no prompt to save. The file will remain in its last saved state, with your recent unsaved changes successfully undone.
Recovering Unsaved Versions
If you close an Excel file without saving, you may still be able to recover a previous unsaved draft. Excel has an AutoRecover feature that automatically saves versions of your file at regular intervals while you’re working. Here’s how to find and restore an unsaved draft in Excel:
Go to the File tab and click Open. In the menu on the left, click Recover Unsaved Workbooks. This will display a list of any unsaved drafts that Excel has automatically saved.
Look through the available versions and drafts. You can preview them to find the one you want to recover. Once you’ve found it, click Open. This will create a new workbook with the recovered unsaved draft.
If you don’t see your unsaved draft available here, Excel likely didn’t auto-save it in time before you closed the file. However, you may still be able to recover a temporary backup copy by searching your hard drive for files with the .TMP extension.
To enable AutoRecover and have Excel save your work more frequently, go to File > Options > Save and check the box for “Save AutoRecover information every:”. Choose an interval like 5 or 10 minutes.
Using a VBA Macro
VBA macros can be helpful to reset an Excel sheet back to its original state after saving and closing. Here is sample code to reset a worksheet (source: https://www.mrexcel.com/board/threads/vba-code-to-reset-the-worksheet-into-its-former-format.1204192/):
Sub ResetSheet()
   Cells.ClearContents
   Cells.ClearFormats
   Rows("1:1").Select
   Selection.AutoFilter
End Sub
To use this macro to undo changes after saving and closing Excel:
- Open the Visual Basic Editor by pressing Alt+F11 on your keyboard.
- Insert a new module and paste the VBA code above into it.
- Save the macro by clicking File > Save.
- To run the macro later, open the Excel file and press Alt+F8 to open the Macro dialog box.
- Select the macro name and click “Run.”
The macro will clear all cell contents and formatting, essentially resetting the worksheet.
Additional Tips
Here are some additional tips for undoing changes in Excel:
Turn off Fast Save for more undo levels: By default, Excel’s Fast Save feature limits undo levels to help optimize performance. To get more undo levels, you can turn this off by going to File > Options > Save and unchecking “Enable background save.” Just keep in mind this may impact performance for large files.
Use the Select Changes tool to reject specific changes: Excel’s Select Changes tool under the Review tab allows you to browse changes made to the workbook and choose which ones to accept or reject. This can be useful for undoing small specific edits without undoing everything.
Turn on AutoRecover and set to frequent saves: Enabling AutoRecover and setting it to save every 2-5 minutes gives you more points to revert to. Go to File > Options > Save and adjust the AutoRecover settings.
Summary
There are several ways to undo changes in Excel after saving and closing a file:
- Enable AutoRecover to revert to an automatically saved version from earlier (How to modify the number of undo levels in Excel). This works if you notice a problem soon after closing the file.
- Use Version History to go back to an earlier manually saved version (available in Excel for Microsoft 365). This allows reverting further back in time.
- Manually revert to a previous version you saved yourself. This requires having manually saved multiple versions.
- Before closing a file, use Undo or Ctrl+Z to reverse recent unwanted changes.
- Try to recover an unsaved draft from the Excel Temporary Files folder.
- Use a VBA macro to programmatically undo changes.
In summary, AutoRecover, Version History, and manual reversion are the main ways to undo changes after closing an Excel file. Pay attention before closing and save often to maximize undo abilities.