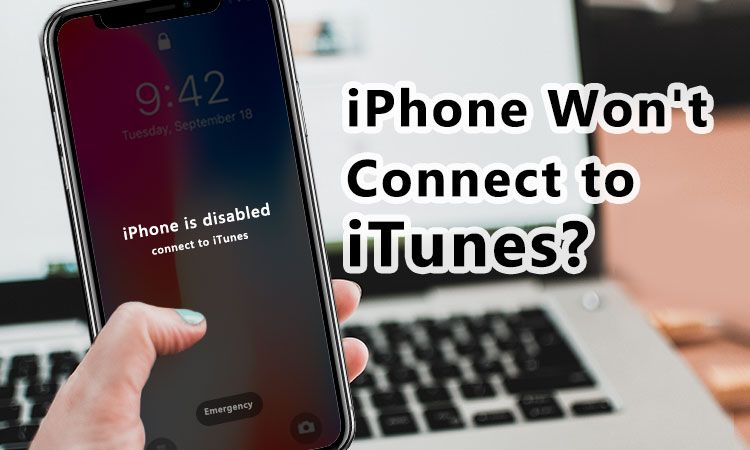
Having a disabled iPhone that won’t connect to iTunes can be very frustrating. Your iPhone is essentially unusable until you can get it unlocked and reset. Fortunately, there are a few different methods you can try to unlock your disabled iPhone if it won’t connect to iTunes.
Quick Summary
Here’s a quick rundown of the main options for unlocking a disabled iPhone that won’t connect to iTunes:
- Force restart your iPhone – Hold down the Power and Home button for 10 seconds to force a hard reset.
- Update or restore with recovery mode – Connect your iPhone to iTunes and put it in recovery mode to restore.
- Remove your SIM card – Take out the SIM card and see if it will then connect to iTunes.
- Use third party unlocking software – Special software like iMyFone Fixppo can unlock and reset disabled iPhones.
- Take it to an Apple Store – Make a Genius Bar appointment to get help directly from Apple.
The most common solution is to force restart your iPhone and/or put it into recovery mode and update or restore through iTunes. Using third party software also works well for unlocking disabled iPhones. As a last resort, you can get assistance directly from Apple. Read on for more details on these methods.
What Causes a Disabled iPhone That Won’t Connect to iTunes?
There are a few common causes of having a disabled iPhone that won’t connect to iTunes:
- Too many failed passcode attempts – After 6 failed attempts, the iPhone disables itself.
- Updating issues – Interrupted update or restore can cause the iPhone to get stuck.
- Software bugs – Bugs in the current iOS can sometimes lead to disabling issues.
- Hardware damage – Water damage or drop damage that impacts the ports.
- Unauthorized modifications – Jailbreaking without properly resetting can disable connectivity.
The most likely culprit is entering the wrong passcode too many times. Your iPhone will disable itself after 6 failed passcode attempts as a security measure. This activates a timeout ranging from 1 minute up to 1 hour before another attempt can be made.
Issues during an iOS update or restore can also sometimes lead to the iPhone being stuck in a disabled state. Similarly, bugs in the operating system may inadvertently disable connectivity. Finally, any kind of hardware damage or unauthorized modifications like jailbreaking could also be the root cause.
Method 1: Force Restart Your iPhone
The first thing to try when dealing with a disabled iPhone is to force restart it. This acts like a hard reset and will reboot your iPhone out of the disabled state in many cases. Here are the steps to force restart an iPhone:
- Press and hold the Side button and either Volume button at the same time.
- Keep holding the buttons even when you see the power off slider.
- After 10 seconds the iPhone will force restart.
- Release the buttons once you see the Apple logo on the screen.
This process holds the buttons long enough to initiate a hard reboot instead of a standard power off. It interrupts the current state your iPhone is in and restarts it from scratch.
After force restarting, try connecting your iPhone to iTunes again. Also be sure to enter the correct passcode immediately when prompted. With some luck, this will have resolved the disabled state preventing connection to iTunes.
Method 2: Update or Restore in Recovery Mode
If force restarting doesn’t work, the next step is to put your iPhone into recovery mode and then update or restore it through iTunes. Here is how to do this:
- Connect your iPhone to your computer using the USB cable.
- Open iTunes on your computer. A message may pop up saying iTunes has detected an iPhone in recovery mode.
- If you don’t get that message, force restart your iPhone again.
- As soon as you see the Apple logo, press and hold the Side button until you see the recovery mode screen.
- You should see a Connect to iTunes screen and an option to Restore or Update.
- Select Update to reinstall the current iOS version or Restore to completely wipe your iPhone and reinstall iOS.
- Wait for the update or restore process to complete in iTunes before using your iPhone again.
This will force your iPhone out of the disabled state by initiating a recovery mode update or restore. Follow the prompts in iTunes to complete the process. When done, hard reset your iPhone once more and try entering the passcode again when prompted.
Important Recovery Mode Notes
- You’ll need to enter your passcode correctly after restoring to reactivate your iPhone.
- Updating/restoring will remove any files and settings changed since your last backup.
- If Find My iPhone was enabled, you may need to enter your Apple ID password in iTunes.
Be prepared to enter your passcode, confirm Find My iPhone credentials if asked, and reconfigure your device settings after completing the recovery mode restore. This should unlock your disabled iPhone as long as there are no underlying hardware issues.
Method 3: Remove the SIM Card
In some cases, simply removing and reinserting the SIM card will allow a disabled iPhone to connect to iTunes properly. Follow these steps:
- Locate the SIM card slot on your iPhone.
- Insert a paperclip or SIM eject tool into the hole next to the SIM slot.
- Press firmly and your SIM card tray will pop out.
- Remove the SIM card from the tray and put the tray back into your iPhone without the card.
- Try connecting your iPhone to iTunes to see if it works now.
- You can put the SIM card back after connecting successfully.
If your disabled iPhone suddenly starts working with iTunes after removing the SIM, you know the issue was somehow related to the card or card slot. You may need to get a replacement SIM or get the card slot repaired.
Where is the SIM card slot on an iPhone?
Here’s where you can find the SIM card slot on various iPhone models:
| iPhone 14 Models | Left side above volume buttons |
| iPhone 13 Models | Left side above volume buttons |
| iPhone 12 Models | Right side below power button |
| iPhone 11 Models | Right side below power button |
| iPhone XS/XR | Right side below power button |
| iPhone 8/7/6 | Right side below power button |
The exact location varies a bit between models. But the SIM card slot is always along one of the sides and uses a paperclip-type eject mechanism.
Method 4: Use iPhone Unlock Software
One of the most reliable ways to unlock a disabled iPhone is to use special third party unlocking software. Programs like iMyFone Fixppo are designed to bypass the disabled state and reset your iPhone to factory settings. Here’s an overview of how they work:
- Download and install the software on a computer your iPhone can connect to.
- Connect your disabled iPhone to the computer.
- The software will enter download mode and install a recovery firmware.
- Once complete, your iPhone will be unlocked and restored to default settings.
This allows the software to rewrite critical iPhone firmware that gets your device stuck in the disabled state. After completing the process, your iPhone is reset with the ability to connect to iTunes again.
Key things to keep in mind when using iPhone unlock software:
- Only reputable software like iMyFone Fixppo should be trusted.
- Make sure Find My iPhone is turned off before unlocking.
- All data on your iPhone will be erased in the reset process.
- The latest iOS version must be installed to reconnect to iTunes.
As long as you use trusted software and don’t mind your iPhone being wiped, this method can be very effective for unlocking and resetting a disabled iPhone.
Method 5: Get Help at the Apple Store
If you’ve exhausted all other options, the last resort is to make a Genius Bar appointment at your local Apple Store. The Apple technicians have special tools at their disposal to unlock disabled iPhones. Here’s what you can expect when you take your iPhone into an Apple Store:
- Schedule a Genius Bar appointment in advance online.
- Show up at the Apple Store at your designated time.
- Explain the disabled situation to the Apple Genius.
- They will examine your iPhone and attempt to unlock it on the spot.
- If hardware damage is the cause, repairs may be necessary.
- There may be a charge if your iPhone is out of warranty.
In many cases, the Genius Bar staff can instantly unlock your disabled iPhone during the appointment. If there is underlying hardware damage, they can facilitate any needed repairs for an additional cost. However, this option involves making an appointment and traveling to the Apple Store.
Prevent Your iPhone From Becoming Disabled
Now that you know how to unlock a disabled iPhone, here are some tips to avoid getting in that situation in the first place:
- Don’t try guessing your passcode – Always type it carefully and double check.
- Set up Find My iPhone – It lets you remotely erase your device if lost or stolen.
- Keep your iPhone software updated.
- Avoid unauthorized modifications like jailbreaking.
- Get iPhone repairs done immediately if physical damage occurs.
- Backup regularly so you don’t lose data if forced to wipe your iPhone.
Enabling Find My iPhone, staying on top of iOS updates, getting timely repairs, and not jailbreaking your device will go a long way towards avoiding disability issues. But if your iPhone does end up disabled, at least now you know how to get it unlocked and working again.
Conclusion
Dealing with a disabled iPhone that refuses to connect to iTunes can be immensely frustrating. Thankfully, there are a number of potential solutions at your disposal. Hard restarting your device or putting it in recovery mode to force an update often does the trick. Professional iPhone unlocking software provides another surefire way to reset your disabled iPhone. And for extreme cases, your local Apple Store Genius Bar can hopefully get your device back up and running again.
Just remember the key methods covered here – force restarting, recovery mode, SIM card removal, unlocking software, and Apple Store support. With some persistence, you should be able to get your disabled iPhone unlocked and operational once more. Just be prepared for potential data loss in the process. And going forward, take precautions to avoid having your iPhone become disabled again.
