The iPhone’s passcode lockout feature is an important security measure that prevents unauthorized access to the device. When someone attempts to unlock an iPhone by guessing the passcode and fails multiple times, the iPhone will lock itself and require connecting to iTunes or iCloud to be unlocked again. This article explains the default settings for failed passcode attempts, provides a brief history of the feature, discusses why passcode attempt limits exist, how to configure the settings, what happens during a lockout, how to recover from a lockout, alternate unlocking methods, and tips for creating a secure passcode.
The goal is to comprehensively inform iPhone users about the passcode attempt limits, to help them understand the security tradeoffs, and to provide guidance on setting up their devices in a secure yet usable manner.
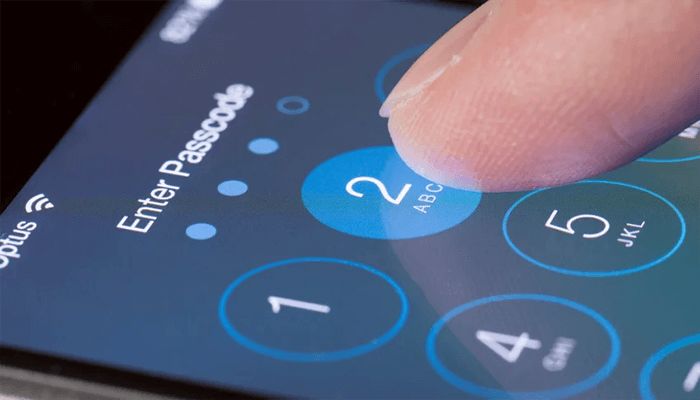
Default Settings
By default, an iPhone is configured to allow 10 failed passcode attempts before the device locks and requires the passcode to be entered again to regain access. After 6 failed attempts, users will see a message saying “iPhone is disabled. Try again in 1 minute.” This lockout duration increases with each subsequent failed attempt.
According to Apple’s support page, after the 7th failed attempt the device locks for 5 minutes. After the 8th attempt, it locks for 15 minutes. Finally, after the 10th failed passcode attempt, the iPhone locks for 1 hour before another attempt can be made (Source).
This default configuration of 10 attempts is meant to balance security and usability. Allowing a handful of tries prevents accidental lockouts while still protecting data if the phone falls into the wrong hands. At the same time, the increasing lockout duration discourages brute force passcode cracking attempts.
History
Apple first introduced passcodes on the iPhone in 2007 with the release of the original iPhone. At that time, there was no limit to the number of failed passcode attempts before the iPhone would lock. Users could keep entering incorrect passcodes indefinitely without the phone locking.
This changed with iOS 4 in 2010, which introduced a limit of 10 failed passcode attempts before the iPhone would lock and require connecting to iTunes to restore and unlock the device. This was done as a security measure to prevent brute force passcode cracking attempts.
Over the years, Apple has continued to adjust the limit on failed passcode attempts. iOS 9 in 2015 reduced the limit to 6, while iOS 11 in 2017 reduced it further to 5 attempts. The current limit as of iOS 15 is 5 failed attempts before the iPhone locks and requires the passcode to be entered correctly to regain access.
So in summary, failed passcode limits have become more stringent over time, decreasing from unlimited attempts originally to just 5 currently. This shows Apple’s increasing focus on device security against unauthorized access.
Why Limit Attempts?
Apple limits the number of failed passcode attempts on iPhones for security reasons. This prevents unauthorized access through brute force attacks, where someone tries thousands or millions of passcode combinations in hopes of guessing the correct one.
Without attempt limits, an attacker could use a computer program to automatically try endless passwords on a locked iPhone. Even a 6-digit numerical passcode has 1 million possible combinations. A complex alpha-numeric passcode has billions of possibilities.
By locking the iPhone after 10 failed attempts, Apple foils these brute force cracking programs. The lockouts quickly escalate from 1 minute to 1 hour, deterring further guessing. This significantly improves iPhone security against unauthorized access.
According to Apple’s support site, “setting a limit on passcode attempts helps prevent someone else from accessing your iPhone, iPad, or iPod touch if your device is ever lost or stolen.” [1] The passcode attempt limits are an important safeguard for users’ privacy and data security.
Configuring Attempt Limits
The default setting on iPhone allows 10 failed passcode attempts before the device locks and requires connecting to iTunes or iCloud to restore access. However, users can customize this limit in Settings to allow more or fewer attempts.
To change the passcode attempt limit on an iPhone running iOS 16 or later:
- Open the Settings app
- Tap Face ID & Passcode (or Touch ID & Passcode on models with a Home button)
- Enter your passcode when prompted
- Under Allow Access When Locked, tap Erase Data
- Adjust the limit under Failed Attempts using the slider
The allowable range is from 4 failed attempts up to unlimited attempts. Lowering the limit enhances security while increasing it makes brute-force passcode guessing attacks more feasible. Users should weigh convenience vs security when choosing an appropriate failure limit for their needs.
To quickly reset the attempt count, power cycle the iPhone by turning it off and back on. This resets the counter but does not change the limit setting.
Lockout Duration
After too many failed passcode attempts, the iPhone will lock the user out for increasing durations of time. Specifically, after 6 failed attempts, the phone locks for 1 minute. After the 7th failed attempt, it locks for 5 minutes. On the 8th failed attempt, the lockout period increases to 15 minutes. Finally, after 10 failed passcode attempts in a row, the iPhone locks for 1 full hour before another attempt can be made [1].
This incremental lockout period is designed to balance security and usability. Short lockouts early on allow some mistakes while entering the passcode, while still protecting the data if too many failures occur. The increasing durations discourage brute force passcode guessing. At the same time, 1 hour is not overly punitive for legitimate users who simply forgot their passcode [2]. Apple likely optimized these values based on real world use cases and data.
Recovering From Lockout
If you enter the wrong passcode too many times and get locked out of your iPhone, there are a couple methods you can use to recover access:
Connect the iPhone to a computer with iTunes and put the device in recovery mode. This will allow you to restore the iPhone software and reset the passcode. See instructions from Apple on how to enter recovery mode.
As a last resort, you can enter your old passcode at the lock screen which may trigger an “emergency unlock” after a few failed attempts. This temporary unlocks the device so you can set a new passcode. See Apple’s support article for details.
Restoring through iTunes should allow you to recover the iPhone without losing data, unless encryption is enabled. The emergency unlock method will also preserve the data.
If you can’t remember your passcode and resetting is your only option, be sure to backup your data first through iTunes or iCloud. A full restore will wipe the device completely.
Other Ways to Unlock
In addition to entering your passcode, there are other ways to unlock your iPhone that do not require inputting the correct passcode combination.
If you have Touch ID enabled, you can unlock your iPhone by placing your fingerprint on the home button. This scans your fingerprint and will unlock the device if it matches your registered fingerprint.
For iPhones equipped with Face ID, you can unlock your device by looking at the front-facing camera. Face ID uses advanced technology to create and store a mathematical representation of your facial features. Your iPhone will unlock when you look at it if it recognizes your face.
Both Touch ID and Face ID provide convenient alternate unlock methods that do not rely on remembering and inputting your passcode. However, both require having initially set up the biometric authentication on the device. If you forgot your passcode before registering fingerprints or facial data, these methods will not help unlock your iPhone.
While quite secure, it is possible in rare cases to unlock someone else’s iPhone with Touch ID or Face ID if you share similar fingerprints or facial features. If security is a major concern, many experts recommend relying on your passcode over biometric unlock methods.
Passcode Tips
When creating a passcode for your iPhone, it’s important to use a strong and secure code that’s difficult for others to guess. Here are some tips for creating a better passcode:
- Avoid common passwords or patterns like “1234” or “1212”. These are too easy to guess.
- Use at least 6 digits for more possible combinations. The default 4 digits provides only 10,000 possible codes.
- Include both numbers and letters for more security. Alphanumeric codes are harder to crack.
- Use random, meaningless numbers and letters. Avoid dates, repeating digits or letters, or other patterns.
- Change your passcode periodically in case it gets compromised.
- Never share your passcode with others or use the same code for multiple accounts.
With a longer, more complex passcode, you can better protect your iPhone from unauthorized access. Just be sure to memorize the code so you don’t get locked out!
Conclusion
The iPhone’s passcode lock provides an important security layer to keep personal data safe. The default setting allows 5 failed passcode attempts before initiating a 1 minute lockout period, which increases exponentially with further failed tries. While the limits are configurable, Apple chose conservative defaults to balance usability and security.
The key takeaways around iPhone passcode limits are:
- The default settings allow 5 failed attempts before a 1 minute lockout.
- Repeated failures can trigger lockouts up to 1 hour.
- Limits are in place to prevent unauthorized access and brute force attacks.
- Users can adjust limits under Settings if needed.
- Lost devices can be unlocked with Find My iPhone or by resetting to factory settings.
- Using a longer, randomized passcode maximizes security.
Understanding the default limits and recovery options empowers users to get the most out of the iPhone’s passcode system. With proper precautions, it can reliably protect personal data without undue inconvenience.
