Using the same SSD (solid state drive) on both Mac and Windows computers can provide the benefits of fast data access speeds, lower power consumption, durability, and portability. However, proper formatting of the SSD is required to make it fully cross-compatible. The purpose of this guide is to explain the steps and considerations for formatting an SSD for seamless use with MacOS and Windows operating systems.
With the right formatting, an external SSD can function as a startup disk or storage drive that works interchangeably between Mac and Windows machines. This allows you to easily move data between computers without needing to reformat. Proper formatting also enables the SSD to deliver optimal performance. We will cover the key formatting options for achieving SSD compatibility on both platforms.
Choosing an SSD
There are several popular form factors to consider when choosing an SSD:
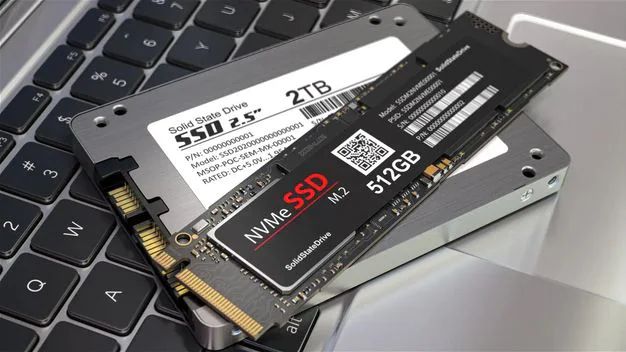
The 2.5″ SATA SSD is the most common form factor and offers the best value per gigabyte. These SSDs come in an enclosed design and are compatible with laptops and desktops.
M.2 SSDs come in a very small, thin physical design that can maximize space efficiency in laptops and small devices. M.2 SSDs connect directly to the motherboard without cabling and come in various lengths (1).
mSATA SSDs are about the size of a stick of RAM and are another option for space-constrained devices. However, mSATA drives are slower than M.2 drives (2).
PCIe/NVMe SSDs connect via PCI Express ports and offer very fast read/write speeds compared to SATA drives. They are mostly used in high performance desktops and servers.
Formatting Considerations
When formatting an SSD for use with both Mac and Windows, the main file system formats to consider are exFAT, APFS (Apple File System), and NTFS (NT File System). Here’s an overview of each format:
exFAT is a good cross-platform file system format that works with both Mac and Windows. It is optimized for flash memory like SSDs and supports large file sizes exceeding 4GB. According to OWC, exFAT is a simple format without extra features, useful in cross-platform scenarios. However, maximum file size is limited to 16TB.
APFS is the default file system format for SSDs on modern macOS versions. It is optimized specifically for flash/SSD storage and offers strong encryption and better support for large volumes compared to HFS+. As noted by darkghosthunter, APFS improves upon HFS+ for SSDs in features like cloning/snapshots, atomic safe-save, crash protection, and sparse file support. However, APFS is not readable on Windows without third-party software.
NTFS is the modern Windows file system format. It supports advanced storage features like encryption, disk quotas, and file compression. According to OWC, NTFS has native read-only support on macOS, but full read/write access requires third-party software. Maximum file size is 16TB.
In summary, exFAT offers the best cross-platform compatibility between Mac and Windows. APFS and NTFS are more specialized formats optimized for each operating system respectively. The choice depends on your specific needs and usage.
Formatting for Mac
The best way to format an SSD for use with Mac is to use the built-in Disk Utility application (Apple Support). Disk Utility allows you to quickly and easily format the drive to work optimally with the Mac operating system and applications.
To format an SSD using Disk Utility:
- Connect the SSD to your Mac.
- Open Disk Utility (located in Applications > Utilities).
- Select the SSD from the left sidebar.
- Click “Erase” at the top.
- Give the SSD a name.
- Select “APFS” as the format.
- Click “Erase.”
Formatting with APFS (Apple File System) is recommended as it is optimized for solid state drives. APFS offers strong encryption, space sharing, fast directory sizing, and improved file system fundamentals (MacPaw).
Once formatted with APFS, the SSD will be ready to use as external storage with Time Machine backups, media storage, or anything else you need it for on your Mac.
Formatting for Windows
The most common way to format an SSD for Windows is by using Disk Management. Disk Management allows you to easily format and partition a drive through the built-in Windows interface. Here are the steps to format an SSD in Disk Management on Windows 10 and 11:
1. Press the Windows key and type “disk management.” Select Create and format hard disk partitions from the results.
2. Right-click on the SSD you want to format and select Format.
3. Under File System, choose NTFS. Give the drive a descriptive name if desired.
4. Check the Quick Format box. This will format the drive quickly by skipping scanning for bad sectors.
5. Click OK to begin formatting the SSD.
The format should only take a minute or two to complete. Once done, the SSD will show up as a properly formatted volume ready to use in Windows. If the drive does not show up, you may need to restart your computer.
For more details, refer to this guide from OnLogic: How to Format an SSD in Windows 10 and 11
Creating Partitions
One option for formatting an SSD to work with both Mac and Windows is to create separate partitions for each operating system. This allows you to have distinct sections of the drive formatted specifically for Mac or Windows without needing to reformat each time you switch between computers.
To create partitions, first connect the SSD to your Mac and open Disk Utility. Select the SSD from the sidebar, click the Partition tab, then click the Plus button to add a new partition (1). Resize the partitions to your desired storage allocation for each operating system. Name one partition “Mac” and the other “Windows.”
For the Mac partition, format as APFS or Mac OS Extended (Journaled). For the Windows partition, format as exFAT for compatibility with both Windows and Mac (2). Now you have dedicated spaces for Mac and Windows to access the SSD without formatting conflicts.
When connecting the SSD to your Windows PC, you may need to initialize the disk to GPT partitioning in Disk Management before both partitions become accessible. The partitions should then appear as separate drives in Windows File Explorer and macOS Finder.
File System Compatibility
When formatting an SSD for use with both Mac and Windows, choosing the right file system is crucial for cross-platform accessibility and data transfer. The optimal file system for sharing a drive between Mac and PC is exFAT.
exFAT is supported natively on both macOS and Windows without any additional software. It removes the 4GB size limit of FAT32 while also supporting large volumes over 2TB. The tradeoff is that exFAT lacks some features like journaling and permissions. But for simple plug-and-play storage and transfer between Mac and Windows, exFAT offers the best compatibility.
Other options like HFS+ and APFS work great for drives dedicated solely to Mac. And NTFS is optimal for Windows-only drives. But neither offers seamless cross-platform performance out of the box. To make HFS+, APFS, or NTFS work on both operating systems requires installing third-party software drivers.
The goal when formatting an external SSD for Mac and Windows is simplicity and compatibility. exFAT meets those requirements natively, making it the ideal file system for sharing data across platforms.
Moving Data
One of the main benefits of partitioning your SSD is the ability to easily move data between the Mac and Windows partitions. To transfer files between partitions, simply open Finder on your Mac and you will see each partition listed under Devices. Click on one partition, then drag and drop files to the other partition.
For example, to move files from your Mac partition to your Windows partition, open the Mac partition in Finder, select the files you want to move, drag them over to the Windows partition in Finder, and drop them into place. The files will copy over.
It’s important to note that if you are transferring large files, it is faster to move them internally between partitions rather than using an external transfer method like a USB drive. Since both partitions exist on the same physical SSD, the file transfer can occur much quicker.
Overall, setting up separate partitions for your different operating systems makes transferring files simple. Just use Finder to drag and drop between partitions.
Maintenance
Properly maintaining your SSD is important for optimal performance and longevity. Here are some tips:
Enable TRIM – TRIM is a command that allows the SSD to wipe deleted data blocks and make them available for writing new data. Both macOS and Windows enable TRIM support automatically, but it doesn’t hurt to verify it is enabled (cite: https://www.crucial.com/support/articles-faq-ssd/optimizing-your-sata-ssd).
Update firmware – Check for and install any firmware updates for your SSD, as these can improve performance and fix bugs (cite: https://www.thegamer.com/how-to-optimise-ssd-better-performance/).
Monitor health – Use built-in tools like Disk Utility on Mac or Storage Spaces on Windows to periodically check the health and usage metrics of your SSD.
Limit writes – Avoid repeatedly writing and deleting large amounts of data to minimize wear. Enable write caching if your SSD supports it.
Keep space free – SSDs need roughly 10% free space for optimal performance, so don’t let your drive fill up.
Clean installs – When setting up a new SSD, perform a clean OS installation rather than cloning your old drive to avoid transferring unnecessary files.
Summary
To summarize, there are a few key steps to take when formatting an SSD for use on both Mac and Windows computers:
Format the SSD using ExFAT file system. This will ensure compatibility between Mac OS X and Windows.
If needed, create separate partitions for Mac and Windows. Use APFS format for the Mac partition and NTFS for Windows.
Be sure to back up any data first before reformatting the SSD. Then use Disk Utility on Mac or Disk Management on Windows to reformat the drive.
After formatting, you can easily transfer files between Mac and Windows by storing them on the ExFAT portion of the SSD.
Periodically run maintenance like error checking and optimization to keep the SSD performing well.
With this approach, an SSD can work seamlessly between Mac and Windows computers.
