Activating an M.2 SSD in BIOS is a straightforward process that ensures your solid state drive is detected by your system. An M.2 SSD offers faster read/write speeds and better performance compared to traditional SATA drives. However, you need to enable a few settings in BIOS before you can start using an M.2 drive.
What is an M.2 SSD?
An M.2 SSD, also known as an NGFF (Next Generation Form Factor) SSD, is a high-speed solid state drive that uses the PCIe bus. It was designed to be small and lightweight to best fit in thin, compact systems. An M.2 SSD looks like a stick of RAM and slides directly into an M.2 slot on your motherboard.
M.2 drives deliver faster transfer speeds over traditional 2.5″ SSDs by connecting directly to PCIe lanes. This direct connection reduces latency and allows for theoretical transfer speeds of up to 32 Gb/s with PCIe 3.0 x4 lanes. High-end M.2 drives can have read/write speeds over 3,000/2,000 MB/s respectively.
In addition to performance benefits, M.2 SSDs don’t require any cables for data or power transfer. The compact design allows laptops and ultrabooks to be thinner compared to using a traditional 2.5″ SSD.
Reasons to Activate an M.2 SSD in BIOS
There are a few key reasons why you should make sure to activate an M.2 SSD in BIOS:
- Enable detection – Activating the M.2 slot in BIOS allows your motherboard to detect the SSD.
- Access full performance – Your drive can’t function at full speed unless PCIe lanes are enabled in BIOS.
- Boot drive – You’ll need to select the M.2 SSD as a boot device to install your operating system on it.
- Avoid conflicts – Enabling the slot avoids conflicts with other connections like SATA ports that may share bandwidth.
Without properly configuring BIOS settings for your M.2 drive, your system won’t be able to see or use it. The drive should be activated prior to installing your operating system for the best experience.
How M.2 Slots Work
Understanding how M.2 slots function can make the BIOS activation process easier.
There are a few key notes about M.2 slots:
- Multiple interfaces – M.2 drives can use PCIe, SATA, or even USB 3.0 for communication. NVMe drives use PCIe while SATA M.2 drives use the SATA interface. Make sure you select the correct interface for your drive in BIOS.
- Lanes – M.2 slots support up to 4 PCIe lanes. More lanes allow for higher bandwidth and speeds. Enabling x4 instead of x2 effectively doubles the throughput.
- Bandwidth sharing – Some motherboards share bandwidth between M.2 slots and other ports when multiple devices are connected. This can reduce the maximum speed of your M.2 drive.
- Disabling SATA – Using a SATA M.2 drive may disable some SATA ports on your motherboard since they use the same connection.
When activating your M.2 slot, you’ll need to consider factors like drive type, lane count, and potentialbandwidth sharing. Refer to your motherboard manual for specifics on how enabling an M.2 slot affects other connections.
How to Check if Your Motherboard Has an M.2 Slot
Before starting the BIOS activation process, you’ll want to double check that your motherboard actually has an M.2 slot:
- Consult motherboard manual – The manual will have detailed info on all slots and ports.
- Visually inspect motherboard – Look for a small, thin slot somewhere on the board.
- Search online – Your motherboard model number can be searched online to verify specifications.
- Use PC motherboard app – Apps like HWiNFO can detect and confirm if an M.2 slot is present.
The M.2 slot itself looks similar to a stick of RAM. It may be labeled directly on the motherboard or denoted by “M2_1” or something similar in the manual. Make sure to locate the correct M.2 slot if your motherboard has more than one.
How to Enable M.2 in BIOS
Once you’ve confirmed that your motherboard has an M.2 slot, follow these steps to enable it in BIOS:
- Insert M.2 SSD – Install your M.2 drive into the slot if you haven’t already.
- Access BIOS – Restart your computer and press the BIOS key (F2, F10, Del) to enter BIOS.
- Find M.2 settings – Refer to your manual for the exact menu locations.
- Enable M.2 slot – Set the M.2 slot to enabled. Some boards have separate enable options for SATA and PCIe M.2 connections.
- Set transfer mode – Select PCIe or SATA as the transfer mode depending on your drive type.
- Adjust lanes – Choose x2 or x4 PCIe lanes for NVMe drives. More lanes allow higher bandwidth.
- Change SATA ports – If needed, disable any SATA ports that will be affected by using the M.2 slot.
- Save and exit – Save changes and restart your PC. Your BIOS settings will now take effect.
With your M.2 slot now active, you should be able to detect the drive in your OS and start transferring files. Be sure to select the correct boot device priorities as well if you want to install your OS on the M.2 drive.
Common BIOS Options for M.2 Drives
Here are some of the most common BIOS options you’ll encounter when activating an M.2 SSD:
- SATA Mode – Sets between AHCI and RAID mode for SATA M.2 drives.
- PCIe Lanes – Selects the x2 or x4 PCIe lanes for NVMe M.2 drives.
- Link Speed – Chooses between Gen1, Gen2, and Gen3 signaling speeds.
- Slot Enable – Globally enables or disables the M.2 slot.
- Transfer Mode – Toggles between SATA and PCIe/NVMe modes depending on drive type.
Refer to your motherboard’s BIOS manual for specifics on which options need to be changed. Some boards will have an explicit “M.2 Settings” submenu to modify.
Verifying Your M.2 SSD is Active
After enabling your M.2 slot in BIOS, verify that the drive is detected by your OS:
- Check Disk Management – Open Windows Disk Management to see all drives.
- Confirm drive letter – Your M.2 drive should have a drive letter assigned.
- Open file explorer – Open My PC or This PC to see the M.2 drive.
- Check device manager – Open device manager and view disk drives.
- Verify speed – Run a benchmark like CrystalDiskMark to test read/write speeds.
If your M.2 drive isn’t showing up anywhere in your OS, you may need to go back and double check your BIOS settings. Refer to your motherboard manual for troubleshooting steps.
Installing an OS on an M.2 SSD
With BIOS properly configured, you can install Windows or another OS directly onto your M.2 SSD:
- Backup data – Backup important data from any existing drive you’re replacing.
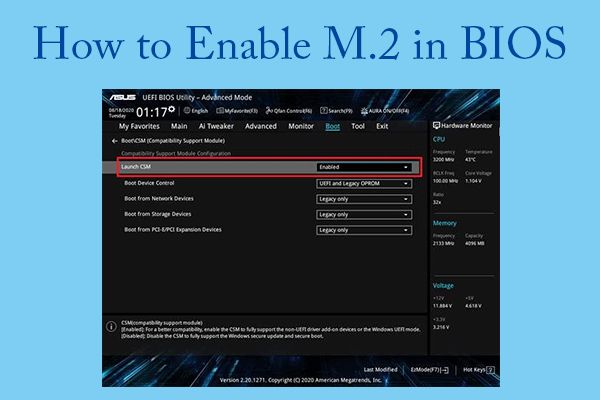
- Enable CSM – Enter BIOS and enable CSM/legacy boot mode required for OS installation.
- Change boot order – Prioritize the M.2 drive over other boot devices.
- Insert installation media – Connect the Windows or OS install USB drive.
- Boot from media – Configure BIOS to boot to the installation media first.
- Install OS – Run through the OS installation wizard and select the M.2 drive.
- Install drivers – Install motherboard/SATA drivers if prompted.
Once complete, make sure to boot back to the M.2 drive priority #1 in your BIOS boot options. You can now enjoy faster speeds with your OS running on the M.2 SSD.
Troubleshooting M.2 Activation Issues
Use these tips to troubleshoot any activation issues with your M.2 drive:
- Reseat M.2 drive – Remove and reinsert the M.2 drive to ensure a secure physical connection.
- Try different slot – If you have multiple slots, try moving the drive to a different available M.2 slot.
- Check for dirt – Use compressed air to blow out any dust or debris from the M.2 connector and slot.
- Update BIOS – A motherboard BIOS update can sometimes resolve activation issues.
- Reset CMOS – Reset BIOS to factory defaults by clearing the CMOS.
- Disable overclocks – If overclocked, revert CPU/RAM settings to default and test.
Common problems like loose connections, outdated BIOS, and overclocking can prevent proper M.2 detection. Following troubleshooting steps methodically can help narrow down and fix activation problems.
Activation for Cloning to M.2
When cloning a drive to your new M.2 SSD, be sure to have it activated in BIOS first:
- Enable M.2 slot in BIOS
- Adjust transfer mode to NVMe or SATA
- Set PCIe lane count if applicable
- Save changes and exit BIOS
- Clone existing drive to M.2 SSD
- Expand partition to fill new larger SSD
Trying to clone prior to BIOS activation can result in errors or no detection of your M.2 drive. Configuring BIOS properly ensures maximum performance when migrating your existing OS over to the faster M.2 SSD.
Conclusion
Activating your M.2 SSD using BIOS is crucial to utilizing the drive to its full potential. Ensure the slot is enabled, transfer mode set properly for NVMe or SATA, and boot priorities adjusted for OS installation. Take the time to correctly configure BIOS settings and you’ll be rewarded with significantly faster system performance.
