Backing up an Android device is an important step to preserve your data, photos, videos, contacts, and more in case your phone is ever lost, stolen, or stops working properly. While backing up a functioning Android phone is straightforward, dealing with an unresponsive or frozen device adds an extra challenge.
In this guide, we’ll walk through various methods to backup and extract data from an unresponsive Android device. We’ll cover software solutions using Android’s built-in recovery tools, ADB commands, and data extraction apps. We’ll also look at hardware methods like directly accessing the memory chip.
With the right tools and techniques, you can recover your valuable information even when your Android is unresponsive.
Quick Overview: How Do I Backup an Unresponsive Android?
Here are the key steps needed to backup an unresponsive Android phone:
- First try rebooting the device – a normal reboot can often resolve temporary software glitches
- If that doesn’t work, boot into Android’s recovery mode interface to access backup and reset options
- Use ADB (Android Debug Bridge) commands on a computer to control the device over USB and pull backup data
- Specialized data extraction apps can be installed into recovery mode to extract files and backups
- As a last resort, you can remove the phone’s memory chip and use adapters to access the data directly from a computer
The best method to use depends on whether you can get the device to respond in recovery mode, if you have already enabled developer options and USB debugging, and if you have the necessary cables, adapters, and technical knowledge.
Prerequisites for Backing Up an Unresponsive Android
Before starting the backup process for an unresponsive Android device, make sure you have the following:
- The Android device you want to backup
- A computer with Windows, Mac, or Linux OS to connect the Android device to
- A USB cable to connect the Android device to the computer
- USB drivers installed on the computer for the specific Android device
- Developer options enabled on the Android device with USB debugging turned on (for ADB)
- ADB (Android Debug Bridge) software installed on the computer (optional)
- Data extraction apps like EaseUS MobiSaver installed on the computer (optional)
- A small Phillips head screwdriver to open up the phone (for memory chip method only)
Having these items prepared ahead of time will give you all the tools necessary to try various backup techniques until one works with your unresponsive Android.
Try Restarting the Unresponsive Android Device
Before diving into advanced backup methods, the first step is always to try restarting the Android device. A simple reboot can clear out minor glitches and get the phone responding again.
Here are ways to restart an Android phone:
- Hold down the Power button for 60+ seconds until the device shuts down
- If there is still no response, hold down the Power + Volume Down buttons together for 10+ seconds
- For devices with removable batteries, take out the battery and reinsert it
Once powered off, wait a minute or two, then press the Power button normally to boot the device back up.
Hopefully this will get your phone out of its unresponsive or frozen state. If the Android continues to be unresponsive or keeps freezing, move on to the next steps.
Enter Android Recovery Mode
The next recommended step is to boot your Android into recovery mode, as this will provide access to the device even if the main operating system is unresponsive.
Recovery mode is a separate interface that runs outside of the normal Android OS, providing tools for maintenance, restoration, and backups.
To enter recovery mode:
- Start by fully turning off the phone – hold down Power for 60+ seconds
- Next, hold Volume Up + Power together until the recovery menu appears
- Some devices use Volume Down or other button combos, so search for the key combo specific to your Android model as needed
In recovery mode, you’ll have access to the Android recovery menu. Options here include applying system updates, wiping cache partitions, factory resetting the device, and crucially, backing up and restoring data.
Use Android Recovery to Backup Data
Once in the recovery menu interface, look for an option called “Backup & Restore” or something similar. This will allow you to back up critical partitions and data.
Steps to take a backup within recovery mode:
- Use volume keys to navigate to the Backup & Restore option
- Select the partitions and data types you want to backup such as Boot, System, Data, etc.
- Confirm the backup operation
- The backup file will be saved to external SD card or internal storage
With this method you can retrieve backups of call logs, contacts, messages, apps, music, and other irreplaceable data.
Factory Reset the Device
If you can’t directly backup files, another recovery mode option is performing a factory reset. This will wipe your Android device back to a blank state, but that process includes copying important partitions that you can retrieve later.
On the recovery menu:
- Select the Wipe data/factory reset option
- Confirm the action on the warning prompt
- Let the reset process fully complete
The device will restart wiped, allowing you to hopefully access it normally and pull backups from Google or app accounts.
Important: A factory reset will erase all device data, apps, accounts, and files, so only use this method if you cannot backup normally via the Android recovery interface.
Use ADB and Fastboot Commands
ADB (Android Debug Bridge) is a powerful utility that lets you send commands to manage an Android device over a USB connection from a computer. With ADB, you can backup data from a phone even if the touchscreen is not functional.
Here are the key steps to use ADB for backups:
- Install ADB on your Windows, Mac, or Linux PC
- Enable USB debugging in Android developer options
- Connect the Android device via USB cable
- Open command prompt/terminal and run: adb devices
- Use adb backup, pull, and sync commands to extract data
Some key ADB backup commands include:
- adb backup -all -f backup.ab (full data backup to backup.ab file)
- adb pull /sdcard/DCIM/Camera/ camera_photos (copy photos to PC)
- adb pull /data/data/com.android.providers.contacts contacts.db (copy contacts DB)
With ADB you can copy off photos, videos, music, documents, contact databases, app data, and other files for safe keeping.
Advanced tip: Fastboot is an interface similar to ADB that can be used on some devices when recovery mode does not work. Look into fastboot backup and flashboot commands for additional options.
Retrieve Backups from Google and App Accounts
Many Android devices automatically sync data such as contacts, calendars, photos, and documents to Google and app accounts. Even without direct phone access, you may be able to recover backups of your information.
Here are some account-based backup options:
- Google Account – Contacts, calendars, photos (Google Photos), app data can be viewed by signing into your google account via a computer or another phone.
- Gmail – Email, contacts, and calendar events are synced to your Google Mail account.
- Apps Like WhatsApp – Chat histories and media can be accessed by reinstalling the apps on another device and logging in.
- iCloud – iPhones sync data to the Apple iCloud which can be accessed on a Mac, PC, or new iPhone.
Enable backup services on your new phone and import data from Google, iCloud, and app accounts to regain access to your information.
Note that app data is only synced automatically for select apps, not the full phone contents. Relying solely on account backups will result in data loss.
Use Android Data Extraction Software
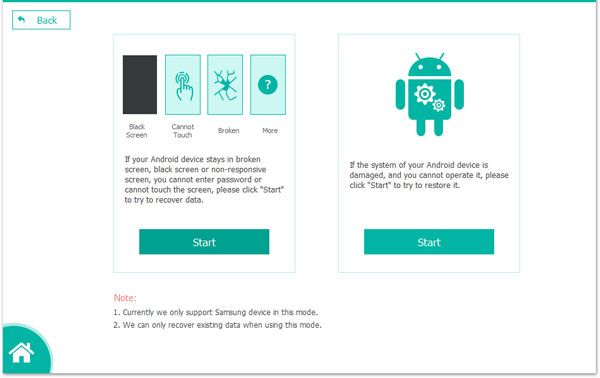
Specialty third-party software tools exist that are designed specifically for extracting files and backups from Android devices in any state. They can provide access even when a device is frozen, boot looping, or will not turn on.
Two top options are:
- EaseUS MobiSaver – Can make full images of Android data for backup and restore via a USB connection.
- Dr.Fone – Facilitates selective backups of app data, photos, videos, audio, and documents.
These tools work by leveraging Android’s recovery and download modes along with proprietary data extraction techniques. They may be able to access and image data that you cannot via standard Android backup facilities.
The biggest advantage of commercial Android data extraction tools is that they do not require USB debugging or any special developer options to be enabled on the device ahead of time.
Using EaseUS MobiSaver
Here is an overview of making an Android data backup with EaseUS MobiSaver:
- Download and install EaseUS MobiSaver on your Windows or Mac computer
- Connect the Android phone via USB cable
- If the phone is on, force shut it down
- Enter recovery or download mode on the Android device
- In MobiSaver select “Backup” and choose file types to image
- Pick a folder to save the full backup files to
- MobiSaver will create complete data backups as .img files
This .img backup image contains the phone’s data partitions, contacts, SMS, apps, SD card files, etc. You can restore the data back to the same or a new Android device later after fixing any device issues.
Directly Access Device Memory Chips
As a last resort if all else fails, you may be able to directly access the data stored on an Android device’s memory chips. This method requires disassembling the phone and using special USB adapters.
The key steps are:
- Disassemble the phone to expose the board and locate the eMMC or NAND memory chips
- Remove the memory chip from the board
- Obtain an eMMC or NAND USB adapter suited for the chip type
- Solder wires or attach the adapter to connect the chip to your computer
- Specialized software can then read the raw data for file carving and data mining
This method has the benefit of accessing data directly at the hardware level. But it requires technical skill to disassemble devices and work with memory chips. Corrupted chip connections or soldering can further damage the memory and make data extraction harder.
Pros should be consulted for direct memory chip data recovery. Companies like Desert Data Recovery have experts that can interface chips with proprietary reading hardware to pull backups where software options don’t work.
Conclusion
Backing up an unresponsive Android phone and extracting its data is very possible using the techniques outlined above. The specific method to choose depends on factors like:
- If the phone boots into recovery mode
- USB debugging mode being enabled
- Your own technical skill level
- Access to data recovery software tools
Ideally, you can simply restart the Android device to get it functioning again. Barring that, recovery mode backups, ADB commands, data extraction apps, and manual memory chip access provide ways to retrieve your valuable photos, videos, contacts, app data, and other unique information.
With some persistence and the right tools, you can get backups from an unresponsive Android device. Just be sure to regularly backup your phone when working properly to avoid these recovery scenarios entirely!