The NTFS and exFAT file systems are two common file systems used for storage drives on Windows computers. NTFS (NT File System) was introduced in the 1990s for use on internal hard drives, while exFAT (Extended File Allocation Table) is a modern file system optimized for external storage devices.
There are a few key reasons why you may want to switch a drive from NTFS to exFAT. NTFS has higher overhead which can slow down data transfers, while exFAT is lighter weight for better performance. Additionally, NTFS is proprietary to Windows while exFAT has wider compatibility with other operating systems like macOS and Linux. Finally, exFAT also supports larger individual file sizes over 4GB compared to NTFS.
Converting an NTFS drive to exFAT allows you to take advantage of the benefits while retaining your data. However, the process requires careful steps to avoid data loss. This guide will walk you through how to safely convert an NTFS partition to exFAT without losing data.
Back Up Your Data
It is crucial to back up your data before converting from NTFS to exFAT. This provides a safety net in case anything goes wrong during the conversion process. As recommended in this article on Ubackup, “An important means of data protection is to back up files before formatting or other major operations.”
There are several recommended methods for backing up your data:
- Copy files to an external hard drive. This creates a physical backup you can restore from if needed.
- Use cloud storage services like Google Drive, Dropbox, or iCloud. These provide offsite backups not connected to your main computer.
- Utilize backup software to automate scheduled backups. Examples include Apple Time Machine for Mac or File History for Windows.
- Clone your entire drive. Cloning creates an exact copy you can restore from.
The key is to use a backup method that provides multiple copies of your data, both onsite and offsite if possible. As noted in this Techspert Services article, “A backup must be repeated or recreated to preserve or record any changes to the data since the last copy was made.” Following best practices for backing up data minimizes the risks associated with changing file systems.
Check the Partition Style
Disks use either the older Master Boot Record (MBR) or the newer GUID Partition Table (GPT) partition style. MBR is limited to only 4 primary partitions while GPT supports unlimited partitions and larger disk sizes. To check the partition style, open the Disk Management tool in Windows, right-click the disk, and select Properties. Under Partition style, it will show either MBR or GPT. For more details on the differences, see this guide on MBR vs GPT.
If the disk uses MBR, you’ll need to convert it to GPT to use exFAT. GPT adds a protective partition at the beginning and end of the disk. However, converting from MBR to GPT is only recommended if the disk is empty or does not contain the active system partition.
Convert the Partition Style If Needed
If your drive is currently using the MBR (Master Boot Record) partition style, you’ll need to convert it to GPT (GUID Partition Table) before changing from NTFS to exFAT.
To convert from MBR to GPT without data loss in Windows, you can use the command prompt (source):
- Open the command prompt as administrator.
- Type “mbr2gpt /validate /allowFullOS” and hit enter to validate the conversion.
- If validation is successful, type “mbr2gpt /convert /allowFullOS” to perform the actual conversion from MBR to GPT.
This will convert the partition style non-destructively. However, there is still a small risk of data loss. Be sure to have a full backup before attempting this.
Third party tools like EaseUS Partition Manager also allow MBR to GPT conversion without data loss (source). These may provide a simpler interface but often aren’t free.
Converting from MBR to GPT prepares your drive to use the exFAT file system. But it doesn’t change the existing partition and file system yet.
Shrink the NTFS Partition
To convert the drive to exFAT, you first need to shrink the NTFS partition to free up space. Here are the steps to shrink an NTFS partition without losing data:
-
Open Disk Management. You can access this by right-clicking the Start menu and selecting Disk Management.
-
Right-click on the NTFS partition you want to shrink and select “Shrink Volume.” This will open the Shrink dialog box. [1]
-
Enter the amount by which you want to shrink the partition. Make sure not to select an amount that’s too large, as it can cause data loss. A safe amount is usually 100-200 GB.
-
Click “Shrink” to reduce the partition size. This frees up unallocated space for the new exFAT partition.
Shrinking the partition this way allows resizing without deleting or damaging data. Once you’ve freed up space, you can create a new exFAT partition in that space.
Create a New exFAT Partition
Once you have unallocated space on your drive, you can create a new exFAT partition. Here are the steps:
1. Open Disk Management. You can access this by right-clicking the Start menu and selecting “Disk Management”.
2. Right-click the unallocated space on your drive and select “New Simple Volume”.
3. In the wizard that opens, specify the size for the new partition and assign it a drive letter.
4. For “File System”, select “exFAT” from the dropdown menu.
5. Click “Next” and then “Finish” to create the new exFAT partition.
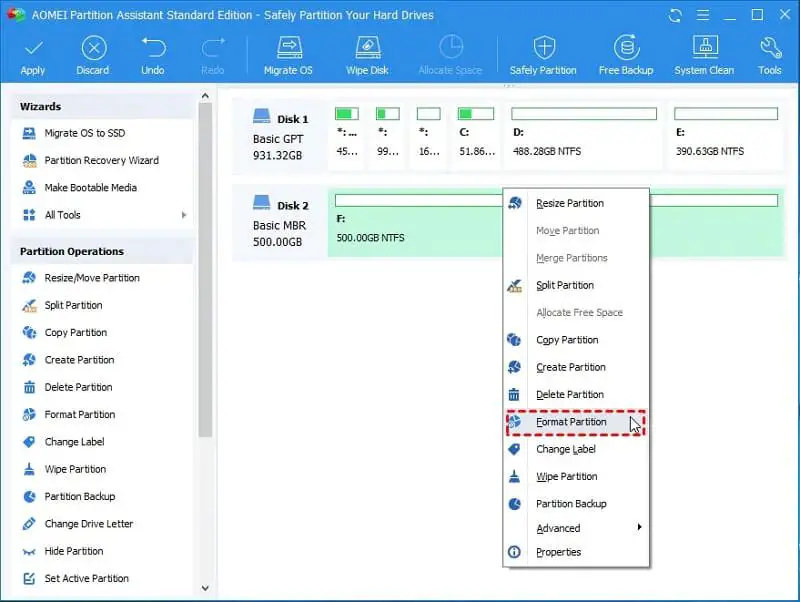
Once created, you’ll need to format the partition:
1. Right-click the new exFAT partition and select “Format”.
2. In the popup, confirm the file system is exFAT.
3. Click “OK” to begin formatting the partition.
The partition will now be ready to store files and data in the exFAT format.[1]
Transfer the Data
Once you have created the new exFAT partition, the next step is to transfer the data from the old NTFS partition to the new exFAT partition. The easiest way to do this is by using the Robocopy command in Windows.
Robocopy (Robust File Copy) is a powerful command-line tool built into Windows that allows you to efficiently copy files and directories while preserving permissions, attributes, and timestamps [1]. Here are the steps to use Robocopy to move your data:
- Open an elevated Command Prompt window.
- Navigate to the folder you want to copy by using the cd command.
- Run the robocopy command to copy everything from the source folder to the destination folder:
robocopy C:\Users\User\NTFSFolder C:\Users\User\exFATFolder /E /COPYALL - The /E flag copies subdirectories including empty ones.
- The /COPYALL flag copies all file info.
Robocopy will prompt you before overwriting any existing files in the destination folder. Once the transfer is complete, you can verify that all your files and folder structures have been moved over successfully [2].
Using Robocopy ensures that permissions, metadata, and other file attributes are preserved when moving data between partitions [3]. With the data transferred, you can now safely delete the old NTFS partition.
Check the Data
Once you have transferred all the files and folders from the NTFS partition to the new exFAT partition, it is crucial to verify that all files were copied correctly without any errors or corruption. There are a few ways to check that the data was transferred properly:
Use a verification tool like Robocopy or FCIV to scan the files and generate checksums to compare between the source and destination. This will identify any files that did not copy over fully.
Spot check folders and file contents to verify they open and display properly. Look for signs of corrupted data or errors.
If any issues are found with missing or corrupted data, you may need to repeat the transfer process. Make sure there are no problems with the hard drives or connections involved. You can also try alternative copy methods like rsync that include verification checks.
Once you have confirmed all data has copied over intact, you can securely delete the original NTFS partition and continue using the exFAT partition.
Delete the Old NTFS Partition
Once you have transferred all the data off the original NTFS partition and confirmed it is safely on the new exFAT partition, you can go ahead and delete the now-empty NTFS partition. This will free up the space it was using on the drive.
To delete the partition, you can use the Disk Management utility or the diskpart command. In Disk Management, right-click on the partition you want to delete and select “Delete Volume” 1. This will immediately delete the partition. Using diskpart, run the command “select partition X” where X is the partition number, then “delete partition override” 2. This will force delete the partition.
Once the original NTFS partition is deleted, the freed up space will become unallocated space on the drive. You can then use this space to extend your exFAT partition if needed.
Conclusion
In summary, converting an NTFS partition to exFAT without losing data involves first backing up your data as a precaution. You’ll then check your current partition style and convert it to GPT if needed, since exFAT requires GPT. Next, shrink your NTFS partition to make room for the new exFAT partition. Once the new exFAT partition is created, transfer your data over before deleting the old NTFS partition.
The benefits of the new exFAT partition are that it works better with external drives and non-Windows devices. It has fewer overhead operations, so it can improve performance on these devices. exFAT also supports larger files over 4GB compared to FAT32. However, NTFS is still better for internal Windows drives since it has more robust features like file compression, encryption, permissions, and disk quotas. For external storage and cross-platform compatibility, exFAT strikes a nice balance.
