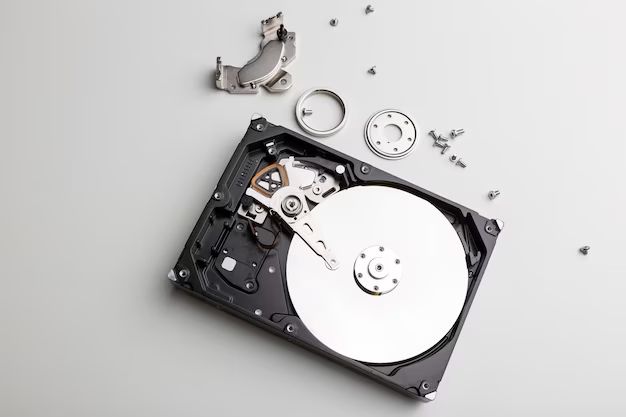
Cloning a hard disk is the process of creating an exact, bootable copy of your hard drive. It allows you to quickly duplicate everything on one hard disk to another disk or partition, including the operating system, installed programs, settings, and files, without having to reinstall everything.
Why Clone a Hard Disk?
There are several reasons you may want to clone your hard disk:
- To upgrade to a larger hard drive without having to reinstall the operating system and programs
- To migrate your system from an old drive to a new one
- To make a backup copy of your entire system
- To duplicate your current setup on another computer
Cloning saves you the hassle of having to manually backup and reinstall everything from scratch. It allows you to seamlessly transfer your full setup to new hardware.
Requirements for Cloning a Hard Disk
To successfully clone your hard disk, you will need:
- Source hard disk – The disk you want to clone that contains the operating system, programs, and files.
- Destination hard disk – An empty disk with equal or larger capacity than the source disk.
- Hard disk cloning software – Special software designed to duplicate hard drives.
- Hard disk cloning hardware – Some cloning kits include physical adapters to connect the source and destination disks.
The destination disk needs to be the same size or larger to hold an exact copy of the source disk. Make sure it does not contain any necessary data as it will be overwritten in the cloning process.
Hard Disk Cloning Process
Cloning a hard disk is a fairly straightforward process and involves the following steps:
- Select cloning software/hardware – Choose a reliable cloning utility or kit that supports your hard disk type.
- Connect the hard disks – Use SATA, USB or cloning adapters to connect the source and destination disks to the same computer.
- Boot into cloning utility – Set your computer to boot into the cloning software interface.
- Select source disk – Specify the drive containing your system, programs and files.
- Select target disk – Choose the destination disk to duplicate the source to.
- Start cloning – Execute the cloning procedure and wait for it to fully complete.
- Disconnect and reboot – Detach the cloned drive and reboot your computer.
The cloning software will automatically copy all the data on the source disk over to the destination, creating an identical clone. Some tools offer advanced options like resizing partitions on the target disk.
Cloning Software Options
There are a variety of hard disk cloning tools available to simplify the cloning process:
Commercial Cloning Software
- Acronis True Image – Full-featured cloning suite for Windows and macOS.
- Macrium Reflect – Affordable Windows cloning utility with scheduling options.
- NovaBackup – Reliable cloning and imaging backup software for Windows.
- Clonezilla – Open source cloning program for Windows and Linux.
- Redo Backup – Cloning tool optimized for Mac with cloud backup capabilities.
Free Cloning Tools
- EaseUS Disk Copy – Straightforward freeware cloner for Windows.
- HDClone – Basic cloning utility built into MiniTool Partition Wizard.
- DriveImage XML – Older but still reliable free cloning program.
- CloneZilla – Disk imaging and cloning tool based on open source Linux tools.
Hardware Cloning Kits
- Sabrent Hard Drive Duplicator – Dock that duplicates hard drives without a computer.
- KanguruClone Hard Drive Duplicator – Standalone clone station for 2.5″ and 3.5″ drives.
- StarTech.com Dual-Bay Dock – External docking station that supports offline cloning.
Look for highly rated software that has been consistently updated and works reliably based on user reviews. While free tools get the job done, paid options tend to offer better performance, tech support and advanced functionality.
How to Clone a Hard Drive in Windows
Here is a step-by-step guide to cloning your hard drive in Windows using the popular cloning utility Macrium Reflect:
- Download and install Macrium Reflect. Get the latest version from the official website and install it on your PC.
- Connect the new target drive. Shut down your computer, connect your new blank hard drive via SATA or USB adapter, then power back on.
- Launch Macrium Reflect. Open the program once Windows boots up.
- Select Clone this disk. Choose the option to clone a disk when prompted.
- Pick source disk. Select your current Windows system drive as the source disk to clone.
- Pick target disk. Choose your new empty hard drive as the target.
- Check clone options. Review settings like file transfer size and shut down PC when done.
- Start cloning. Click Clone this disk when ready to duplicate source to target.
- Wait for completion. The clone process may take 30 minutes to several hours depending on drive size.
- Shut down and swap drives. Turn off your PC, replace your old drive with the new cloned drive, then power back on.
After booting up from the cloned drive, you can format the old disk to use for storage or external backup.
How to Clone HDD to SSD in Windows
Cloning your hard disk drive (HDD) to a solid state drive (SSD) enables you to migrate your operating system, programs and files to a faster, more reliable SSD boot drive.
Follow these steps to seamlessly clone your HDD to SSD without reinstalling everything from scratch:
- Connect your new SSD – Attach it internally via SATA cable or externally through USB.
- Download EaseUS Disk Copy – Get this popular free cloning utility for Windows.
- Launch EaseUS and select HDD – Choose your current HDD as the source disk.
- Select SSD as target – Pick your connected blank SSD as destination.
- Click Proceed – Review settings if desired, then initiate the clone process.
- Wait for completion – Cloning can take anywhere from 30 minutes to a few hours.
- Shut down and replace HDD with SSD – Power off PC, swap the drives, then power back on.
After booting from the SSD clone, you can format the old HDD to repurpose it for external storage if needed.
How to Clone HDD to Larger HDD in Windows
When your hard disk is running out of space, you can clone it to a larger drive to gain more storage capacity while retaining all your installed apps and data.
Here is an overview of cloning to a larger hard disk drive on Windows:
- Buy a new larger HDD – Make sure it has adequate capacity for your needs.
- Connect both disks to your PC – Attach the current and new HDDs internally or externally.
- Download Macrium Reflect – A reliable drive cloning utility for Windows.
- Select smaller HDD as source – Choose your current disk when prompted.
- Pick larger HDD as destination – Select the new bigger empty drive as target.
- Resize partition if desired – Expand partitions on clone to fill larger capacity.
- Click Clone this disk – Execute the duplication process to larger drive.
- Replace old HDD with larger clone – Swap drives once cloning completes.
This allows you to seamlessly migrate to a bigger hard drive while keeping all your Windows installation and files intact.
How to Clone HDD to SSD on Mac
On Mac, you can use the built-in Disk Utility app to easily clone your hard disk to a new solid state drive. Here is the process:
- Connect SSD to Mac – Attach new SSD drive internally or externally via USB.
- Open Disk Utility – Launch Disk Utility app on your Mac.
- Select source disk (HDD) – Choose your current startup disk in left panel.
- Click Restore tab – Select the Restore tab to clone one drive to another.
- Drag HDD to Source field – Drag your current HDD icon into the Source field.
- Drag SSD to Destination – Drag your new SSD into Destination field.
- Click Restore – Review settings and start the cloning process.
- Wait for completion – Cloning can take from 30 minutes up to a few hours.
- Replace HDD with SSD – Once done, swap drives and restart Mac.
After booting up from the cloned SSD, format your old HDD to repurpose or erase it.
How to Clone Mac HDD to Larger HDD
Follow these steps to clone your Mac hard disk to a larger drive using Disk Utility:
- Obtain larger destination HDD – Get a new larger internal or external hard drive.
- Connect both HDDs to Mac – Attach current startup disk and new larger HDD.
- Open Disk Utility – Launch Disk Utility program on your Mac.
- Select source HDD – Choose your current smaller hard disk on the left.
- Click Restore tab – Go to the Restore tab to clone drives.
- Drag source HDD to field – Drag the source disk icon into Source field.
- Drag target HDD to field – Drag your larger new HDD into Destination.
- Start restore process – Review information and click Restore to clone.
- Let cloning complete – Wait for the duplication process to finish.
- Replace old HDD – Once done, shut down Mac and swap in larger drive.
After booting up from the larger cloned HDD, erase your old disk to reuse or add external storage.
Conclusion
Cloning a hard drive enables you to quickly and easily migrate your operating system, installed software, settings and files to new hardware. It saves you from having to manually reinstall everything or restore from backups. Some key takeaways include:
- Use reliable third-party cloning software like Macrium Reflect or built-in tools like Mac Disk Utility.
- Make sure destination drive is same size or larger than source disk.
- Connect both drives to computer during the cloning process.
- Swap source drive with cloned drive after completing cloning.
- Formatting old drive allows you to repurpose it for storage.
With the right preparation and software, cloning your hard drive is a straightforward process to upgrade your PC or Mac without starting your system over from scratch.