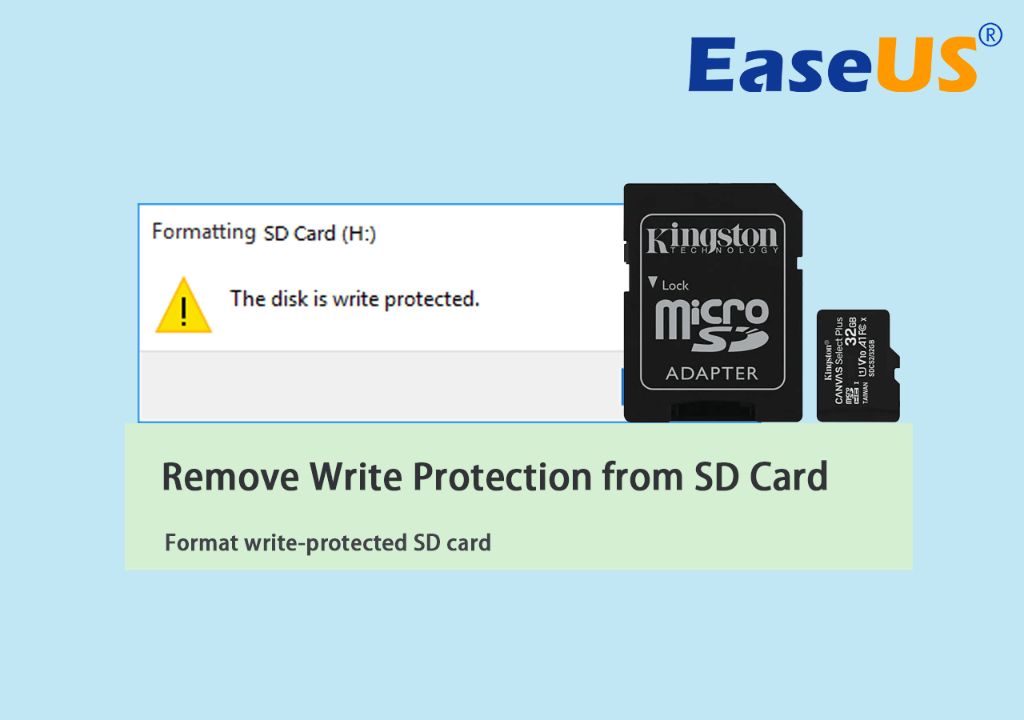
What is a Write-Protected SD Card?
A write-protected SD card is an SD card that has been configured to prevent any data from being written to it. This means files cannot be added, deleted, or modified on the card (Recoverit, 2022).
SD cards have a small physical switch on the side that toggles between the “locked” and “unlocked” positions. When the switch is slid to the locked position, it sets the write-protection mode on the card (EaseUS, 2022).
Write protection is useful to prevent important files and data from being accidentally erased or overwritten. It safeguards the card from malware or viruses that may attempt to infect it. Photographers often use write protection when distributing media to clients to prevent the images from being deleted or altered (Minitool, 2022).
On Windows, write-protected SD cards will appear with a locked icon when viewed in File Explorer. Attempting to modify files on a write-protected card will result in an error such as “The disk is write protected” or “Access denied.”
Removing Write Protection from an SD Card
If an SD card is write-protected, it means the card is locked and can only be read from, not written to. There are a few ways to remove write protection from an SD card on Windows:
Using the physical lock switch on the SD card – Most SD cards have a small switch on the side that slides between a “locked” and “unlocked” position. Sliding this switch towards the unlocked position will remove write protection. Just be sure the card is not currently in use before toggling the lock switch. See this guide for more details: https://www.makeuseof.com/tag/remove-write-protection-sd-card/
Unlocking via diskpart utility on Windows – The diskpart command line utility in Windows can also remove write protection from a card. To do this, open a Command Prompt window as Administrator, type “diskpart”, then “list disk”, “select disk x” (where x is the disk number of your SD card), and “attributes disk clear readonly”. See https://www.easeus.com/partition-master/how-to-format-a-write-protected-sd-card.html for the full instructions.
Using SD card formatting software – Specialized third party software like EaseUS Partition Master also have options to remove SD card write protection. This can be useful if the physical switch is stuck or damaged. Simply install the software, select your SD card, and use the “Write Protection” tool to unlock the card.
Formatting a Write-Unprotected SD Card
With a write unprotected card, there are two main options for formatting the SD card to exFAT:
- Using Windows’ built-in disk formatting tool
- Using third party SD card formatting software like SD Formatter
The Windows built-in disk management utility can be accessed by going to Control Panel > Administrative Tools > Computer Management > Disk Management. Right click on the SD card and choose “Format”.
Make sure to choose exFAT as the file system, rather than FAT32. exFAT supports larger individual file sizes above 4GB and better suits high capacity SD cards 1.
Specialized tools like SD Formatter also allow low-level formatting and testing for SD cards. This helps prepare the card for optimal performance and ensures full compatibility with devices like cameras. Refer to the SD Association’s formatter guide for step-by-step instructions.
In most cases, Windows’ quick format option is sufficient for personal use. But for SD cards that will store critical data like photos, a full format scan may help identify potential bad sectors.
Formatting Write-Protected SD Cards
If your SD card has write protection enabled, you won’t be able to format it through the standard Windows interface. There are a couple methods you can use to format a write-protected SD card:
Using the diskpart clean command:
https://recoverit.wondershare.com/partition-tips/remove-write-protection-on-sd-cards.html
You can use the command prompt tool diskpart to completely wipe and reformat a write-protected SD card. This will erase all data on the card. To do this:
- Open the Command Prompt as administrator
- Type
diskpartand press Enter - Type
list diskto identify the disk number of your SD card - Type
select disk x(replace x with your disk number) - Type
cleanto delete all data and partitions - Type
create partition primaryto recreate the partition - Type
format fs=fat32 quickto quick format as FAT32
This will completely reformat the SD card, overwriting the write protection.
Using low-level formatting tools:
https://www.easeus.com/partition-master/how-to-format-a-write-protected-sd-card.html
You can also use third party low-level formatting tools like SD Formatter or Partition Wizard. These tools can do a complete overwrite of the SD card to remove write protection. Follow these steps:
- Download and install the low-level format tool
- Connect the write-protected SD card to your computer
- Open the software and select the SD card
- Choose “Low-level format” or equivalent option
- Check for any warnings and back up data if needed
- Start the low-level format process
This will complete erase and reformat the card, overriding the write-protection.
Choosing the Right File System for SD Cards
When formatting an SD card, you’ll need to choose between the exFAT or FAT32 file systems. Both have their own pros and cons to consider.
exFAT allows for much larger file sizes than FAT32. While FAT32 has a maximum file size of 4GB, exFAT supports files up to 16 exbibytes! This makes exFAT more ideal for large files like movies or other media. exFAT also has no realistic file number limit like FAT32 does (FAT32 vs. ExFAT vs. NTFS: Which Format Is Best for Your … – PCMag).
However, FAT32 has wider compatibility with devices. Older devices may not support exFAT. FAT32 is compatible with nearly every device like Windows, Mac, Linux, game consoles, cameras, etc. exFAT, on the other hand, may not work with some older or lower-end devices (FAT32 vs. exFAT vs. NTFS: What’s the Difference? – How-To Geek).
So if you need support for larger files, exFAT is the better choice. But for maximum compatibility across many devices, FAT32 may be preferable. Consider what devices will need to access the SD card when deciding between these two file systems.
Potential Issues When Formatting SD Cards
Formatting an SD card does not always go smoothly, and there are several potential issues that can arise:
Corrupted data: If the SD card has corrupted data or file system errors, it may fail to format properly and continue giving errors. This usually requires re-formatting the SD card, but data may be lost in the process. You can try using data recovery software to rescue photos or files before attempting to reformat the card.
Card not detected: The computer may fail to detect the SD card, thus making it impossible to access or format the disk. This could be due to faulty card readers, driver issues, or physical damage to the card. Trying a different card reader, updating drivers, and inspecting the SD card for damage may help resolve detection issues.
Format failure: The formatting process can sometimes fail with errors like “Unable to complete format” or “Cannot format disk”. This is often linked to bad sectors, physical defects, or general deterioration of the SD card. You may need to try low-level formatting tools, test the card health using disk utilities, or replace the faulty card in such cases.
To avoid running into formatting issues, it helps to regularly backup SD card data, check cards for errors, and replace older cards. When problems do occur, disk utilities, data recovery tools, and troubleshooting card readers/drivers may enable successful formatting.
Sources: https://recoverit.wondershare.com/memorycard-recovery/sd-card-needs-formatted.html
Backing Up Data Before Formatting
It’s crucial to backup all the data on your SD card before formatting to avoid permanent data loss. There are two main approaches to backing up your SD card data before formatting:
Using File Copying/Sync Tools
Many file manager apps like ES File Explorer allow you to directly copy files and folders from your SD card to another storage location like your phone’s internal storage or cloud storage. You can simply navigate to the SD card in the app, select all files/folders you want to backup, and copy them to the desired backup location. Some apps like Google Drive also let you sync folders to cloud storage for backup.
According to this source, you can use the Google Drive desktop app to sync folders from your SD card to Google Drive cloud storage as a backup before formatting the card.
Creating Disk Images
Another option is to create a disk image (a file that perfectly clones the entire SD card contents), and store it on another device or drive. Apps like EaseUS Todo Backup as mentioned in this source allow you to easily create full disk images or file backups of your SD card data before formatting.
Once you’ve secured your SD card data through copying or disk images, you can safely proceed with formatting the card without worrying about data loss.
Quick Format vs Full Format for SD Cards
There are two main formatting options when formatting an SD card – quick format and full format. The main difference between these two is:
Quick Format:
- Only deletes the file system information and erases the index of existing files.
- Data still remains on the card but is marked as free space to be overwritten.
- Much faster than full format, usually takes seconds.
Full Format:
- Scans the entire card and erases all data by overwriting with zeros or ones.
- Removes all data including partitions and takes much longer, minutes to hours depending on card size.
- More secure erase but may reduce lifespan of card due to excessive writes.
In most cases, a quick format is sufficient when formatting a new SD card or reformatting your existing card. However, a full format may be preferred in certain situations:
- When donating, selling or disposing of the SD card, a full format is more secure.
- If there are read/write errors, bad sectors or file system corruption, a full format can help fix these issues.
- When switching between operating systems or file formats, a full format ensures full compatibility.
So in summary, quick format is good for a quick erase while full format is more thorough but takes longer. Choose wisely based on your specific needs.
Testing and Verifying the SD Card After Formatting
After formatting an SD card, it’s important to test it to verify that the formatting was successful and the card is functioning properly. There are a few ways to test an SD card:
Read/Write Speed Tests
Performing read and write speed tests on the SD card can identify any performance issues. There are free tools like CrystalDiskMark that can test the sequential and random read/write speeds of the card and compare to expected speeds for that card’s specifications.
Checking for Bad Sectors
Tools like HDD Scan can scan the SD card and identify any bad sectors. Bad sectors can cause data loss or corruption, so it’s best to reformat the card if any are found.
Testing with Files and Folders
Write sample files like photos, videos, documents to the SD card and verify they save properly. Create folders, move files between them, copy/paste files, and delete sample files. Test different file types like JPEG, MP4, DOC etc. This verifies basic read/write operations are working correctly.
If any errors occur during testing, the SD card may need to be reformatted or replaced if defective. Proper testing ensures your card is ready to reliably store important files after formatting.
Recovering Accidentally Formatted SD Card Data
If you accidentally format your SD card and lose important photos, videos, or other files, recovery is possible in many cases. There are two main options for attempting to retrieve your data.
Using Data Recovery Software
One method is to use SD card data recovery software like Disk Drill or Recuva. These programs scan your drive and reconstruct lost files. Follow these general steps:
- Download and install the recovery software.
- Connect the SD card to your computer, but avoid saving new files.
- Run a scan for lost data. This may take some time.
- Preview found files and select those to recover.
- Choose a location to save the recovered data.
The sooner you run the recovery software after formatting, the better. Overwriting existing data reduces your chance of retrieving it. Many SD recovery tools are free to use.
Sending to a Data Recovery Service
For business-critical or irreplaceable files, consider a professional data recovery service. They use specialized techniques in a controlled lab environment to extract data. This option costs money but offers the best chance for recovering lost photos, videos, and documents if the SD card data is extremely valuable.