When creating a set of instructions, it’s important to format them in a clear, organized way so readers can easily follow along. Proper formatting helps break down each step and makes the process less intimidating. In this article, we’ll go over some best practices for formatting step-by-step instructions using HTML tags.
Use a Logical Structure
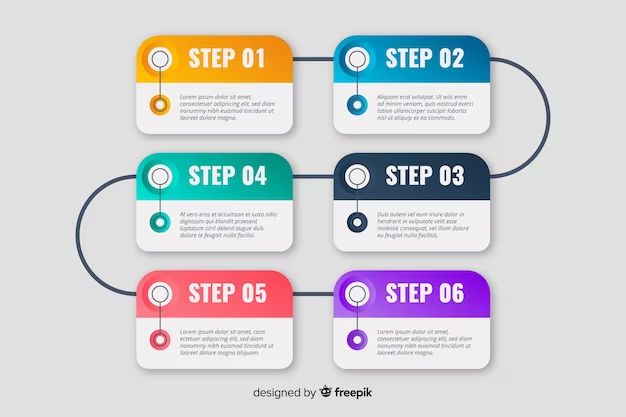
The most important thing when formatting instructions is to structure them logically. Think through the order of steps needed to complete the process and organize them sequentially. Start with an introduction explaining the overall goal, followed by numbered steps in the order they should be completed. Here are some tips for structuring step-by-step instructions:
- Begin with a descriptive title explaining what the instructions will help readers accomplish.
- Include an introduction paragraph explaining the purpose and context behind the instructions.
- Organize steps in a numbered list in the order they need to be completed.
- Use clear headers and subheaders to break up different “phases” of the process.
- End with a conclusion summarizing key points and next steps.
Number the Steps
Numbering each step is crucial for step-by-step instructions. It helps break up each task and makes the process easy to follow visually. Here are some tips for numbering steps effectively:
- Use ordered lists with numbers for each step.
- Be consistent with numbering. Don’t switch between numbers, letters, roman numerals, etc.
- Number the steps in the order they need to be completed in.
- Restart numbering from 1 for each new “phase” of steps.
- Use the same number if a step contains multiple smaller sub-steps.
Write Clear Instructions
With instructions, clarity is key. Each step should explain precisely what the reader needs to do without any ambiguity. Here are some tips for writing clear step-by-step instructions:
- Use the active voice and address the reader directly using “you.”
- Break down steps into small, manageable tasks.
- Include detail but don’t overload readers with unnecessary information.
- Avoid ambiguous phrases like “set up the device.” Explain exactly how to set it up.
- Define any terms or tools readers will need to complete the step.
Add Visuals When Needed
Visuals are invaluable for step-by-step instructions. Pictures, diagrams, tables, etc. help illustrate complex steps visually so readers can follow along easier. Consider adding visuals:
- When a step requires manipulating physical objects/technology.
- To explain a complicated concept or end result.
- To provide a bird’s-eye view of a setup.
- To show what a finished step should look like.
Make sure any visuals are well-designed and placed next to the related step for easy reference.
Use HTML Tags
HTML is great for formatting step-by-step instructions. Here are some HTML tags to use:
- <p> – Paragraph text
- <ol> – Ordered/numbered list
- <li> – List item
- <b> – Bold text for emphasis
- <i> – Italic text for key terms
- <img> – Images and diagrams
- <table> – Tables for data
Here is an example of how to use HTML tags when formatting instructions:
<p>Now we can begin the step-by-step process. Get ready by assembling these tools:</p>
<ul>
<li>Hammer</li>
<li>Nails</li>
<li>Wood</li>
</ul>
<ol>
<li>Take a nail and place it against the wood.</li>
<li>Use the <i>hammer</i> to tap the nail into the wood.</li>
<li>Continue adding nails every 2 inches until secured.</li>
</ol>
Let Readers Know What They’ll Need
Don’t assume readers will already have the tools or materials needed. Your instructions should clearly lay out everything required to complete the process. Some tips:
- Make a list of required tools and ingredients near the beginning.
- Link to specific products if helpful, like particular brands or models.
- Specify the quantities needed of any materials.
- Mention safety gear or clothing if important to the task.
- Include a section for “Before You Start” explaining what readers need to prepare.
Explain the Context When Needed
Some extra context can help readers better understand the broader goal behind the instructions. Consider providing relevant explanation about:
- Background about why the task is done or how the process works.
- The intended end result or purpose of completing the steps.
- Time, costs, or requirements associated with the process.
- Variations or customizations readers can make.
- Tips, tricks, or best practices you recommend.
Include Warnings Where Necessary
Safety first! If any steps require special caution or vigilance, be sure to call that out explicitly with warning language. Some tips for warning readers:
- Use phrases like “Warning!” or “Important:” to draw attention.
- Bold, italicize, or underline the warning text.
- Explain dangers, risks, or safety concerns.
- Provide guidance on how to complete risky steps safely.
- Consider using a red font color for extra visual emphasis of warnings.
Add a Troubleshooting Section
Things don’t always go according to plan, so include some troubleshooting tips. This section provides guidance if readers run into problems at any point in the process. Useful troubleshooting tips include:
- Common issues that may arise and how to fix them.
- How to tell if a step was done incorrectly.
- Advice on getting “unstuck” and back on track.
- When to seek help from an expert if needed.
- Points of contact for troubleshooting questions.
Include a Conclusion/Summary
Wrap up your instructions with a concise conclusion or summary:
- Restate the most important steps/takeaways.
- Note what the reader should now be able to accomplish.
- Provide next steps or additional resources as needed.
- Thank readers for following along!
Use a Consistent Structure
Keeping your formatting consistent throughout the instructions will make them easier to follow. Some consistency tips:
- Stick with the same sequence of sections and headings.
- Maintain the same tone and writing style.
- Use similar wording and language for each step.
- Keep steps at roughly the same length and level of detail.
- Use the same text formatting and colors for emphasis.
Include a Table of Contents for Long Instructions
For lengthy, complex instructions, include a table of contents at the beginning:
- List each major section and heading with page numbers.
- Link from each item to the corresponding section for easy navigation.
- Keep the table of contents in order and consistent with headings.
- Only include main sections – not individual steps.
Here is an example table of contents using HTML:
<table>
<tr>
<th>Section</th>
<th>Page</th>
</tr>
<tr>
<td>Introduction</td>
<td>1</td>
</tr>
<tr>
<td>Gathering Supplies</td>
<td>3</td>
</tr>
</table>
Test and Refine the Instructions
Have someone else follow your instructions to test their clarity and accuracy before finalizing them. Some tips for testing instructions:
- Have testers go through each step without your guidance.
- Ask testers lots of questions about each point.
- Observe where testers get stuck or confused.
- Request feedback on how instructions could be improved.
- Confirm if any key information is missing.
- Check that instructions lead to the desired result.
Then refine the instructions based on feedback before publishing.
Conclusion
Well-formatted step-by-step instructions are invaluable for guiding readers through a process successfully. By following best practices like using a logical structure, clear writing, visuals, and HTML tags, you can create instructions that are easy to follow from start to finish. Remember to structure your steps clearly, provide ample context, include warnings, and refine your instructions based on feedback. With these tips in mind, you can produce step-by-step instructions that will set your readers up for success.
