Formatting Windows 10 is the process of erasing all the files, settings and programs on your Windows 10 computer and reinstalling the operating system from scratch. There are a few reasons why someone may want to format their Windows 10 computer and do a clean install:
To wipe the computer and start fresh – Formatting clears out any files or personal data and resets Windows 10 to its default factory settings. This is often done if the computer is being sold or given to someone else.
To resolve performance issues – Over time, installed apps, files and settings can slow down a Windows 10 computer. Formatting the drive provides a clean slate which often improves performance.
To eliminate malware or viruses – Formatting completely removes any malware, viruses or other unwanted programs that may have infected the system.
To upgrade to a new version of Windows – Doing a clean install is recommended when upgrading Windows 10 to a newer version in order to avoid potential bugs or issues.
Overall, formatting and reinstalling Windows 10 allows the operating system to run like new and gives the user more control over the look, settings, and pre-installed apps.
Back Up Your Files
Before formatting your Windows 10 drive, it’s absolutely critical that you back up your personal files and data. Formatting will completely erase everything on the drive, so if you don’t have backups, you will lose all your files permanently. According to Quora, formatting a drive results in complete data loss. And as noted by New Era Technology, 67% of data loss is caused by formatting or hard drive failures.
To avoid disaster, make sure you backup all your important documents, photos, videos, music, browser bookmarks, and any other personal files or data you want to keep. Back up to an external hard drive, USB flash drive, cloud storage, or another computer on your network. Test restoring some files from the backup to ensure it worked properly before formatting your computer.
Formatting will wipe your drive clean, so a backup is the only way to preserve your files. Don’t skip this step, or you risk permanent data loss.
Create a Windows 10 Installation Media
To format and clean install Windows 10, you’ll first need to create bootable installation media on a USB flash drive or DVD. The easiest way to do this is with the Windows 10 Media Creation Tool from Microsoft.
To get started, visit the Media Creation Tool page and download the tool. Run the executable file once it finishes downloading. In the tool, select “Create installation media for another PC” and choose either USB flash drive or ISO file for a DVD. Next, select the language, edition, and architecture you want, and agree to the terms.
Once you’ve entered all the information, the Media Creation Tool will download Windows 10 and prepare the installation files and boot data on your drive. This process can take some time depending on your internet speed. Once complete, you’ll have Windows 10 installation media ready to boot from and format your PC.
Boot From the Installation Media
Booting from the installation media is the next step after creating the USB or DVD. This allows your computer to load Windows 10 from the external media rather than the internal drive. Here’s how to boot from USB or DVD on Windows 10:
Restart your computer and press the key to access the boot menu, which varies by manufacturer but is often F2, F10 or F12. On HP computers, tap F9 or F12 repeatedly after powering on to open the boot menu (https://www.hp.com/us-en/shop/tech-takes/how-to-boot-from-usb-drive-on-windows-10-pcs).
Select the USB or DVD drive from the boot menu. The computer will now start the Windows 10 setup from the installation media instead of the normal internal hard drive. Follow the on-screen prompts to begin installing Windows 10 on your PC.
If your computer doesn’t allow boot from USB, you may need to enable this option in the BIOS. Refer to your motherboard manual for instructions. For more details, see Microsoft’s guide on booting from USB to install Windows (https://learn.microsoft.com/en-us/windows-hardware/manufacture/desktop/install-windows-from-a-usb-flash-drive?view=windows-11).
Format the Drive
Once you boot from the Windows 10 installation media, you will need to format the drive you want to install Windows 10 on. Formatting the drive erases all data and prepares it for a clean install of the operating system.
To format the drive, follow these steps:
- In the Windows Setup screen, click on “Install Now.”
- On the “Where do you want to install Windows?” page, click on “Drive options (advanced).”
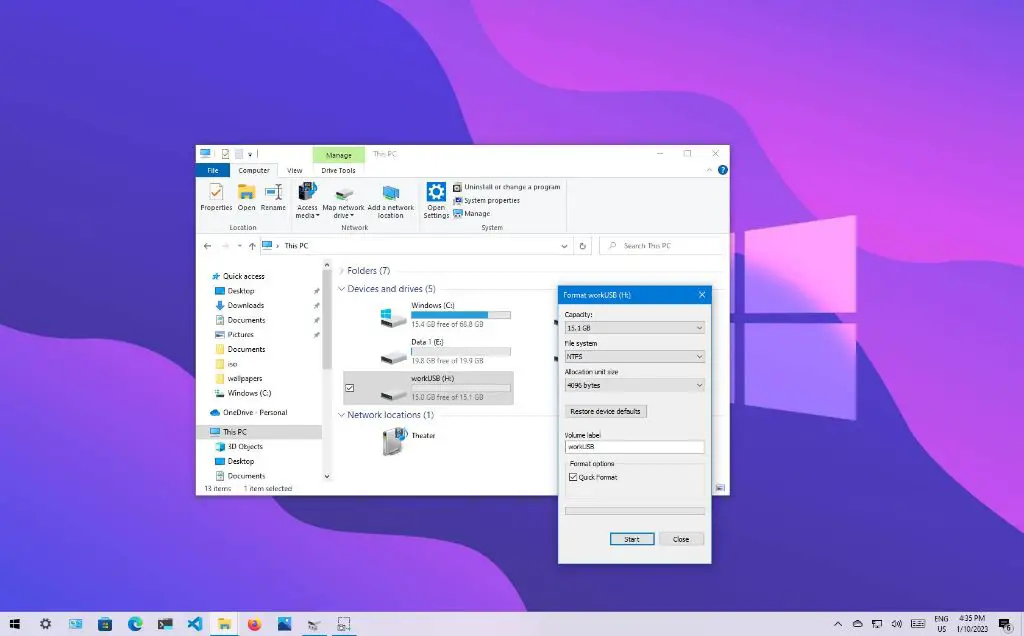
- Select the drive you want to format and click “Format.” This will open the “Format Partition” window.
- In the “File System” dropdown, select “NTFS.” Keep the default settings for allocation unit size and volume label.
- Check the “Quick Format” box.
- Click “OK” to begin formatting the drive. This will take several minutes.
Once the formatting is complete, you can proceed with the clean installation of Windows 10. The drive is now prepared and empty for Windows 10 to be installed.
For more details on formatting options during Windows 10 install, see the Microsoft Answers forum post: How to format hard disk during installation of Windows 10?
Clean Install Windows 10
To perform a clean installation of Windows 10 using a USB drive, follow these steps:
First, boot your computer from the USB installation media you created earlier. You may need to press a specific key during boot up to bring up the boot menu, depending on your PC’s make and model. Select the USB drive from the boot menu.
On the first Windows 10 installation screen, click the “Next” button. On the second screen, click “Install Now.”
Select “Custom: Install Windows only (advanced).” This will let you format and clean install Windows 10 on your PC.
On the next screen, select the drive where you want to install Windows 10. To do a clean install, you’ll want to format the drive first. Click “Format” to delete all partitions on the drive and format it.
After formatting completes, click “Next.” Windows 10 will now begin installing on the clean drive.
The installation process will take some time to finish. Once done, you will be able to configure basic Windows 10 settings and create a local user account.
After Windows 10 finishes the initial setup, you will have a clean installation ready to be customized with your apps and preferences.
(Citable url used:https://answers.microsoft.com/en-us/insider/forum/all/how-to-perform-a-clean-install-or-reinstall-of/aef0ae63-2117-41ee-a8ea-4a3181625b08)
Install Drivers
Installing the latest drivers is one of the most important steps after formatting Windows 10. Outdated or missing drivers can lead to hardware issues, crashes, and poor performance [1]. Windows Update may install generic drivers, but for maximum stability and functionality you’ll want to install drivers directly from the manufacturer websites.
Here are some essential drivers to download and install after a clean Windows 10 install:
- Motherboard/chipset drivers – These allow communication between the CPU and components like USB ports and PCIe slots [2].
- Graphics card drivers – Critical for gaming, video playback, and GPU accelerated tasks.
- Audio drivers – For sound card and onboard audio.
- Network adapter drivers – For wired and wireless network connectivity.
- Other peripherals – Printers, scanners, touchpads, external drives, etc.
Always download the latest drivers directly from your device manufacturers’ websites. Avoid using drivers on the installation media, as these can be months out of date [3].
Reinstall Programs
After formatting your Windows 10 installation, you’ll likely want to reinstall some of your must-have programs and software. Here are some of the most common and useful programs to consider reinstalling:
Media players like VLC media player are essential for watching videos and listening to music. VLC is a versatile open-source media player that can handle just about any audio or video format.
An office suite like LibreOffice allows you to work with documents, spreadsheets, presentations and more without paying for Microsoft Office. LibreOffice is a free and open source option with excellent compatibility.
Security software such as Malwarebytes helps protect your computer from viruses, malware and other online threats. Malwarebytes offers a free scanner tool and paid real-time protection.
File compression tools like 7-Zip or WinRAR allow you to zip and unzip archived files. These are must-have utilities for managing compressed files in Windows.
System utilities like CCleaner help you clean up junk files, browser caches, registry issues and optimize your PC’s performance. CCleaner is a staple Windows utility for many users.
Gamers will want to reinstall game launchers like Steam, Origin, Uplay or Blizzard Battle.net to access their game libraries again. Graphics drivers for NVIDIA or AMD cards are also essential for gaming.
Browsers like Google Chrome, Mozilla Firefox or Microsoft Edge provide access to the web again. Make sure to reinstall your preferred browser and import bookmarks/settings as needed.
Reinstalling key software and utilities helps restore full functionality after formatting Windows 10. Focus on the programs you use regularly to get up and running again quickly.
Restore Backup
After formatting your Windows 10 drive and reinstalling Windows, you’ll want to restore your personal files and data from your backup. Here are the steps to restore your files:
First, connect the external hard drive or storage device where you saved your backup. Open File Explorer and navigate to the location of your backup files. The files may be in the root folder of the drive or in a folder called “Backup” or with the date of the backup.
Select the files and folders you want to restore and copy them. Then paste them into the appropriate locations on your newly formatted Windows 10 drive. For example, paste documents into your Documents folder, music into Music, photos into Pictures, etc.
If you backed up your files using the File History tool, you can restore files by opening Settings > Update & Security > Backup > More options > Restore files from a current backup. Select the backup version you want to restore from and choose the files/folders to restore.
For a full system image backup created with Windows Backup, you’ll need to launch the Windows Recovery Environment. In the restore section, find the system image file and choose the C: drive to restore it to. This will restore your entire Windows installation along with files.
Take your time during this process to ensure you restore all your important personal data. Once finished, your files and folders should be intact again after formatting Windows 10.
Conclusion
In summary, formatting your Windows 10 device and performing a clean install is a straightforward process that can provide several benefits. By creating a bootable USB drive, booting into the installation media, formatting your drive, and performing a clean install, you can wipe your device and start fresh with a clean and optimized Windows 10 system. Key advantages of this process include removing bloatware and unnecessary files, resolving software issues, speeding up performance, and enhancing reliability and stability. Just be sure to properly back up any important personal files and data beforehand. With the necessary preparation and by carefully following each step, formatting and clean installing Windows 10 using a USB drive can restore your device to a like-new state.
