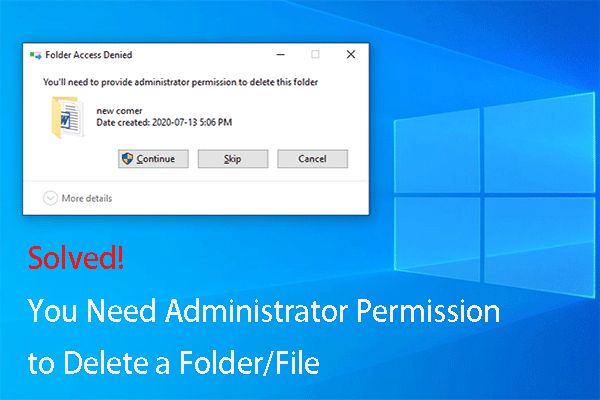
In Windows 10, users sometimes encounter the message “You’ll need to provide administrator permission to delete this file” when trying to delete a file or folder. This occurs when the current user account does not have full administrator access and privileges on the computer.
By default, most user accounts in Windows are set up as standard or limited users. Standard users cannot make major changes to the system that could impact other users or create security risks, such as deleting key operating system files. The administrator account has full control over the computer and can delete any file or make major system changes.
If a standard or limited user tries to delete a file they don’t have permissions for, Windows blocks the action and asks them to provide admin credentials. This is a security measure to prevent unwanted changes by non-admin users. Some files require admin rights to delete because they are protected system files, belong to other user accounts, have specific permissions set on them, or are located in restricted folders like Program Files.
Determine File Permissions
There are a couple ways to check if a file requires administrator permissions to delete in Windows 10. The easiest is to simply right click on the file, select Properties, and go to the Security tab. This will show you the permissions settings for that file. If the owner is listed as TrustedInstaller or System, then admin rights are required to make changes to or delete the file.
You can also use the icacls command from an elevated Command Prompt. Running “icacls filename” will display the permissions. If SYSTEM or TrustedInstaller are listed as the owner, admin access is needed.
Using either of these methods allows you to easily check file permissions and determine if administrator rights are required before trying to delete a file.
Request Admin Rights
If you are logged into a standard user account and need admin rights to delete a file, you can request elevated privileges in a few ways:
You can click the file you want to delete, go to the Properties window, select the Security tab, and click Advanced. From here, you can see the owner of the file. Click Change to open a window where you can enter an admin username and password to take ownership of the file.
Alternatively, you can right-click the file and select Run as administrator. This will launch Windows Explorer as an admin, allowing you to delete the protected file.
Finally, you can use the consent.exe tool in Windows 10 to prompt the admin for privileges. Open a Command Prompt as admin and enter:
consent.exe /user:USERNAME /elevation:admin
Replace USERNAME with the admin account name. This will create a UAC prompt on their desktop requesting privileges.1
With any of these methods, as long as an admin grants consent, you can gain elevated rights to delete restricted files.
Use Take Ownership
One way to gain administrative permissions to delete a file is to take ownership of it. The Take Ownership feature in Windows allows you to assume ownership of files, folders, and registry keys. When you take ownership, you gain full control over the item.
To use Take Ownership on a file in Windows 10:
- Right-click on the file and select Properties.
- Go to the Security tab and click Advanced.
- Click the Owner tab and select your user account.
- Check the box for “Replace owner on subcontainers and objects.”
- Click Apply and OK to confirm the changes.
This will make your account the owner of the file. As the owner, you can now change the permissions to give yourself Full Control. To do this:
- Go back to the Security tab and click Edit.
- Select your user account and allow Full Control permissions.
- Click OK to apply the permission changes.
Once you have full control permissions as the owner, you can delete the file without needing admin access. The open-source TakeOwnershipPro tool can automate taking ownership of files in Windows.
Change Permissions
To modify file permissions to allow deletion, follow these steps:
- Right-click on the file or folder you want to modify and select Properties.
- On the Properties window, click the Security tab.
- Click Edit, then Add to add a user or group.
- Select the name and click OK. Check the Allow box for Delete in the Permissions section.
- Click OK on the Security tab to save the permission changes.
Modifying permissions will allow the added user or group to delete the file or folder. Be sure to only add users or groups that need delete access. Too broad of permissions could lead to accidental or malicious deletion of files (cite: CCTC Windows Section Flashcards).
You can also use the cacls command in Command Prompt to modify permissions and grant delete access to a file or folder. Refer to the Command Prompt section for details.
Unlock with Unlocker
Unlocker is a free utility that can help delete locked files that Windows refuses to remove normally. It bypasses file permission issues to force deletion of files, folders, and directories.
To use Unlocker to delete a locked file in Windows 10:
- Download and install the Unlocker software. It is available free from sites like Softonic.
- Right-click on the locked file you want to delete and select “Unlocker” from the context menu.
- Unlocker will analyze the file and show why it is locked. Click the “Delete” button to force deletion.
- If the file is being used by a process, Unlocker will prompt to end the process. Confirm to allow deletion.
- The locked file will now be deleted successfully using Unlocker’s advanced capabilities.
Unlocker is able to remove files that Windows normally does not allow you to delete. It can be a useful utility for deleting stubborn locked files when you have proper administrator access.
Delete via Command Prompt
You can delete protected files by opening an elevated Command Prompt window as an administrator. This gives full permissions to delete system files.
Follow these steps:
- Open the Windows start menu and search for “Command Prompt”
- Right-click on Command Prompt and select “Run as administrator”
- In the Command Prompt window, navigate to the folder location of the protected file you want to delete. For example:
cd C:\Windows\System32 - Type the command
del filenameand press Enter. Replace filename with the name of the file.
This will immediately and permanently delete the protected file without sending it to the Recycle Bin. Be very careful when deleting system files in this manner.
For more information, see: How to Create and Delete Files from Command Prompt
Reset File Permissions
One way to reset permissions on a file back to the default settings is by using the Takeown and Icacls commands in Command Prompt. This will remove any explicit permissions that have been set on the file and revert it back to inheriting permissions from the parent folder.
To do this, open Command Prompt as Administrator and navigate to the file location. Then run the following commands:
Takeown /F filename.txt /R /D Y
This will take ownership of the file, overwriting the current owner. The /R recursively takes ownership of all files in a folder, /D deletes all existing permissions, and Y confirms the action.
Next, run:
Icacls filename.txt /reset /T
The /reset switch will replace the ACLs on the file with defaults inherited from the parent folder. /T performs this action on all specified files [1].
Now the file permissions should be reset back to the inherited defaults. You can verify by checking the Security tab on the file properties.
Disable UAC
One way to avoid permission issues when deleting files in Windows 10 is to disable User Account Control (UAC) completely. UAC is the security component that requires administrator privileges for making system changes. With UAC disabled, all users will have full administrator access.
According to Minitool (source), there are some pros and cons to consider before disabling UAC:
Pros:
- No permission prompts when installing software or changing settings.
- Faster access with full admin rights for all users.
Cons:
- Increased security risks without the protection of UAC.
- Malware has an easier time infecting the system.
- Changes can be made system-wide without oversight.
Overall, disabling UAC gives users more convenience but opens up the system to potential security flaws. It’s generally not recommended to turn UAC off completely unless absolutely necessary.
Conclusion
Deleting files that require administrator permissions in Windows 10 can be accomplished through several methods. The key steps include:
- Checking the file permissions to confirm admin rights are needed
- Using Take Ownership to grant yourself full control
- Modifying the file permissions to allow your user account deletion abilities
- Using the Unlocker utility to delete protected files
- Deleting via an admin Command Prompt window
- Resetting the file permissions after deletion
- Temporarily disabling User Account Control
By understanding these options, you can gain the admin access needed to delete restricted files in Windows 10. Just be sure to only use these methods on your own system and files.