With iCloud Photo Library, you can safely store all your photos and videos in iCloud and access them from any device. It also optimizes your iPhone storage, so you don’t run out of space.
When you enable iCloud Photo Library, your photos and videos are automatically uploaded and stored in iCloud. They are not physically on your iPhone but can be downloaded as needed. This means you can have access to all your photos without taking up valuable storage space on your iPhone.
In this guide, we’ll show you how to set up and use iCloud Photo Library to upload your photos and videos from your iPhone and delete the originals from your iPhone storage to free up space.
Quick answers to key questions
– How do I upload photos from my iPhone to iCloud? Enable iCloud Photo Library in your iPhone’s Settings. New photos you take will be automatically uploaded. For existing photos, open the Photos app and select ‘Upload to iCloud.’
– How do I delete photos from my iPhone after uploading? After confirming photos and videos are safely in iCloud, go to Albums > Camera Roll and select photos to delete. Tap ‘Delete’ and confirm.
– How much iCloud storage do I need? The free 5GB may be enough if you don’t have too many photos. 50GB costs $0.99/month or 200GB for $2.99/month.
– Does deleting photos from my iPhone delete them from iCloud? No, the copies stored in iCloud are separate from your iPhone. Deleting from iPhone does not affect the iCloud versions.
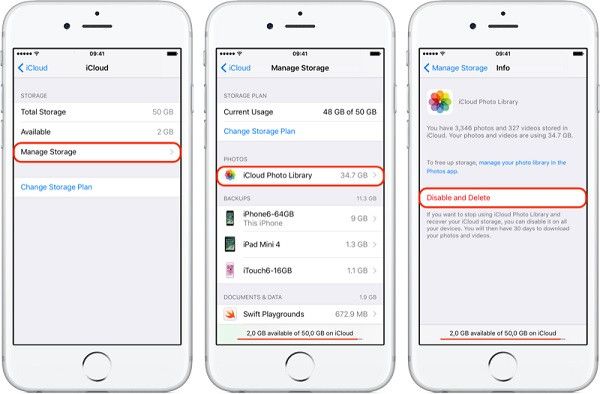
Step 1: Make sure you have enough iCloud storage
Before transferring all your photos and videos to iCloud, check that you have enough storage space available.
Here’s how to check your storage on an iPhone:
1. Open the Settings app.
2. Tap on your Apple ID banner at the top of the screen.
3. Tap on iCloud.
4. You’ll see a screen showing how much iCloud storage you’re using.
The free 5GB of space may be enough if you don’t have too many photos and videos stored on your iPhone.
If you’re getting close to the limit or have already exceeded it, you’ll need to upgrade your iCloud storage plan to continue using iCloud Photo Library.
Apple offers larger paid iCloud storage plans:
– 50GB for $0.99 per month
– 200GB for $2.99 per month
– 2TB for $9.99 per month
Upgrading allows all your photos and videos to transfer to iCloud where they are safely stored and accessible across devices.
How many photos and videos can 5GB store?
As a rough estimate, 5GB of free iCloud storage space can hold:
– Around 125,000 standard iPhone photos or
– Around 11 hours of iPhone video at standard resolution
So if you have a lot more photos or videos than that, it’s best to upgrade your iCloud storage when setting up iCloud Photo Library.
Step 2: Turn on iCloud Photo Library
1. Go to the Settings app and tap your name at the top.
2. Tap iCloud > Photos.
3. Tap the switch to turn on iCloud Photo Library.
4. Tap Done to confirm.
This will activate iCloud Photo Library on your iPhone.
New photos and videos you take will now automatically upload and store in iCloud as you take them.
What does iCloud Photo Library sync?
With iCloud Photo Library enabled, here’s what gets automatically uploaded and synced across your devices:
– Photos and videos taken on your iPhone camera
– Screenshots and screen recordings
– Photos and videos saved from Messages
– Photos and videos saved from websites and apps
– Albums and favorites
– Photo editing adjustments
– Deleted photos and videos (stored for 30 days before permanent deletion)
Turning it on ensures all your visual content is continuously backed up and accessible on all your Apple devices logged into the same iCloud account.
Step 3: Upload existing photos and videos to iCloud
For photos and videos already stored on your iPhone, you need to manually upload them to iCloud.
Here’s how:
1. Open the Photos app.
2. Tap the icon in the top left and select ‘Upload to iCloud’.
3. Select ‘Upload All’ or choose ‘Selected Albums’ to only upload certain albums.
4. Tap ‘Upload’ and let the upload process complete. Progress will be shown.
This uploads all your existing photos, videos, albums and other content to iCloud where they are safely stored and accessible.
How long does uploading take?
The time it takes to upload your photos and videos depends on:
– Number of photos/videos – more content takes longer.
– File sizes – higher resolution videos take longer.
– Internet connection speed – faster WiFi allows quicker uploads.
As a rough guide, under ideal WiFi conditions, expect approximately 300-400 photos per minute to upload.
So 3,000 photos would take around 10 minutes. 10,000 photos around 30 minutes.
Videos take longer than photos. You may wish to continue using your iPhone as normal while uploads happen in the background.
Step 4: Delete photos and videos from iPhone
Once your photos and videos are fully uploaded and safely stored in iCloud, you can delete them from your iPhone storage to free up space.
**Important:** Do not delete any photos or videos until you are sure they are fully uploaded and stored in your iCloud Photo Library.
To delete photos and videos from your iPhone:
1. Open the Photos app and go to the Albums tab.
2. Open the Camera Roll album which contains all photos.
3. Tap Select in the top right.
4. Select the photos/videos you want to delete.
5. Tap delete in the bottom left and confirm deletion.
This will delete them from your iPhone only. Your copies stored in iCloud are kept safe and will still be viewable.
You can delete batches of photos this way until your iPhone storage is freed up. All your visual content will remain safely stored and accessible in iCloud.
Should I use Optimize [device] Storage?
On the Photos settings screen, you’ll see an option called ‘Optimize [device] Storage’.
This can automatically manage the photos and videos stored on your device. When enabled, your full photo library is stored in iCloud, and your iPhone will store lower resolution versions that use less space.
The full original remains safely in iCloud and will download when needed.
This saves storage space while still providing access to all your photos. It’s best for larger libraries if you don’t want to manually delete photos.
Step 5: View and download photos anywhere
Once in iCloud, your photos and videos are accessible on any Apple device using the same iCloud account and Photos app, including:
– iPhone
– iPad
– Mac
– iPod Touch
– Apple TV
You have the flexibility to view, share and even edit photos from any device. Any changes will sync across all devices.
If you’re on another device and want to download a full original photo or video from iCloud for offline access, open the photo then tap the Download button.
How to download all iCloud photos to a new device
When you log into a new iPhone or other device with the same iCloud account, you can choose to download all iCloud photos.
On the new device:
1. Turn on iCloud Photo Library in Settings.
2. When prompted, choose ‘Download and Keep Originals’.
This will download full copies of all your iCloud photos and videos to the new device’s local storage.
Step 6: Use iCloud Photo Sharing to collaborate
iCloud Photo Sharing allows you to share photo albums with other people and collaborate.
To start a shared album:
1. Open the Photos app and select images you want to share.
2. Tap the Share button and select iCloud Photo Sharing.
3. Choose who to share with from your contacts, enter a name for the album, and set permissions.
4. Tap Create to finalize and share the album.
Recipients can view and contribute photos and videos to the collaborative album from iPhone, iPad, Mac or iCloud.com on the web.
Manage access to shared albums
As the album creator, you can manage who has access to a shared album.
In Photos, tap Shared at the bottom, choose the shared album, then tap People at the top.
From here you can add more people or remove existing participants from the shared album.
Step 7: Use iCloud Photo Library on Windows PC
While iCloud has limited support on Windows, you can view and manage your iCloud Photo Library from a Windows PC using the iCloud website:
1. Go to iCloud.com in any web browser and sign in with your Apple ID.
2. Click on Photos to open your iCloud Photo Library online.
3. You can view, download and organize photos here, with changes syncing to your devices.
4. The iCloud app for Windows can also be installed for accessing photos.
So you get online access to your iCloud Photo Library on a Windows PC, even if native integration is more limited compared to Apple devices.
Conclusion
Following the steps above allows you to seamlessly upload your iPhone’s photos and videos to iCloud Photo Library for safe storage, free up space on your iPhone by deleting the originals, and enjoy access to your photos from any device.
Key takeaways:
– Enable iCloud Photo Library in Settings and upload existing photos from the Photos app.
– Confirm items are fully uploaded before deleting them from your iPhone.
– Manage storage with Optimize [device] Storage or by manually deleting uploaded items.
– View and download your photos from iCloud on iPhone, iPad, Mac, Windows and more.
– Share collaborative albums using iCloud Photo Sharing.
With your entire photo library stored safely in iCloud and available across all devices, you get the most out of Apple’s ecosystem with the peace of mind of a complete visual backup.