VMware is a leader in the virtualization market, with a 44.74% market share as of 2021. Virtualization allows multiple virtual machines, or VMs, to run on a single physical server. This provides benefits like improved hardware utilization, cost savings, flexibility and scalability. VMs function like physical servers, with their own virtual hardware resources. VMware provides tools to manage VMs, like creation, configuration, cloning and recovery. This allows efficient allocation of server resources to VMs as needed.
Prerequisites
Before recovering a VM in VMware, you need to make sure your VMware infrastructure is properly set up. VMware has specific requirements for the vCenter Server, ESXi hosts, and vSphere version in order to perform VM recovery operations:
- vCenter Server 6.5 or later (required for vSphere vMotion and other recovery methods)
- ESXi 6.5 or later on hosts (for compatibility with latest VM hardware versions)
- vSphere Enterprise Plus license (required for vSphere vMotion)
- Available storage on datastores for recovered VMs
- Network connectivity between hosts for vMotion traffic
Confirm these prerequisites are met before attempting to recover VMs in your environment. Refer to VMware documentation such as vSphere Systems Requirements for details.
Types of VM Recovery
There are two main types of VM recovery in VMware – full recovery and partial recovery.
Full recovery involves recovering the entire virtual machine, including all of its virtual disks and configuration files. This completely restores the VM to its previous state before failure or deletion (PowerProtect Data Manager 19.9 Administration and User Guide).
Partial recovery allows recovering individual virtual disks or components of a VM. For example, you may only need to recover the OS virtual disk rather than the full VM. This can be faster than a full recovery (Cisco Elastic Services Controller 5.7 User Guide).
The type of VM recovery depends on the specific failure scenario and how much data needs to be recovered. Full VM recovery provides complete restore but takes more time and resources than a partial recovery.
Backup VM Files
The first step in recovering a VMware virtual machine is to backup the VM files. VMware stores virtual machines in a set of files like .vmx and .vmdk files. These files contain the virtual machine configuration, storage, and state.
VM files are typically located in a VMware datastore, which maps to a storage location on a physical disk, SAN, or NAS. To locate the VM files, log into the vSphere client and browse to the datastore where the VM resides. The VM files will be in a folder with the VM name.
Once you’ve located the VM files, you can back them up using VMware’s natvie backup tools like vSphere Data Protection or VADP. Alternatively, you can use a third-party backup tool that integrates with the VMware API like Veeam or Veritas NetBackup. These tools can back up the VM files directly from the datastore without needing to power down the VM.
Backing up the raw VM files provides a quick and easy recovery option. You can simply restore the files to the same or new location to recreate the VM.
Recover VM from Backup
One of the fastest and most reliable ways to recover a VM is to restore it from a recent backup. VMware offers built-in backup and recovery tools like vSphere Data Protection that make it easy to backup VMs and quickly restore them in case of failure or deletion.
To recover a VM from backup in vSphere:
- Open the vSphere Web Client and connect to your vCenter Server.
- Navigate to Hosts and Clusters and select the VM you want to restore.
- Right click on the VM and select All vSphere Replication Actions > Recover from Replication.
- Select the appropriate snapshot or backup job you want to restore from.
- Choose whether to recover to the original location or a different one.
- Monitor the recovery process in Recent Tasks.
The time to restore a VM from backup can range from minutes to hours depending on the backup size and resources available. Key advantages of recovering from backup include:
- Fast recovery time compared to alternatives.
- Able to restore to a specific point-in-time snapshot.
- Can restore to original or alternate location.
“Veeam Backup & Replication v6.5 – VMware.” https://www.yumpu.com/en/document/view/4178548/veeam-backup-replication-v65-vmware-pdf, Accessed 23 Feb. 2023.
Clone VM
Cloning a VM in VMware creates an identical copy of the original virtual machine. The clone is an independent copy that shares nothing with the original VM after the cloning operation is complete [1]. When cloning a VM, you can choose to clone the VM’s disks, configuration, or both:
- Cloning VM disks creates an identical copy of the VM’s virtual disks.
- Cloning VM configuration creates a new VM with identical hardware settings, network settings, etc. as the original VM.
The clone VM can be powered on and used immediately after the cloning process finishes. Cloning is useful for quickly deploying multiple identical VMs, replicating a standardized VM, or backing up a VM by cloning it to a different host [2].
Import VM
Importing a VM allows you to take an existing virtual machine from another location or format and bring it into VMware. This can be useful for migrating VMs between environments or converting virtual machines from other formats like OVF/OVA.
To import a VM in VMware:
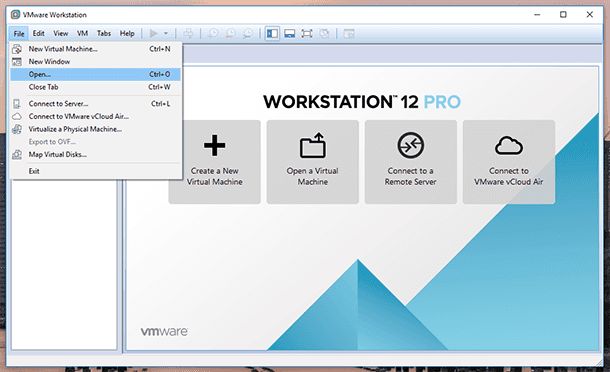
- Open VMware and go to File > Deploy OVF Template.
- Browse to select the OVF or OVA file you want to import. OVF stands for Open Virtualization Format while OVA is the single file distribution format of OVF.
- Select the destination for the imported VM, such as a specific vSphere host or cluster.
- Configure the settings for the imported VM like compute resources, storage, and network.
- Accept the licensing agreement and start the deployment. This will convert the OVF/OVA into a VMware virtual machine.
- Monitor the deployment status until completion. The imported VM will now be available in your VMware environment.
Importing a VM from OVF/OVA allows you to smoothly migrate virtual machines from other platforms into VMware. Just be sure to verify the virtual hardware is compatible before importing the OVF/OVA.
Recover Deleted VM
If a VM is accidentally deleted from the vSphere inventory, it is possible to recover it as long as the VMDK files still exist on the datastore. The steps to recover a deleted VM are:
1. In the vSphere Web Client, right click on the datastore where the VM’s VMDK files are stored and select ‘Browse Files’. Locate the folder for the deleted VM, which will be named after the VM’s UUID.
2. Note down the names of the VMDK files for the VM. There may be multiple flat and delta disk files.
3. Right click on the vSphere inventory and select ‘New Virtual Machine’. On the ‘Select creation type’ page, choose ‘Create new virtual machine’ and click ‘Next’.
4. On the ‘Select a name and guest OS’ page, provide a name for the VM. Make sure the guest OS matches what the original VM was.
5. On the ‘Select storage’ page, select the datastore where the VMDK files are located.
6. On the ‘Select storage policy’ page, choose the appropriate policy or leave as default.
7. On the ‘Customize hardware’ page, select the VMDK files noted in step 2. Make sure the virtual hardware matches the original VM.
8. Complete the VM creation wizard. Once done, power on the VM. It should now be recovered.
This process restores the VM configuration and reconnects the existing VMDK files. As long as those VMDK files containing the virtual disks are intact, the VM can be recovered. This method allows recovering a deleted VM quite easily without needing backups or other recovery methods.
.
Source: https://communities.vmware.com/t5/ESXi-Discussions/Recover-Deleted-VM-From-VMFS5/td-p/2689075
Troubleshooting
Some common issues that can occur when trying to recover a VM in VMware include:
- The VM is stuck on starting up or is not responding. This can be caused by misconfigured hardware, corrupted VM files, or incompatible guest OS settings. Try resetting the VM configuration and checking the VMware logs for details (see VMware KB1007819).
- The VM has become orphaned and is no longer registered with the ESXi host. This usually happens after a failed host migration. Orphaned VMs can be recovered by identifying their files on the datastore and registering them with the new host (see VMware Docs).
- vSphere Replication fails during VM recovery. Check prerequisites like power state and available resources. Follow troubleshooting steps to resolve and retry the recovery (see VMware Docs).
Carefully reviewing logs and error messages can help identify and resolve many common VM recovery issues in VMware.
Conclusion
Recovering a virtual machine in VMware can be accomplished through several methods depending on your specific needs and situation. The most common approaches are restoring from a backup, cloning an existing VM, or importing the VM files into a new VM.
Some key takeaways:
- Back up VMs regularly to have restore points available if needed.
- Leverage snapshots before major VM changes in case you need to roll back.
- Cloning requires less time than restoring a full backup but does not revert to an earlier state.
- Importing VM files creates a new VM but does not retain existing settings.
- Deleted VMs can be recovered within a certain timeframe by using the inventory file.
- Proper troubleshooting helps identify the optimal recovery method.
With multiple recovery options available in VMware, you can choose the best approach based on your use case and requirements. Just remember to back up VMs often for maximum recoverability.