Windows 7 is one of the most popular and widely used operating systems from Microsoft. It provides a stable, reliable, and easy-to-use computing experience. However, like any operating system, Windows 7 can sometimes encounter problems and issues that require repairing or restoring the system.
A system repair disc is a bootable disc that can help diagnose and fix issues with Windows 7, such as startup problems, system file errors, damaged system files, and more. It contains various system recovery tools and diagnostics utilities that can be used without fully reinstalling the operating system.
In this comprehensive guide, we will walk through the steps on how to create a system repair disc for Windows 7 and how to use it to repair common issues with the operating system.
What is a System Repair Disc?
A system repair disc is a bootable CD or DVD that contains Windows recovery tools and diagnostics utilities. It can be used to boot up a Windows 7 computer that is having startup or system files issues, allowing you to run diagnostics, system restore, system file check, and recover damaged files.
Some key highlights of a system repair disc:
- Contains a bootable image of the Windows Recovery Environment (WinRE)
- Can be used to boot a Windows 7 PC that is unable to start normally
- Allows access to System Restore, System Image Recovery, Windows Memory Diagnostic tool, Command Prompt and more
- Helps fix boot issues, system file errors, and damaged system files
- Allows you to back up files, restore Windows registry, run diagnostics tests
- Works on any Windows 7 computer, regardless of manufacturer
In summary, a system repair disc gives you access to many advanced recovery tools and diagnostics tests without having to reinstall Windows 7 completely. It is an essential troubleshooting resource for any Windows 7 user.
When to Use a System Repair Disc?
Here are some common situations when you should use a system repair disc to fix issues in Windows 7:
- Startup and boot problems – If Windows 7 fails to boot and you get errors like ‘Bootmgr is missing’, the repair disc can be used to diagnose and fix boot files.
- Driver issues – Faulty or incompatible drivers can cause crashes or prevent Windows from loading. The repair disc provides options to fix driver related issues.
- Windows Update problems – Repair disc can fix issues with installing updates and restore missing system files.
- System file errors – If Windows detects corrupted system files, repair disc can run System File Checker and restore corrupted files.
- System Restore failure – If System Restore fails to work, the repair disc can be used to initiate System Restore.
- Registry errors – The disc allows you to backup and restore registry which may help with registry related issues.
- Hardware failures – It can help troubleshoot and fix some basic hardware failures like RAM or hard disk errors.
- Virus/malware issues – Repair disc provides access to antivirus and antimalware tools that can remove infections.
- Lost administrator password – It can be used to reset forgotten administrator account password.
In summary, whenever Windows 7 is having startup, system file or boot issues that prevent normal operation, the system repair disc should be the first resource to identify and fix the underlying problems.
How to Create System Repair Disc in Windows 7?
Windows 7 makes it easy to create a system repair disc. Here are the steps to create one:
- Insert a blank CD or DVD into your computer. If you are using a DVD, make sure it is completely blank.
- Open Control Panel and visit Backup and Restore.
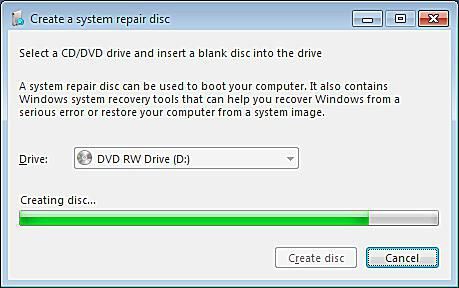
- On the left panel, click “Create a System Repair Disc”.
- The tool will start burning a bootable disc containing system recovery tools.
- Label the disc appropriately once done and store it in a safe place.
The process takes around 10-15 minutes depending on the write speed of your optical drive. At the end, you will have a bootable system repair disc for your Windows 7 computer.
Here are a few tips when creating the repair disc:
- Use a blank CD-R or DVD-R disc. Avoid using rewritable discs.
- The disc can only be created on a Windows 7 computer. It won’t work on other Windows versions.
- You can only create one system repair disc per PC.
- Keep the disc protected in a storage case when not in use.
If your computer does not have an optical drive, you can also create a system repair USB stick using the Windows 7 USB/DVD download tool.
Overall, make sure to create a repair disc as soon as you have set up your Windows 7 machine. It will prove invaluable if you ever need to troubleshoot or repair system issues.
How to Use System Repair Disc to Fix Windows 7?
When faced with a problem in Windows 7, here is how you can leverage the system repair disc to diagnose and fix system issues:
- Boot from the System Repair Disc – Insert the disc into your PC, restart it and press any key when prompted to ‘Press any key to boot from CD or DVD’. This will boot your PC into the Windows Recovery Environment.
- Choose keyboard layout – Select your appropriate keyboard input method.
- Select recovery tools – You will see various recovery tool options. Choose the desired recovery tool to fix your problem.
- Run Startup Repair – This is an automated repair tool that will diagnose common boot issues. Run this first for any boot problems.
- Use System Restore – To revert system files, select System Restore and choose a restore point prior to when the issue started occurring.
- Run system file checker – Use this to scan for and restore corrupted system files that may be causing issues.
- Access Command Prompt – Advanced users can access the Command Prompt to run disk checks, system file repairs and troubleshoot issues.
- Restore using system image – If you have a Windows system image backup, you can restore your entire Windows configuration back using the repair disc.
- View system info – Use this to get detailed system information like event logs that can help diagnose complex issues.
The repair disc provides quite a few options. Try Startup Repair and System Restore first. If the problem persists, you can try the other tools. Make sure to select the appropriate recovery tool based on the problem you are facing.
With some guided troubleshooting, the system repair disc can fix many common Windows 7 problems and get your PC running again without losing your installed programs and data.
Fixing a Corrupt Registry with System Repair Disc
The Windows registry stores system configuration data and settings. A corrupted registry can cause crashes, freezes and prevent Windows from starting. Here are the steps to fix registry issues using the system repair disc:
- Boot from the system repair disc and select ‘Command Prompt’ option.
- At the command prompt, type cd /d %systemdrive%\windows\system32 and press Enter.
- This will change to the Windows system32 folder. Now type ERDNT and press Enter.
- The Emergency Recovery NT tool will launch. Select the appropriate Windows installation.
- Go to Advanced Options > Registry > Load Hive.
- Browse to the file SOFTWARE and load this hive.
- Once loaded, go to File > Unload Hive to unload the corrupt hive.
- Finally select Registry > Restore Registry to restore a working registry.
These steps will unload the corrupted registry hive and restore a functioning copy to get Windows booting again. Make sure to backup critical data first before attempting these advanced steps.
Resetting Forgotten Administrator Password
If you have forgotten the administrator account password in Windows 7, the system repair disc allows you to reset it. Here’s how:
- Boot from the system repair disc.
- Select the operating system and click ‘Next’.
- Click on ‘Command Prompt’ under System Recovery Options.
- At the command prompt, type net user administrator *
- It will prompt you to enter the new password twice. Provide a new password.
- The administrator account password has now been reset. Reboot Windows normally and login with the new password.
This process resets the local administrator account password so you can login again. Make sure you remember or securely store the new password that you set.
Conclusion
A Windows 7 system repair disc is an invaluable tool to fix many common problems with the operating system. It allows you access various advanced recovery and diagnostic features without reinstalling Windows.
Make sure to create a repair disc proactively and use it whenever you face system issues like failed boot, corrupted system files, driver problems, malware infection etc. With some guided steps, it can help repair Windows 7 problems and avoid loss of programs or data in most cases.
Keep the disc securely stored and remember it can repair issues in any Windows 7 computer, not just the one it was created on. Using system restore orStartup Repair is usually helpful for most users. More advanced options like command prompt utilities and registry edits provide wider troubleshooting capabilities as well.
Overall, the system repair disc should be part of any Windows 7 user’s toolkit to help diagnose and fix inevitable issues that can occur with the operating system. It provides an easy way to repair Windows 7 without resorting to a full system reinstallation.