RAID 0 (also known as disk striping) is a type of RAID configuration that combines multiple disks into one logical unit. Data is distributed across the disks in blocks for faster read/write speeds and increased storage capacity. SSD RAID 0 combines multiple solid-state drives in this striped RAID array to provide significant performance improvements.
The main benefits of an SSD RAID 0 configuration include:
- Increased read and write speeds – data is split and written across multiple drives simultaneously
- Higher bandwidth – combining multiple SSDs increases overall bandwidth
- Larger available storage capacity – total space sums capacity of each disk
- Faster access times – data access parallelized across multiple SSDs
Overall, RAID 0 SSD arrays provide substantial gains in disk performance compared to single SSDs, making them ideal for applications that demand high speed like gaming, video editing and production workloads. The tradeoff is no data redundancy.
Prerequisites
To set up RAID 0 with SSDs, there are two key prerequisites:
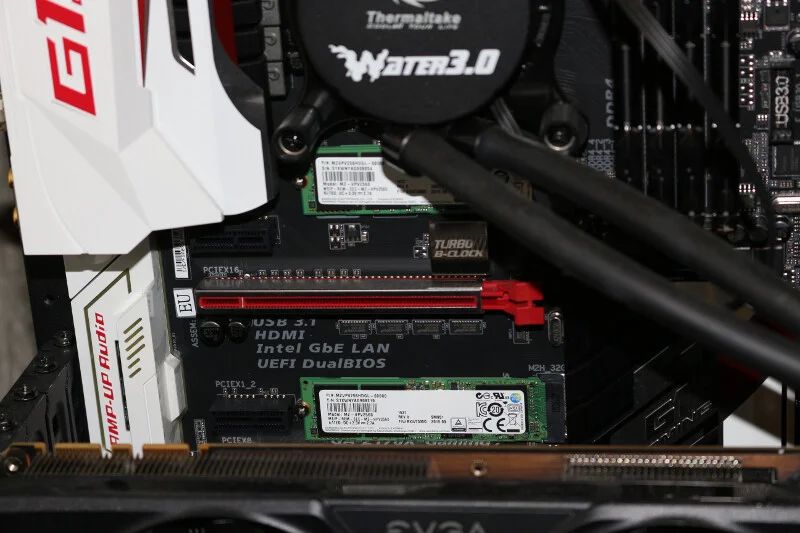
First, you need a minimum of two SSDs of the same size and interface (SATA, M.2, etc). RAID 0 combines multiple drives into one logical drive, spreading data across them in stripes. So all the SSDs need to match for maximum performance and capacity utilization. Using two 500GB SSDs in RAID 0 would give you a total logical drive size of 1TB for example.
Second, your motherboard needs to have RAID support. This means having the proper chipset and ports to connect the SSDs, along with RAID functionality in the BIOS or firmware. Many consumer boards nowadays come with basic RAID capabilities, but you may need a higher-end enthusiast board for advanced RAID modes. Refer to the motherboard specs to ensure it lists RAID 0 as a supported feature before purchasing.
As an example, this Tom’s Hardware forum thread discusses RAID compatibility on different motherboard chipsets and controllers.
Enter BIOS
To enable RAID, you first need to enter your computer’s BIOS settings during the boot process. This is done by pressing a specific key as the computer powers on and before the operating system loads. The most common keys to access BIOS are Delete, F2, F10, F11, and F12, but it can vary by manufacturer. Consult your motherboard or computer manual to determine the proper key.
Once you press the designated key, you’ll be brought to the BIOS settings screen. This may look slightly different depending on the BIOS brand, but you’ll want to locate the settings related to storage or SATA configurations. There may be a tab or menu option specifically for “RAID” or “SATA” where you can find and enable RAID settings.1
Enabling RAID mode will allow you to configure multiple disks together and access the RAID setup utility. Be sure to save any changes before exiting the BIOS. Now your computer will initialize the RAID controller on next reboot, allowing you to create your RAID arrays.
Enable RAID
To enable RAID mode in the BIOS, you’ll need to go into the integrated RAID controller settings. The exact steps may vary depending on your motherboard manufacturer, but generally you’ll need to:
1. Select the RAID mode. This may be called something like “RAID” or “Intel RST Premium”.
2. Once RAID mode is enabled, you’ll see options for creating RAID arrays. Select the option to create a new RAID array.
3. Choose RAID 0 as the RAID level. This will stripe data across both SSDs for increased performance.
4. Select the two SSDs you want to include in the RAID 0 array.
5. The BIOS will initialize and create the array. Make sure to save changes before exiting the BIOS.
Enabling RAID in the BIOS will allow the operating system to detect the RAID 0 array during installation or first boot up. Be sure to have the RAID driver ready on a USB drive in case you need to load it during OS installation. Once enabled, you can proceed with installing Windows or your preferred operating system onto the RAID 0 array.
Create Array
To create the RAID 0 array, you will first need to select the SSDs to include in the array. This is done in the RAID configuration utility in the BIOS. Navigate to the section for creating arrays. Select all of the SSDs you want to include in the RAID 0 array (for optimal performance, use two SSDs of the same capacity). Make sure only the SSDs you want for RAID 0 are selected, as any data on the disks will be erased in the next step.
With the SSDs selected, choose the option to create a new RAID 0 array. You may need to press Enter or select a ‘Create’ option. The system will prompt you to confirm initializing the disks, as this will erase all data. Confirm the initialization, and the SSDs will be formatted for RAID 0 usage.1
The process may take a few minutes as the SSDs are initialized and the array is created. Once complete, the RAID 0 array will be listed in the configuration utility. You can review the properties to confirm the array uses stripe set size for optimal performance.
Install OS
After creating the RAID array in the BIOS, the next step is to install your operating system onto the array. This will require booting from the Windows or Linux installation media.
For Windows, insert the Windows installation DVD or USB and boot from it. Proceed with the installation as normal, being sure to select the RAID array as the destination for installation when prompted.
For Linux, boot from the Linux live USB or DVD and launch the installer. When prompted for the installation target, be sure to select the RAID array. Depending on the Linux distribution, you may need to take extra steps to install the bootloader properly on a RAID array.
For example, according to the Debian installation guide from GG Circuit, you should select all the drives in the RAID array when installing the bootloader.
Once the OS installation is complete, reboot into the newly installed system on the RAID array.
Install Drivers
After installing the operating system, you may need to install RAID drivers for the RAID controller to function properly. Many motherboards include RAID capabilities through chipsets like AMD RAID or Intel RST, which require RAID drivers to enable RAID functionality.
First, identify the RAID controller used on your motherboard. The manufacturer’s website will provide the necessary RAID drivers. For example, ASRock and AMD provide RAID drivers for their products.
To install RAID drivers in Windows, extract the driver files to a folder, then open Device Manager, right-click the RAID controller, and select Update Driver. Choose to browse your computer for drivers, then locate the folder with extracted drivers. This will install the proper RAID drivers for your controller.
Without the correct RAID drivers, you may experience issues like reduced performance, inability to detect/manage disks in RAID configurations, or instability. So installing the latest RAID drivers from your hardware vendor is a crucial step after setting up RAID arrays.
Verify Setup
After setting up RAID 0, it’s important to verify that the array is working as expected. Here are a couple ways to confirm the RAID 0 configuration:
Check Disk Management for stripe: Open up Disk Management in Windows. The RAID 0 array should show up as a single drive, with a stripe indicating it is made up of the combined space of the disks in the array. This verifies the physical disks are working together in a RAID configuration. [1]
Run disk speed test: Use a disk speed testing tool like CrystalDiskMark to test the read and write speeds of the array. RAID 0 performance should show significantly faster speeds than a single disk, since data is striped across multiple disks for parallel access. Look for read/write speeds that correlate to the number of disks multiplied by a single disk speed. This confirms the performance boost expected from a RAID 0 array. [2]
Maintenance
While RAID 0 can improve performance, it does come with some maintenance requirements to ensure reliability and longevity of your array.
One of the most important maintenance tasks is regular backups. According to Reddit user u/tony475130 on r/buildapc, RAID 0 arrays can be prone to failure, so you’ll want to frequently back up any critical data stored on them. With RAID 0, if one drive fails, all data on the array will be lost. Backups allow you to recover from drive failures.
Another key maintenance item is keeping your SSD firmware up-to-date. SSD manufacturers like Samsung, Crucial, and others periodically release firmware patches that can improve performance and fix bugs. Be sure to check for and install firmware updates as recommended by your specific SSD manufacturer. Newer firmware versions may provide optimizations specifically for RAID configurations.
Conclusion
Setting up a RAID 0 array with SSDs provides a simple way to improve storage performance. The key steps are entering the BIOS to enable RAID mode, creating the array, installing the OS and drivers, and verifying the setup.
The main benefits of an SSD RAID 0 array are:
- Increased read and write speeds – Combining multiple SSDs multiplies the total bandwidth.
- Faster boot and loading times – Applications and games start up quicker.
- Improved productivity – Faster file transfers, installs, saves, and more.
- Enhanced performance – Especially for tasks involving large files like video editing.
Overall, RAID 0 with SSDs can provide a great performance boost. Just be sure to back up data regularly since there is increased risk of failure.
