Transferring music from an iPhone to a Mac is a common task for many iPhone users. Whether you are trying to free up storage space on your iPhone, create backups of your music library, or simply load new music onto your Mac, transferring your music between devices is simple and straightforward.
Why Transfer Music from iPhone to Mac?
There are a few key reasons you may want to transfer music from your iPhone to your Mac:
- Back up your iPhone music library – Having a backup of your music on your Mac protects you in case your iPhone is damaged, lost or needs to be reset.
- Free up storage space on your iPhone – Music, videos and photos can quickly eat up storage space on your iPhone. Offloading some of that media to your Mac can free up valuable storage.
- Easily sync music across devices – Having your music library on your Mac makes it easier to sync playlists and songs across all your devices.
- Access your music on a bigger screen – Viewing and interacting with your music library may be easier on the larger screen of your Mac compared to your iPhone.
Ways to Transfer Music from iPhone to Mac
There are a few different methods you can use to transfer music from your iPhone over to your Mac. The option you choose depends on how much music you need to transfer, what type of computer you have, and whether you want automatic or manual syncing.
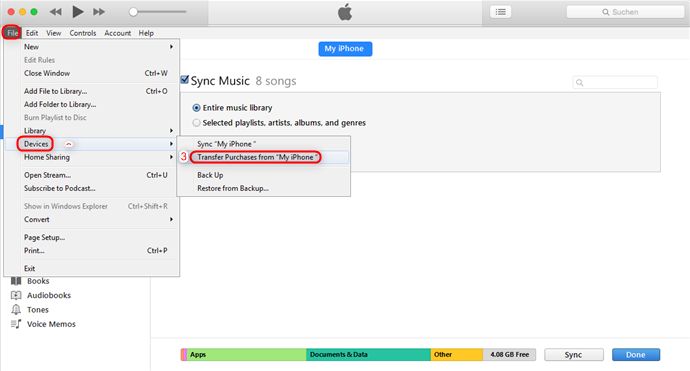
Use iTunes (Automatic Syncing)
If you want to continuously and automatically sync your iPhone music to your Mac, using iTunes is the optimal choice. Here is how to transfer music using iTunes syncing:
- Connect your iPhone to your Mac using the USB to Lightning or USB-C cable that came with your iPhone.
- Open iTunes on your Mac. iTunes should automatically detect your connected iPhone.
- In iTunes, click on your connected iPhone icon. Then click “Summary” in the horizontal menu bar.
- Check the box for “Sync Music.” Select “Selected playlists, artists, albums and genres” if you only want to transfer some of your music. Or select “Entire music library” to transfer everything.
- Click the “Apply” button to confirm your sync settings.
- iTunes will now automatically sync your chosen music from your iPhone over to your Mac each time you connect it. The music will be saved in your iTunes Media folder on your Mac.
This syncing method makes it easy to automatically keep your music perfectly matched across devices. Just connect your iPhone, let it sync, then safely eject it when finished.
Use Finder (Manual File Transfer)
If you prefer manually transferring music files whenever needed, you can use Finder on your Mac instead of iTunes. Here is how to transfer music using Finder:
- Connect your iPhone to your Mac using your USB cable, just like with iTunes.
- Open Finder on your Mac. Your connected iPhone should appear as an icon in the Finder sidebar under “Locations.”
- Click on your iPhone icon. You will now see a file browser window showing the contents of your iPhone.
- Navigate to the “Music” folder to view the music files stored on your iPhone.
- Select the music files and folders you want to transfer to your Mac.
- Drag and drop the selected files/folders to a location on your Mac, such as your Music folder.
- Optionally delete the transferred music from your iPhone to free up space.
The key advantage of using Finder is flexibility. You can manually transfer selected music files at any time without affecting music already on your Mac. It gives you full control over what gets transferred.
Use Third-Party Apps (Selective Transfer)
In addition to iTunes and Finder, there are third-party iOS apps that provide options for transferring your iPhone music. Here are some top apps to consider:
- iMazing – Provides complete wireless control and transfers between your iPhone and Mac. Lets you selectively sync almost any iPhone data.
- AnyTrans – Easily move your music library and playlists between iPhone, Mac and iTunes. Allows fully customizable transfers.
- CopyTrans Manager – Designed specifically for media management between iPhone and Mac. Can transfer songs, playlists, videos, podcasts and more.
- iExplorer – Browse and transfer music and playlists from any iPhone, iPad or iPod Touch to Mac or PC.
These third-party tools provide greater flexibility in what, how, and when you transfer music. The only potential downside is an added cost, as many require purchasing the app or software.
Transfer Music from Mac to iPhone
Once you’ve transferred music over to your Mac, you may eventually want to transfer music back to your iPhone. This gives you a way to load new music onto your iPhone that you may have added to your library on your Mac.
The processes for transferring music from a Mac to an iPhone are virtually identical to iPhone-to-Mac transfers. The main options are:
- Use iTunes syncing to automatically transfer music from Mac to iPhone when connected.
- Manually drag and drop music files from Mac to iPhone via Finder.
- Use third-party apps to selectively transfer music libraries and playlists from Mac to iPhone.
No matter which way you choose to transfer music back to iPhone, the processes work the same simple way in reverse. Just make sure you have enough free storage on your iPhone before transferring large amounts of music back onto it.
Top Tips for Transferring Music between iPhone and Mac
Here are some top tips to keep in mind when transferring music between your iPhone and Mac:
- Use original file formats – When possible, keep your music files in their original formats like MP3, AAC, ALAC instead of converting formats.
- Consolidate your library – Consolidate duplicate songs and albums into a single library folder on your Mac for simpler transfers.
- Create backups – Always backup your iPhone music library before wiping and restoring your iPhone.
- Sync selectively – If using iTunes, choose “Selected playlists…” instead of your entire library to have more control.
- Manage storage – Check how much free space you have on both iPhone and Mac before transferring large music libraries.
Troubleshooting iPhone to Mac Music Transfers
Despite how straightforward music transfers typically are, you may occasionally encounter issues getting music from your iPhone over to your Mac. Here are some potential solutions to common problems:
- iPhone not recognized by Mac – Disconnect the USB cable, close any open apps, reboot both devices, then reconnect. Check for updated OS versions.
- Syncing extremely slow – Sync less media at a time. Use manual file transfer via Finder instead of full iTunes syncing. Move computer closer to router or connect iPhone directly to computer.
- Music won’t copy from iPhone to Mac – Music may be DRM protected. Check file permissions. Reboot iPhone and Mac and retry transfer.
- Transferred music greyed out – Turn off iCloud Music Library on your Mac. Log out then back into iTunes & Apple Music.
If you continue having issues transferring your music after trying typical troubleshooting, you may need advanced technical support to diagnose the specific problem with your devices and find an optimal solution.
Frequently Asked Questions
Here are answers to some common frequently asked questions about transferring music between iPhone and Mac:
Does transferring music from iPhone to Mac delete it from iPhone?
No, transferring music off your iPhone does not automatically delete it from the iPhone. You will need to manually delete transferred music from your iPhone if you want to free up storage space.
Does iTunes transfer all music from iPhone to Mac?
iTunes can be set to sync your entire iPhone music library or just selected playlists/artists/albums. Enable the sync option for “Entire music library” if you want to transfer everything.
Is it better to use iTunes or Finder to transfer music?
iTunes is better for automatic wireless syncing anytime you connect your iPhone. Finder is better for manual control over selective music transfers instead of your whole library.
Does transferring music count against iPhone storage?
Music transferred from iPhone to Mac will not count against your iPhone storage after it has been moved. But music transferred back to your iPhone from Mac will incrementally increase iPhone storage use.
Will transferring music to Mac erase it from Music app?
No, your Music app on iPhone will remain unchanged when transferring music to Mac. You need to manually delete music from iPhone if you want to remove it after transferring.
Conclusion
Transferring music from your iPhone to Mac is a breeze thanks to direct physical connections via cable along with the powers of iTunes and Finder syncing. You have the choice between automatic wireless syncing via iTunes or manually dragging and dropping selected music via Finder on demand. Third-party apps provide even more functionality for advanced music library management and transfer capability.
Follow the step-by-step instructions outlined above depending on if you want to use iTunes, Finder, or a dedicated third-party app. Just make sure to have enough free storage, use original high-quality file formats, and create backups of your music libraries before any major transfers. With the right tools and approach, you’ll have your music effortlessly synced across iPhone, Mac and beyond in no time.