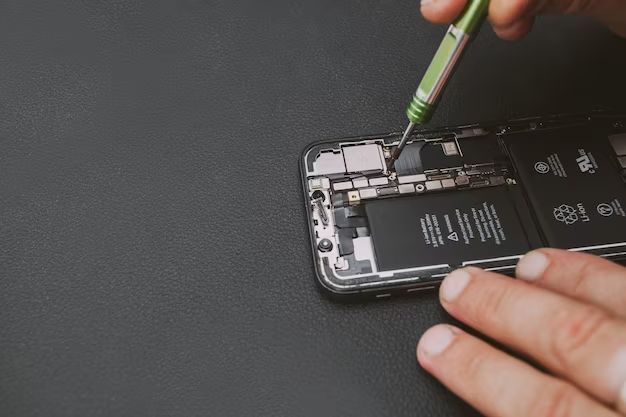
Fixing an iPhone can seem daunting to the average user. iPhones are complex devices packed with cutting-edge technology. However, with the right tools, patience, and a methodical approach, many common iPhone repairs are within the grasp of tech-savvy DIYers.
What are the most common iPhone repairs?
The most common iPhone repairs include:
- Cracked screen replacement
- Battery replacement
- Charging port repair
- Speaker replacement
- Camera repair
- Button replacement
Cracked screens are by far the most frequent iPhone repair. A cracked screen not only looks bad, but can also lead to cuts on fingers and can impede using the touchscreen. Replacing a cracked iPhone screen requires disassembling the phone, removing the old screen, and installing a replacement OEM screen. Performing this repair requires patience, proper tools, and following video guides step-by-step.
A failing or worn out battery is the second most common iPhone repair. An iPhone battery replacement involves removing the old battery and adhering a new battery in place. Battery replacements on newer iPhones require removing the screen first. iPhone batteries can be purchased from Apple or third-party suppliers. Batteries from Apple come with adhesive pre-installed for easier installation.
Damaged charging ports are also a frequent iPhone repair. The iPhone’s Lightning port is used for both charging and data connections. A broken charging port can prevent an iPhone from charging properly. Charging port repairs require disassembling the iPhone, desoldering the old port, and soldering a new port in place. This is one of the more challenging DIY iPhone repairs.
Other common iPhone repairs include fixing speakers, cameras, buttons, and more. Each specific repair will require the correct tools, parts, and following repair guides closely.
What tools and skills are required?
Here are the basic tools and skills necessary for completing common iPhone repairs:
- Screwdriver set – Specialty screwdriver bits are required for opening iPhones and removing components.
- Prying tools – Used for opening iPhones and prying apart components.
- Tweezers – Help grip and maneuver small parts and connectors.
- Heat gun or iOpener pack – Applying controlled heat helps soften adhesive during disassembly.
- Isopropyl alcohol – Used for cleaning components before installation.
- ESD-safe mat – Protects against static discharge that can damage components.
- Patience – Rushing repairs can lead to damaging components.
- Attention to detail – Keeping track of all screws and components is crucial.
- Basic soldering – Required for charging port replacements and some other repairs.
It’s also imperative to closely follow video repair guides when completing any iPhone repair. Simply disassembling an iPhone without guidance can make reassembly very challenging.
How difficult are common iPhone repairs?
Here is a breakdown of the difficulty levels of common iPhone repairs:
| Repair Type | Difficulty Level |
|---|---|
| Cracked screen replacement | Moderate |
| Battery replacement | Easy-Moderate |
| Charging port replacement | Difficult |
| Speaker replacement | Easy-Moderate |
| Camera repair | Moderate |
| Button replacement | Easy |
As seen above, some repairs like charging port replacements and camera repairs are quite difficult and best left to experienced repair technicians. However, easier repairs like battery swaps, screen replacements, and speaker fixes are within reach for DIYers with sufficient care and patience.
Is it worth fixing an iPhone yourself?
Whether or not fixing an iPhone yourself is worthwhile depends on several factors:
- Cost savings – DIY repairs are usually 60-70% cheaper than Apple or third-party repair shops.
- Time investment – Repairs require significant research and hands-on time.
- Repair complexity – Simpler fixes like batteries and screens are more DIY friendly.
- Your skill level – Those new to electronics may want to opt for professional repairs.
- Tools needed – Must invest in proper tools which can be expensive.
- Warranty considerations – DIY fixes void any warranty and can risk water resistance.
For simpler repairs like batteries and screens, the cost savings of DIY iPhone repairs make them worth considering for many tech enthusiasts. But for challenging fixes like charging ports, or for those new to iPhone repairs, professional technicians may be a better and safer choice despite the higher cost.
What mistakes should be avoided?
It’s important to avoid these common mistakes when attempting DIY iPhone repairs:
- Failing to follow video guides step-by-step
- Not organizing screws and components properly during disassembly
- Rushing through disassembly or reassembly
- Applying too much heat when softening adhesive
- Puncturing or tearing cables or ribbon connectors
- Cracking or scratching components during prying
- Failing to disconnect the battery before repairs
- Not testing replacements before reassembly
- Skipping ESD protection
- Using low quality or improper replacement parts
Avoiding these common pitfalls, working slowly, and diligently following video guides can help ensure a successful iPhone repair.
What safety tips should be followed?
These safety tips should be followed when repairing an iPhone:
- Use ESD protection – Wear an ESD wrist strap and work on an ESD mat.
- Disconnect the battery – Isolate power before attempting repairs.
- Avoid overheating – Use heat tools cautiously when softening adhesive.
- Handle glass carefully – Cracked glass can have sharp edges.
- Beware of puncture hazards – Ribbon cables and batteries can be easily punctured.
- Apply adhesives properly – Improper amount or placement can hamper function.
- Keep small parts organized – Losing screws or brackets can make reassembly impossible.
- Wear safety glasses – For protection against flying fragments while prying.
- Use proper tools – Incorrect or poor quality tools can damage components.
- Take breaks – Repairs require concentration, avoid fatigue.
Exercising caution and following best practices will go a long way towards safely completing iPhone repairs.
What are some recommended online resources?
Here are some excellent online resources for learning how to fix iPhones:
- iFixit – Has thousands of step-by-step iPhone repair guides.
- DirectFix – YouTube channel with useful iPhone repair videos.
- Adafruit Learning System – Has great iPhone teardown and repair tutorials.
- Louis Rossmann – YouTube channel focusing on iPhone board-level repairs.
- MobileSentrix – Free online iPhone repair class from MobileSentrix.
Studying guides and videos from these well-regarded sources is the best way to learn iPhone repair techniques.
Can you provide a step-by-step example for a common iPhone repair?
Here is a step-by-step guide for replacing the battery in an iPhone XS:
- Gather the replacement battery, and necessary tools like pry tools, tweezers, and a Phillips screwdriver.
- Power off the iPhone and open the SIM tray with a paperclip for easier disassembly access.
- Apply heat to the rear glass back panel with a heat gun or iOpener pack to soften the adhesive underneath.
- Once heated, use a suction cup to create a gap between the back glass and chassis. Then insert pry tools and slowly cut the adhesive.
- Once the back glass is removed, unscrew and remove the single bracket covering the logic board connector.
- Gently disconnect the battery connector and adhesive pull tabs.
- Use tweezers to carefully pry up the secured battery and fully remove it.
- Thoroughly clean the open battery area of any adhesive residue.
- Peel away the protective film on the battery contacts of the replacement.
- Insert the new battery into position and press down firmly.
- Reconnect the battery connector cable.
- Replace the logic board bracket and any other components removed.
- Reinstall the back glass panel, pressing down on the adhesive.
- Power on the iPhone and test for proper function.
Carefully following each step and using the right tools will result in a successful iPhone battery swap.
What are some common mistakes that should be avoided?
Here are some common mistakes to avoid when repairing iPhones:
- Failing to properly disconnect the battery – This can lead to shorts and damage.
- Not removing all screws before prying – Can damage screw bosses and threads.
- Lifting cables instead of unplugging – Pulling on cables tears them.
- Using metal tools while powered on – Metal can short live circuits.
- Failing to apply fresh adhesive on reassembly – Components won’t stay secured.
- Overtightening or stripping screws – Carefully follow torque specs.
- Swapping non-identical components – Ensure replacement compatibility.
- Not testing before final reassembly – Check for full functionality first.
- Discarding or losing small components – Vital brackets, screws etc.
- Rushing while overheating components – Watch for damage signs.
Avoiding rookie errors like these will increase the chances of repair success and prevent avoidable damage.
How can the durability and repairability of iPhones be improved?
There are several ways Apple could enhance the durability and repairability of iPhones:
- Reduce adhesive usage – Excess adhesive hinders disassembly for repairs.
- Provide detailed repair schematics – Assists DIYers and technicians.
- Use modular components – Allows replacing specific failed parts vs. entire assemblies.
- Improve water resistance – Gaskets vs. permanent adhesive seals.
- Reinforce glass – More shatter-resistant materials and designs.
- Offer affordable OEM parts – Parts directly from Apple vs. sketchy third-parties.
- Simplify access to batteries – Don’t need full device disassembly.
- Standardize screws – Using proprietary pentalobe screws hinders repairs.
- Stop lobbying against “Right to Repair” – Unethical to impede repair access.
With a combination of thoughtful hardware design choices and embracing repair-friendly policies, Apple could significantly boost iPhone repairability.
Conclusion
iPhone repairs that may seem intimidating or over complex to average users are actually quite approachable with proper tools, parts, and online repair guides. Less experienced tinkerers should start with simpler fixes like batteries and screens, while leaving challenging repairs like charging ports to seasoned pros. Avoiding common mistakes, working methodically, and strictly following video tutorials will set DIYers up for success. With some diligence and determination, many iPhone owners are capable of high-quality do-it-yourself repairs and restorations.
