Quick Answers
Installing a hard drive involves several key steps:
- Choosing the right hard drive for your needs
- Physically installing the hard drive in your computer case
- Attaching SATA and power cables to connect the hard drive
- Configuring BIOS settings related to the hard drive
- Partitioning and formatting the hard drive
- Installing the operating system and drivers
- Transferring data over to the new hard drive
Choosing the Right Hard Drive
The first step in installing a new hard drive is choosing the right model for your needs. Key factors to consider include:
- Storage capacity – How much data do you need to store? Common hard drive sizes today range from 250GB to 4TB.
- Form factor – What size hard drive does your computer case support? The most common sizes are 3.5″ desktop drives and 2.5″ notebook drives.
- RPM speed – Faster RPM (rotations per minute) means better drive performance. 7200RPM is standard for desktops, while laptop drives often use 5400RPM.
- Cache size – More cache (up to 256MB) means better performance. Bigger is generally better.
- Interface – Most modern hard drives use SATA interfaces, but legacy IDE drives are still around too.
- Price – How much are you willing to spend? Hard drives range greatly in cost depending on size, speed, and features.
Once you know what you need, you can narrow down the choices and select the best overall hard drive for your purposes. It’s worth investing in sufficient capacity and performance to meet your storage needs for at least a few years.
Example Hard Drive Spec Comparison
| Model | Capacity | Form Factor | RPM | Cache | Interface | Price |
|---|---|---|---|---|---|---|
| WD Blue 1TB | 1TB | 3.5″ | 7200 | 64MB | SATA | $49 |
| Seagate BarraCuda 2TB | 2TB | 3.5″ | 7200 | 256MB | SATA | $89 |
| Samsung 870 EVO 500GB | 500GB | 2.5″ | 5400 | 512MB | SATA | $89 |
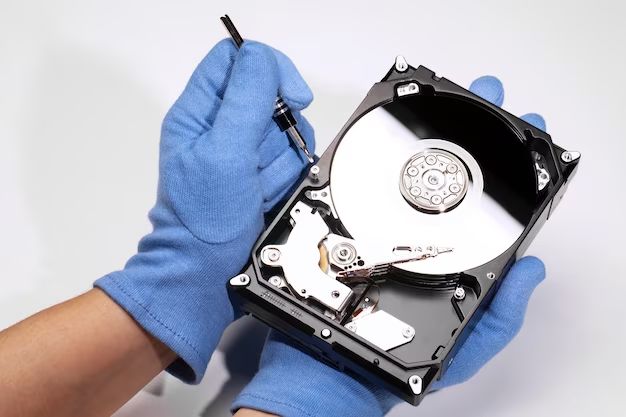
Physically Installing the Hard Drive
Once you have selected the right hard drive, it’s time to physically install it in your computer case. The steps include:
- Open up your computer case and locate an empty 3.5″ or 2.5″ drive bay.
- Match the orientation of the drive to the bay, making sure the SATA ports line up.
- Slide the hard drive securely into place and screw it into the side rails.
- Visually inspect the connections to ensure proper fit and alignment.
- Close up the computer case once the hard drive is securely installed.
If your case lacks extra drive bays, you may need to remove your existing drive and replace it with the new one instead. Just make sure to transfer any important data first!
Tips for Physical Installation
- Ground yourself by touching a metal case component before handling the drive.
- Don’t force connections; they’re designed for easy insertion.
- Route cables cleanly away from fans, heat sinks and sharp edges.
- Double check the drive orientation before inserting.
- Use care when sliding the drive rails into place.
Connecting Cables to the Hard Drive
With the physical installation complete, the next step is connecting the necessary cables to interface the hard drive with your system.
There will be two types of cables to attach:
- SATA Cable – Provides the data connection between the hard drive and motherboard. Modern SATA cables usually have a small L-shaped connector on one end and a longer flat connector on the other end.
- Power Cable – Supplies electricity from your power supply to the hard drive. Usually labeled as “HDD” or “Drive”, with a wider multi-pin connector.
Carefully match up each connector to the ports on the hard drive and plug them in securely until they click into place. Make sure not to bend any pins and route the cables neatly within the case.
Some key cable management tips:
- Avoid too much tension or tight bends in cables.
- Use twist ties or clips to neatly contain cables.
- Ensure cables don’t obstruct fans or airflow.
- Double check cable connections before powering on.
Configuring BIOS Settings
Before using your newly installed hard drive, some BIOS settings may need to be verified or changed in your system configuration:
- SATA Controller – Ensure SATA ports are enabled that your drive connects to.
- AHCI Mode – Should be enabled for best performance with hard drives.
- Boot Order – Update this if you’re booting from the new drive.
To access BIOS Setup, restart your computer and press the BIOS key during the boot-up, often Delete, F1, F2, F10 or F12. Navigate to the various menus and update the necessary settings related to your new hard drive.
Make sure to save changes before exiting BIOS. The system will likely restart itself as part of this process.
BIOS Tips
- Refer to your motherboard manual for BIOS key and menu specifics.
- Change one setting at a time and reboot to test effects.
- Reset to defaults or load optimizations if having issues.
- Save custom BIOS profiles once setup for easy reloading.
Partitioning and Formatting the Hard Drive
With your new hard drive physically installed and connected, the next step is partitioning and formatting it for usage.
Partitioning divides the hard drive into logical sections that function like separate drives. This allows for multiple partitions with different formats to exist on the same physical drive.
Some scenarios where multiple partitions are useful:
- Dual booting operating systems
- Separating OS files from data storage
- Creating dedicated partitions just for swap or backups
- Keeping different types of data and usages separated
Once partitions are created, they must be formatted with a filesystem type like NTFS or exFAT. This writes the structural framework needed to organize and access data written later on.
Partitioning and formatting can be done through:
- Windows Disk Management
- Linux terminal commands like fdisk
- Third-party partitioning tools like EaseUS Partition Master
The process involves right-clicking the disk name, selecting New Simple Volume, choosing the desired partition size, assigning a drive letter, and selecting your formatting options.
Partitioning and Formatting Tips
- Delete any existing partitions during Windows installs to avoid confusion.
- Perform a quick format to save time and only scan for bad sectors later.
- NTFS has security features and is required for bootable Windows partitions.
- Leave 10-20% free space to avoid performance issues as drive fills.
Installing Operating System and Drivers
With your hard drive prepared, you can now install the operating system and drivers:
- Boot from the Windows, Linux or other OS installation media.
- Follow the on-screen prompts to begin the installation process.
- Select the partition you created for the OS when prompted.
- Continue following the instructions to complete the OS installation.
- Install device drivers related to your specific hard drive model.
- Reboot and verify the OS and drivers load correctly.
Many operating systems today like Windows 10 and Ubuntu can handle the driver installation automatically. But it’s still good practice to grab the latest drivers right from the manufacturer’s website when possible.
This avoids any generic drivers that might not utilize the full feature-set or performance of your specific hard drive model.
OS Installation Tips
- Have your driver installers or packages on a USB drive.
- Disconnect other drives during installation to prevent issues.
- Enable TRIM if supported by your SSD for optimal performance.
- Set the swap partition on Linux to match the amount of RAM.
Transferring Data to the New Hard Drive
With your operating system up and running, the last step is to transfer data over to the new hard drive:
- Connect the old hard drive or use backup media.
- Browse and select the folders and data to copy.
- Use copy/paste or drag-and-drop to transfer data over.
- Verify the data was correctly copied over.
- Delete the data on the old drive if no longer needed.
Migrating your programs and settings can be trickier than files and documents. You may need to reinstall programs to the new drive location. Settings can often be copied from old profile folders in the Users directory.
For larger data transfers, using an external dock, Ethernet cables or imaging software can speed up the process significantly.
Data Migration Tips
- Copy smaller batches separately to isolate any issues.
- Redirect default data locations like Documents or Downloads folders.
- Use Folder Comparison tools to sync and check errors.
- Back up important data before deleting from old drives.
Conclusion
Installing a new hard drive involves several steps – choosing the right drive specifications, physically installing the drive, connecting power and data cables, configuring BIOS settings, partitioning and formatting the disk, installing your operating system and drivers, and finally migrating data over from the old drive.
Following these steps carefully along with proper cable management ensures your new hard drive will be successfully installed and running at full speed. Just be sure to backup important data regularly regardless of any new hardware changes.
Let us know if you have any other hard drive installation tips or issues in the comments!