There are primarily two ways to delete a file on a Windows PC – by sending the file to the Recycle Bin, or by permanently deleting the file.
Sending a File to the Recycle Bin
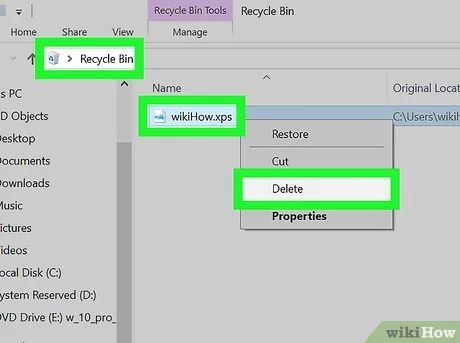
The most common way to delete a file is to send it to the Recycle Bin. The Recycle Bin acts as a temporary holding area for deleted files, allowing you to restore them if needed. Here’s how it works:
- Locate the file you want to delete and right-click on it.
- Select “Delete” from the right-click menu.
- A dialog box will appear asking if you want to send the file to the Recycle Bin. Click “Yes.”
- The file disappears from its original location and is now in the Recycle Bin.
Files in the Recycle Bin are not permanently deleted. They remain there until the Recycle Bin is emptied, either manually or when space is needed for new files. This allows you a safety net in case you delete something accidentally.
Here are some key points about the Recycle Bin:
- It’s located on the desktop by default in Windows.
- Right-clicking on the Recycle Bin gives you options like “Empty Recycle Bin” or restoring deleted files.
- The Recycle Bin has a limited storage quota. Once exceeded, older files get permanently deleted to make room.
- Files can be recovered from the Recycle Bin until it is emptied.
Overall, sending a file to the Recycle Bin is the easiest and safest way to delete it. As long as the Recycle Bin is not emptied, the file can be retrieved.
Permanently Deleting a File
You can also permanently delete a file so that it completely bypasses the Recycle Bin. This means the file gets deleted instantly and cannot be recovered.
Here are the ways to permanently delete a file:
- Press Shift + Delete on the keyboard when deleting a file. A dialog box appears asking if you want to permanently delete the file.
- Right-click on the file, select “Delete”, and uncheck “Recycle Bin” in the confirmation dialog.
- Empty the Recycle Bin to permanently remove all files inside it.
- Use a third-party file deletion tool or shredder utility.
Permanently deleting files bypasses the Recycle Bin and removes any chance for recovering the file later. You should only do this if absolutely certain the file is no longer needed.
Here are some key pointers on permanent file deletion:
- Always double check before permanent deletion to avoid mistakes.
- Permanent deletion is useful when dealing with sensitive/confidential files.
- Deleted files can still be recovered using data recovery software, if needed.
- Physically destroying the storage media (like an SSD or hard drive) is the only way to guarantee permanent deletion.
So in summary, sending a file to the Recycle Bin should be your first approach in most cases. Only use permanent deletion if you are absolutely sure, as there is no way to recover the files after that.
Sending Files to the Recycle Bin Using Keyboard Shortcuts
Along with right-clicking and selecting “Delete”, you can also use these handy keyboard shortcuts to send files to the Recycle Bin in Windows:
- Select the file and press Delete key
- Select the file and press Ctrl + D
- Drag and drop the file directly into the Recycle Bin icon
Keyboard shortcuts help speed up the process of sending files to the Recycle Bin. Just remember to double check you are deleting the correct file before using these shortcuts.
Bypassing the Recycle Bin with Keyboard Shortcuts
To permanently delete files bypassing the Recycle Bin, use these keyboard shortcuts instead:
- Select the file and press Shift + Delete
- Select the file and press Ctrl + Shift + Delete
Again, be very careful when using these shortcuts as the files get permanently deleted.
What Gets Sent to the Recycle Bin vs. Permanent Deletion
Not all files get sent to the Recycle Bin when deleted. Here are some scenarios where files get permanently deleted instead:
- Files on external devices like USB flash drives or network drives
- Files deleted from Command Prompt using DEL or ERASE commands
- Files deleted by programs with specialized deletion algorithms
The Recycle Bin is only for internal drives on the PC. So any files on external devices bypass it and get permanently deleted. This also applies to deletions done outside the Windows graphical interface, like from Command Prompt or third-party tools.
Some additional pointers:
- Folders get sent to the Recycle Bin along with all their contents.
- Large files (over 1 GB) may skip the Recycle Bin even on internal drives.
- You can customize Recycle Bin settings like storage quotas.
In summary, most files on local internal drives go to the Recycle Bin when deleted. Exceptions are external drives, Command Prompt deletions, and large files over 1GB in size.
Permanently Deleting System Files
System files like DLLs, EXEs and other critical operating system files get handled differently than regular files:
- They do not get sent to the Recycle Bin when deleted.
- Instead, Windows prompts for elevation/admin rights to delete system files.
- Some system files may not allow deletion at all if absolutely critical.
Deleting system files can potentially cause instability or prevent Windows from booting properly. To delete system files:
- Open Windows Explorer as administrator.
- Navigate to the System32 folder.
- Right click the system file and select Delete.
- Confirm the UAC prompt to permanently delete the system file.
Use extreme caution when deleting system files and only do so if absolutely necessary. Some critical system files like NTDLL.dll or svchost.exe cannot and should not be deleted.
Bypassing the Recycle Bin via Registry Edit
You can edit the Windows registry to disable the Recycle Bin for specific drives. This forces permanent file deletion instead of using the Recycle Bin.
To bypass the Recycle Bin via the registry:
- Type regedit into the Start menu and select the Registry Editor app.
- Navigate to HKEY_CURRENT_USER\Software\Microsoft\Windows\CurrentVersion\Policies\Explorer
- Right click and create a new DWORD named NoRecycleFiles
- Double click it and set the value data to 1 to enable it.
This will disable Recycle Bin deletions globally. To only disable for certain volumes, create QWORD values under NoRecycleFiles using the following naming convention:
- C for C:\ drive
- D for D:\ drive
- etc…
Set their values to 1 to disable the Recycle Bin on that specific drive letter.
Use registry edits carefully as incorrect changes can damage your Windows installation. Always backup the registry before editing.
Using Command Line for Permanent File Deletion
You can also completely bypass the Recycle Bin using Command Prompt:
- Open the Command Prompt as administrator
- Navigate to the folder containing the file
- Use the DEL command to delete files and folders
- Use the /F and /S switches for forced deletion
- Use the /Q switch to suppress confirmation prompts
For example, to permanently delete a folder named Temp:
DEL /F /S /Q Temp
This will instantly delete the Temp folder bypassing the Recycle Bin without prompting. Use extreme caution with the DEL command as mistakes can be unrecoverable. Also ensure proper permissions if deleting system files.
The RD (Remove Directory) and ERASE commands can also permanently delete files and folders from the command line. Overall, Command Prompt gives you raw low-level access for quick permanent file deletion.
Third Party File Deletion Tools
There are many free and paid third party tools that specialize in file deletion:
- Eraser – Open source tool that overwrites files before deletion.
- SDelete – Command line file shredder from Microsoft Sysinternals.
- Secure Eraser – Deletion tool that integrates with Windows Explorer.
- SoftEther – Freeware file shredder and disk cleaner.
These tools use various data sanitization methods like overwriting files with random data before deletion. This helps prevent recovery of deleted files.
Common capabilities of file shredding tools include:
- Bypassing the Recycle Bin for instant deletion
- Wiping file slack space and free disk space
- Secure overwriting following government erasure standards
- Scheduling and automating deletions
So in summary, third party tools provide powerful and configurable options for permanently deleting files beyond what Windows offers natively.
Conclusion
Here are some key takeaways on the different ways to delete files in Windows:
- Sending a file to the Recycle Bin allows easy recovery if deleted accidentally.
- Keyboard shortcuts like Shift + Delete or Ctrl + Shift + Delete enable permanent file deletion.
- Command Prompt commands like DEL, RD, and ERASE allow bypassing the Recycle Bin.
- The Windows Registry can be edited to disable Recycle Bin on specific drives.
- Third party file deletion tools overwrite and shred files for secure permanent deletion.
Overall, think carefully before bypassing the Recycle Bin for permanent file deletion. The Recycle Bin acts as an essential safeguard against accidental data loss on internal drives. Only use permanent deletion for external devices or when absolutely necessary to prevent recovery of sensitive files. Proper file management procedures are recommended to handle data in a secure manner across the deletion lifecycle.
