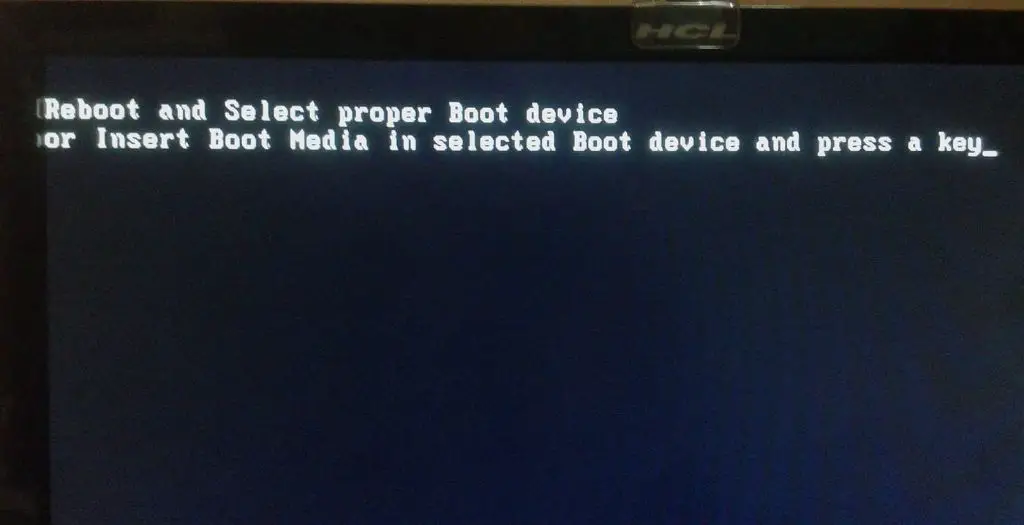
Seeing the error message “Reboot and Select proper Boot device or Insert Boot Media in selected Boot device and press a key” can be frustrating. This typically means your computer is having issues locating the system boot device or bootable media. Don’t panic though, this issue can often be resolved through some troubleshooting steps.
Quick Answers
Here are some quick potential solutions to try if you get this error message:
- Check cables – Make sure all hard drives and SSDs are properly connected with SATA cables.
- Check boot order – Access BIOS settings and confirm the boot order lists the correct hard drive first.
- Remove extra devices – Unplug any external drives, USB sticks or discs that may be confusing the boot order.
- Reset BIOS – Reset BIOS settings to factory defaults if incorrect settings are suspected.
- Replace cables – Try a new SATA cable if drive connections are good but issue persists.
- Verify drive integrity – Use disk management tools to check for issues with the main boot drive.
- Repair or replace drive – If no issues found with cables or connections, the drive itself may need repair or replacement.
What Causes This Error Message?
There are a few common causes for getting the “Reboot and Select proper Boot device” error:
- Boot order change – The BIOS boot order was modified incorrectly so the primary boot device is no longer first.
- Disconnected or faulty drive – A hard drive became disconnected or has failed so the system can’t locate the boot files.
- Corrupted system files – Critical boot files like the Master Boot Record became corrupted and unreadable.
- Incompatible drive change – A hard drive was replaced but the new one is incompatible with the system.
- BIOS settings reset – BIOS settings were cleared or reset, changing the original boot order.
The most common reasons involve a hard drive that has become disconnected in some way, a boot order that has changed, or corrupted system files that have made a drive unbootable. Knowing the potential causes will help isolate where the exact problem lies.
How to Troubleshoot the Error
When faced with this error, the following troubleshooting steps can help identify and resolve the underlying problem:
- Check physical connections – Open the computer case and check that all hard drives and solid state drives are properly plugged in with SATA cables securely attached. Loose connections are a common cause of boot issues.
- Inspect SATA cables – Closely inspect SATA data and power cables for any broken wires, bent pins or other damage. Cables can work themselves loose over time. Try reseating connections or swapping cables.
- Remove extra devices – Any external drives, USB flash drives or optical discs that are connected or inserted can sometimes confuse the boot order. Disconnect all non-essential devices.
- Access BIOS settings – Enter the system BIOS, typically by pressing F2, F10 or Delete during bootup. Check that the boot order list shows the correct hard drive first in the list. If not, change it.
- Reset BIOS to defaults – If the boot order looks incorrect, resetting BIOS settings to their factory defaults can set the proper boot device priority again.
- Verify drive integrity – Use hard drive utilities from the drive manufacturer or general disk tools to scan for bad sectors, corruption or file system errors on the boot drive.
- Reinstall or repair system files – If the main boot drive checks out okay, try using system recovery or repair tools to reinstall or fix corrupted system files.
- Replace faulty hardware – If all else fails, a drive, cable or other hardware component has likely failed and needs replacement to get booting again.
Following these steps methodically can help pinpoint where the underlying problem is. The most common fix is correcting the boot order or reseating a loose cable connection.
Checking Physical Drive Connections
It’s very common for this error to occur simply because a hard drive has worked loose from its SATA cable connections. Checking the physical drive integrity should be the first step in resolving a no boot device error.
Here are detailed steps for inspecting drive cables and connections:
- Power down the computer and disconnect AC power.
- Open the computer case to access internal hard drives.
- Locate the primary hard drive and SSDs connected via SATA cables.
- Check that the SATA data and power cables are plugged in snugly to the drive.
- Reseat connections by unplugging and firmly replugging each SATA cable.
- Inspect cables for bent pins, damaged wires or other issues.
- Try swapping in a known good SATA cable if available.
- Verify all drives are securely mounted and not loose in their bays.
- Close up the case, reconnect AC power and test boot again.
Carefully inspecting and reseating every SATA connection can often resolve a mysteriously undetectable boot drive. Cables can loosen over time from drive vibration or snagging. Check SATA data cables as well as the smaller SATA power connectors.
Checking BIOS Boot Settings
If drive connections check out okay, the next place to look is in the system BIOS settings. The BIOS controls the boot order and determines which device the computer tries to load the operating system from first on start up.
If the primary boot hard drive is no longer showing first in this list, it would produce the “reboot and select proper boot device” complaint. Here is how to check and correct boot order:
- Restart the computer and press the key to enter BIOS, usually Delete, F2 or F10.
- Navigate to the Boot or Boot Priority menu.
- Check that the primary hard drive is listed first in the boot sources.
- If not, use the arrow keys to move it to the top position.
- Save changes and Exit BIOS to reboot.
This will set the first boot device priority back to the system hard drive again. If the drive doesn’t appear at all in the list, then the BIOS is not detecting the drive and there is likely a hardware issue or connection problem.
Removing Non-Essential Devices
If there are multiple storage devices connected to the computer, these extra drives can sometimes confuse the boot order and cause issues. Removing unnecessary devices is an easy step to try clearing up the error.
Here are problem devices to disconnect before rebooting:
- External USB hard drives
- Internal storage drives not critical for booting
- Optical media like DVDs or Blu-Ray discs
- USB flash drives or memory cards
- Phones or media players connected as USB storage
With these drives disconnected, reboot and see if the system can then find the correct primary boot hard drive again. If the boot error continues even with all extras removed, then focus troubleshooting back on the main system drive itself.
Resetting BIOS Settings to Default
If drive connections are secure and the boot order looks correct but issues persist, resetting BIOS settings to default can help rule out a corrupted BIOS as the cause. Here is how to clear CMOS on most systems:
- Power down and unplug the computer.
- Open the case to access the motherboard.
- Locate the CMOS reset or clear CMOS jumper on the board.
- Remove the jumper cap and place it on both pins to short the jumper.
- After a few seconds, remove the jumper and replace the cap on one pin only.
- Close up the case, reconnect power and turn on the PC.
The BIOS settings will now be restored back to factory defaults. Be sure to re-enter any custom settings like overclocked RAM timing after clearing CMOS. With defaults reloaded the system has its best chance of booting properly again.
Verifying Drive Integrity
If the system drive itself appears healthy but issues remain, verifying the integrity of the drive contents can reveal underlying problems.
Some steps to try:
- Run CHKDSK in Windows to check file system status
- Perform a full malware scan to check for infections
- Use drive manufacturer diagnostic tools to test read/write operation
- Check SMART drive monitoring data for excessive bad sectors
Tools like CHKDSK, bootable diagnostics from the hard drive maker, or drive utilities like HD Tune can validate whether the drive itself is still fully functional or not.
CHKDSK
CHKDSK scans the file system for errors and bad sectors. To run in Windows:
- Open the Command Prompt as Administrator
- Enter “chkdsk C: /f” (replace C: with problem drive letter)
- Allow scan to run and repair any found errors
- Repeat on each drive reporting issues
Drive Diagnostic Tools
Most hard drive manufacturers provide bootable tools to diagnose drive issues. For example:
- Seagate SeaTools
- Western Digital Data Lifeguard
- Hitachi Drive Fitness Test
Run extended read, write and surface scans to uncover problems with the drive hardware itself. These bootable tools bypass the OS file system.
SMART Status
The S.M.A.R.T monitoring built into drives alerts to problems like excessive bad sectors. Apps like CrystalDiskInfo display this info:
If SMART shows high error counts, it indicates issues with the physical integrity of the drive surface or read/write heads.
Repairing System Files
If all hardware checks out okay, attempting system file repair could resolve software corruption issues stopping boot.
System Restore
The System Restore function in Windows rolls back system files and settings to an earlier point. Worth trying before more involved options:
- Boot from Windows install media into Recovery mode
- Choose Command Prompt and run System Restore
- Pick a restore point date prior to issue occurring
- Reboot once complete and test if resolved
Startup Repair
Startup Repair scans for corrupt system files and attempts automatic repair:
- Boot from Windows install media to Recovery Options
- Select Startup Repair from the list
- Let the utility run through its automated repair process
- It will reboot when finished to test if fixed
SFC Scan
The System File Checker can scan for corrupt system files and replace them from a cache:
- Boot to Windows Recovery Environment from install media
- Open Command Prompt
- Enter “sfc /scannow”
- SFC will scan and repair system files if possible
Repairing the critical Windows system files required for boot is often enough to resolve the issue and get booting normally again.
Replacing Faulty Hardware
If all else fails, the underlying problem is likely due to a hardware component that needs replacement in order to successfully boot again.
Cables
Damaged SATA cables are a prime suspect for intermittent boot issues. Always recommended to try a brand new SATA data and power cable for the boot drive if you have access to spares.
Hard Drive
Given their mechanical nature, hard disk drives can and do fail. If drive diagnostics reveal read/write issues or bad sectors, replacement of that drive is needed.
Motherboard
In rare cases of broken SATA ports or BIOS malfunction, the motherboard itself may need to be replaced. Try stripping the system down to just the essentials first before resorting to this.
Swapping in known good parts one by one, starting with cheap items like cables, can help zero in on the exact faulty component causing the no boot device pain.
Conclusion
Encountering the infamous “reboot and select proper boot device” error message doesn’t have to lead to frustration or expensive repairs. Methodically working through potential solutions from simplest software settings to replacing damaged hardware can eliminate the problem.
Following the detailed troubleshooting guidance in this article should help get your system successfully booting again, restoring the ability to enjoy accessing all the data and programs contained within!