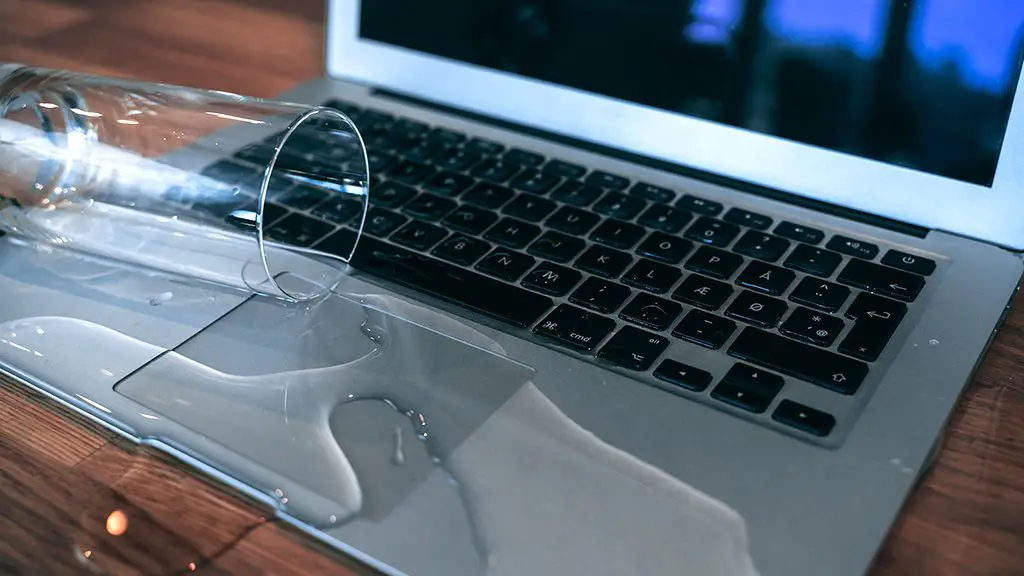
Quick Answer
If you spill a drink on your MacBook keyboard, you need to act fast to limit the damage. Immediately turn off and unplug your laptop. Flip it over to drain excess liquid and gently shake out water from the ports. Dab up any liquid on the surface with a microfiber cloth. Do not press any keys yet. If you have silica gel packets, place them around the keyboard to help absorb moisture. Let your MacBook dry out for at least 24-48 hours before attempting to turn it on again. Do not attempt to dry it with an external heat source. If your keyboard is still not functioning properly after fully drying, you may need to get it repaired or replaced.
Assessing the Spill
The first step is to quickly assess the spill. Was it water, coffee, soda, or another type of liquid? Clear water has the highest chance of limiting damage to your keyboard, while sticky sugary drinks like soda can leave residue behind after drying.
You’ll also want to estimate how much liquid was spilled. Was it a few small droplets or did you knock over an entire glass? The more liquid that gets into your keyboard, the higher the likelihood of short-circuiting and corrosion over time. A minor spill may only require a quick dry-out, while a major spill necessitates more involved cleaning and repairs.
Finally, note which areas of the keyboard got hit. Did the liquid seep down into multiple keys and internal components? Or was it confined to just a few external keys that you can dry out? Spills that get past the external keys and into the inner electrical workings of the keyboard have a higher risk of permanent damage.
Immediate First Steps
Once you’ve assessed the type of spill and how much liquid got into your MacBook, you’ll want to take immediate action to prevent further damage.
Here are the first steps to take right after a keyboard spill:
1. Turn Off and Unplug the MacBook
Turn off your laptop immediately. Press and hold the power button to power down completely. This helps prevent shorts and fires.
Unplug the charging cable and any other connected accessories. You do not want to risk getting shocked while cleaning liquid out of the ports.
2. Drain Excess Liquid
Hold your closed MacBook upside down to drain out as much excess liquid as possible from the keyboard, ports, and openings. Gravity will help remove pooled-up liquid inside.
Gently shake the laptop to dislodge any trapped droplets. Try to remove as much visible surface liquid as you can.
3. Dab or Blot with a Microfiber Cloth
Use a dry microfiber cloth to blot up any remaining liquid on the surface of your MacBook. Avoid rubbing or pressing as this can push the liquid further into the keyboard.
Carefully dab around each key and wipe the cloth along the openings between keys to absorb moisture. Take your time and use a light touch.
Repeat this process with a new dry section of the cloth as needed to soak up all visible wetness.
4. Do Not Press Any Keys
Until your keyboard has fully dried out, do not press any of the keys. This can cause more liquid to be pushed deeper into the internal components. Even lightly tapping keys can set moisture further into the keyboard circuitry.
5. Use Silica Gel to Absorb Moisture
If you happen to have any silica gel desiccant packets, place them strategically around and under the MacBook’s keyboard. Silica gel beads or packs rapidly absorb moisture and help dry out the inside of your laptop.
You can find these moisture-absorbing packets in shoe boxes, beef jerky, and many other products. They help maintain dryness and prevent corrosion.
Drying Out Process
Once you’ve done immediate damage control, the next phase is thoroughly drying out your MacBook’s keyboard and internal components. Getting rid of any lingering moisture inside is crucial for avoiding short circuits, electrical issues, and component corrosion down the line.
Here are tips for safely drying your laptop after a spill:
1. Leave it Powered Off for at Least 24 Hours
Do not attempt to turn on your wet MacBook for at least 24 hours after a spill. This gives time for any liquid to fully evaporate.
Ideally, leave it powered off for 48-72 hours to be safe. The longer your laptop has to dry out before powering on, the better.
2. Keep it Angled to Drain
Prop up your closed MacBook at a 45 degree angle using stands or books. This helps any trapped moisture drain out through the openings and air dry faster.
Gravity will help pull lingering liquid down and away from the internal components as it evaporates.
3. Absorb Moisture with Rice
Pour white rice into a sealable plastic bag and place it beneath and around your MacBook. Rice naturally helps absorb ambient moisture.
Just leave the bagged rice in place while the laptop dries. It will help maintain a moisture-free environment.
4. Use a Fan to Circulate Air
Position an electric fan several feet away from your open MacBook to help speed up drying time. The gentle airflow will evaporate surface moisture and ventilate the inside of the device.
Just take care not to blow debris into the laptop or wiggle any loose connections. Keep the fan a safe distance away on low or medium speed.
5. Do Not Use External Heat
Avoid using a hair dryer, heater, or any other heat source to try to dry out your laptop faster. The concentrated heat can damage plastic components and risk further short circuiting issues.
Air drying is best. Heat accelerates corrosion and can end up doing more harm than good.
6. Be Patient and Let it Fully Dry
However long you think it needs, give your MacBook even more time to air dry before powering it back on after a spill. It takes that long for moisture to evaporate from tight internal spaces.
Do not rush the process. Let your laptop fully dry for as long as possible for the best chance of normal functioning after a spill.
Testing Components After Drying
Once your MacBook has air dried for at least 24-48 hours after a spill, the next step is to test it out and assess any potential damage.
Take the following steps to check component functionality:
1. Inspect for Residual Moisture
Visually inspect around and under the keys for any remaining moisture or wetness. Look for water stains or discoloration. Use a flashlight to peer deeper into the openings.
If you see any lingering wetness or pools of liquid, continue air drying before powering on. All moisture needs to be completely evaporated.
2. Reconnect Cables and Accessories
With the laptop still powered off, reconnect any cables, chargers, or accessories that you removed after the initial spill.
Make sure ports are completely dry before inserting connectors. If you notice moisture on the ends of cables, use compressed air to dry out the ports completely.
3. Turn On Your MacBook
With the battery charged and accessories reconnected, press the power button to turn on your laptop.
Let it boot up completely as normal to the home screen before testing components like the keyboard.
4. Check Keyboard Responsiveness
Try typing with the keyboard to see if all the keys are functioning and responding properly.
Press keys across the whole keyboard, including the spill zone. Make sure no keys stick or fail to input text.
5. Test Trackpad and Ports
Check that the trackpad clicks and scrolls as expected without any sticking or lagging.
Test all ports and accessories like external mice, keyboards, and monitors for full responsiveness.
Make sure speakers and microphone are outputting sound properly without issues.
6. Inspect for Error Messages
Carefully inspect the screen for any error messages during bootup or when using components.
Error codes can indicate short circuits or corrosion damage to internal hardware.
7. Back Up Data if Components Fail
If you experience keyboard keys not working, accessory connectivity problems, screen artifacts, or other hardware issues, promptly back up your data.
Failing components indicate liquid reached internal circuits, requiring repair or replacement.
8. Schedule Repairs if Necessary
If keyboard keys or other components are non-responsive after drying, immediately schedule a repair with an authorized Apple service provider.
Liquid damage requires professional maintenance to fix or replace affected parts and prevent worsening issues.
Cleaning Corrosion and Mineral Deposits
If a sugary drink like soda was spilled, once your MacBook is fully dried you may need to clean corrosion and mineral deposits left behind. Sticky soda can leave residue on the logic board and components.
Here’s how to clean corrosion after drying:
1. Remove Key Caps
Use a small pry tool to gently pop off the key caps from affected keys to access the mechanisms underneath.
This allows you to clean any stuck-on deposits from the spill without damaging the keys.
2. Wipe with Isopropyl Alcohol
Use a cotton swab or soft microfiber cloth dampened with isopropyl alcohol to gently wipe away any corrosion or sticky residue on the exposed keys and components.
Be very careful not to get any moisture into still-vulnerable internal parts.
3. Rinse with Distilled Water
Use another cotton swab dampened with distilled water to lightly rinse away any remaining residue cleaned up by the alcohol.
Distilled water helps remove dissolved deposits without mineral contamination.
4. Dry Components
Allow the exposed keyboard components to fully air dry again to evaporate any moisture from the cleaning process.
You can also use compressed air to speed up drying time. Just avoid blowing any debris into the laptop.
5. Replace Key Caps
Once fully dried, replace the cleaned key caps by gently snapping them back into place over the keys.
Check keys for proper fitting and function. Avoid forcing caps back on crooked.
Preventing Future Keyboard Spills
Once you’ve cleaned up a MacBook keyboard spill, it’s also a good idea to take steps to prevent liquid damage in the future:
1. Use a Waterproof Cover
Invest in a waterproof silicone keyboard cover that fits snugly over your keys. This shields your MacBook from future spills.
Covers are inexpensive and provide reliable protection for accident-prone typists.
2. Never Drink Over Laptop
Be aware of your laptop’s proximity whenever you have an open container of liquid nearby. Never consume beverages directly over your MacBook.
Position drinks safely to the side and take care not to knock them over. This simple precaution goes a long way.
3. Carry Laptop in Waterproof Bag
When commuting with your laptop, store it inside a water-resistant bag or padded sleeve. This adds an extra layer of spill protection.
Bags help shield your device from rain, puddles, and errant spills from fellow travelers.
4. Handle with Care Near Sinks
Be extra cautious when using your laptop in kitchens, bathrooms, and other areas with water sources. Avoid positioning it directly next to sinks.
The splash zone near faucets and drains raises the risks of water damage. Maintain a safe distance.
5. Keep Liquids Away from Work Area
When working at a desk, keep beverages to one side far from your laptop, papers, and other items. Never place drinks right next to your MacBook.
Designate a “no drink zone” surrounding your work area to avoid accidental spills.
When to Seek Professional Repair
While moisture damage doesn’t always permanently destroy electronics, liquid spills can definitely disable MacBook keyboard function and affect performance without proper repairs.
You should take your laptop to an Apple Store or authorized service provider if:
– Keys remain sticky, unresponsive or only intermittently working after drying.
– Speakers, ports, or trackpad malfunction after a spill.
– You notice screen glitches, repeated error messages, or performance issues.
– Corrosion buildup cannot be fully removed through cleaning.
– The spill caused smoking, sparks, or any other obvious electrical damage.
– Your laptop will not power on even after thorough drying.
For severe spills involving large amounts of liquid, professional assessment and maintenance is highly recommended. The cost of repairs greatly outweighs replacing your entire MacBook if damage worsens over time.
Data Recovery Options
For liquid spills that result in a non-functional MacBook, you may need to recover lost data from the laptop’s storage drive before proceeding with repairs. A few options for data recovery include:
Apple Store Data Recovery
Apple’s in-house repair technicians can often recover data from failed MacBook drives and backups during service appointments. This integrated process simplifies data transfer to your replacement device.
Third-Party Data Recovery Services
Reputable data recovery companies can retrieve files from damaged, corrupted, or inaccessible MacBook drives and operating systems. Specialized tools bypass electrical issues to access stored data.
Backup Restoration
If you consistently run MacOS backups via Time Machine, you may be able to fully restore your files, settings, and apps to a replacement laptop using your latest backup. Maintaining backups is essential.
Cost of MacBook Liquid Damage Repair
The cost to repair a liquid-damaged MacBook keyboard or internal components varies based on these factors:
Age of Laptop
Newer MacBook models usually cost more to repair due to higher part replacement expenses. Vintage models may not even have some components available.
Extent of Damage
Minor localized damage like a sticky key costs less than corrosion to multiple components or circuits, which requires more extensive repairs.
Type of Service
Apple Store service, authorized Apple repair centers, and third-party Mac repair shops have different labor rates and fees. Shop around for the best deal.
Parts Required
Simple cleaning may be inexpensive, but replacing a whole top case with keyboard or multiple damaged parts racks up costs. Parts can be pricey.
Data Recovery Needs
If your data must be professionally recovered, expect added data recovery service fees.
As a guide, keyboard repairs can range from $150-$700 depending on damage severity and service provider used. Worst case logic board replacement can cost up to $1000 or more. Preventative keyboard covers are an economical investment by comparison!
Conclusion
Spilling liquid onto your MacBook keyboard can certainly create big headaches. However, by immediately powering off the laptop, gently blotting up excess moisture, thoroughly air drying components, and cleaning away any residue, you can recover functionally and avoid expensive damage in many cases.
Allowing time for your laptop to completely dry out is the most important step after an accident. Do not prematurely power it on while moisture remains internally. Be extremely cautious of heat sources which can do more harm than good.
Seeking professional service for any persistent issues after drying or signs of electrical malfunction is highly recommended to prevent bigger problems down the line. With proper care, your MacBook can survive a splash. Just stay calm, act fast, and drink far away from your laptop in the future!
