Quick Answers
If your laptop keyboard gets wet and stops working, don’t panic. Here are some quick things to try:
- Unplug the laptop and remove the battery immediately.
- Dry the keyboard as much as you can with a towel or dry cloth.
- Use a can of compressed air to blow out any liquid under the keys.
- Let the laptop dry thoroughly for at least 24-48 hours before turning it on.
- Try using an external USB keyboard in the meantime.
- As a last resort, you may need to replace the built-in keyboard.
How Does Water Damage a Keyboard?
Water can damage a laptop keyboard in a few different ways:
- Short circuit – Water can cause short circuits on the keyboard’s internal components, motherboard, and other electronics.
- Corrosion – Water can cause corrosion over time, especially if any impurities are present.
- Interference – Water can interfere with the contacts for each key, preventing signals from being sent to the computer when keys are pressed.
- Residue – Water evaporates but often leaves behind mineral deposits that can interfere with the keys and internal mechanisms.
That’s why it’s critical to act quickly if your keyboard gets wet. The longer moisture sits inside your laptop, the more potential damage it can cause.
Short Circuits
One of the biggest risks when water damages a laptop keyboard is that it can create short circuits. This happens when the water bridges connections between components that are not normally connected.
Short circuits can send current through paths it’s not meant to flow. This can fry chips, microcontrollers, and other parts of your laptop. In some cases it only takes a very small amount of water to cause a short that bricks a laptop motherboard or keyboard.
Corrosion
Even after water has evaporated, it can still cause ongoing issues due to corrosion. This is a chemical reaction that occurs over time when certain metals come into contact with oxygen and water. The metal components slowly degrade.
Many laptop keyboard contacts and circuits contain metals like copper that are prone to corrosion. So even once the water dries out, the corrosion continues damaging the keyboard from the inside.
Key Interference
Most laptop keyboards work by having a small membrane sheet with electrical contacts below each key. When you press a key, it connects a circuit so the keyboard can detect the keypress. Water can interfere with these contacts in a few ways:
- Insulating films can form and prevent contacts from closing.
- Mineral deposits can build up and prevent keys from moving properly.
- Corrosion may develop over time.
All of these effects impair the basic electrical connections needed for each key to work.
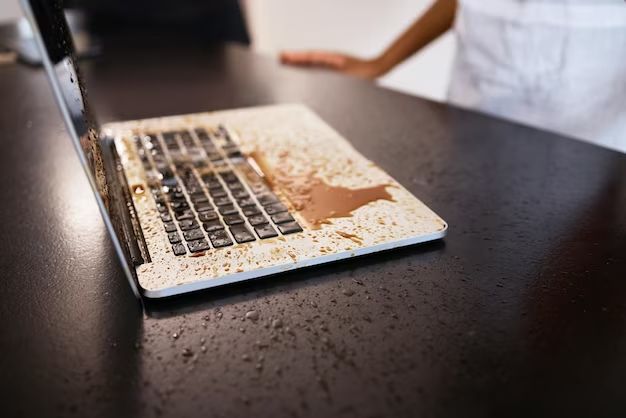
Residue
After water dries, it often leaves behind mineral deposits and residues. This grimy build-up can physically interfere with keys, contacts, and mechanisms. Keys may become sticky or sluggish. In some cases, keys may stop working altogether if the residue is thick enough to totally block their movement.
Cleaning and flushing the keyboard thoroughly is important to avoid issues with substance left behind after water damage.
First Steps for a Wet Laptop Keyboard
If you accidentally spill water or liquid onto your laptop keyboard, here are the immediate steps you should take:
- Unplug the laptop and remove any batteries right away. This cuts power to reduce the chance of short circuit damage.
- Wipe away any pooled water on the surface as much as you can. Be gentle – don’t shake the laptop.
- Open the laptop carefully and position it to drain out any water from inside crevices.
- pat the keyboard dry with a towel. Place paper towels beneath to soak up water.
- Use a can of compressed air to blow between keys and into openings to clear moisture.
- If possible, remove the keyboard to clean and dry the components underneath.
- Let the laptop dry thoroughly for 24-48 hours before attempting to turn it on.
Unplug Power Immediately
As soon as you spill liquid on a laptop, one of the first priorities is to cut power to the device. Unplug the AC adapter from the wall and remove any batteries from their bays.
This stops electricity flowing through components while they are wet. It reduces the chances of shorts that could permanently fry the logic board or keyboard.
Absorb Visible Water
Use paper towels or a dry cloth to soak up any pooled water on the laptop’s surface. Work gently to avoid shaking the device or letting more water run into openings.
Tilt or orient the laptop to help drain out as much moisture as you can from gaps and vents where water may have seeped inside.
Pat or Air Dry
Don’t rub the keyboard. Instead, pat gently with an absorbent towel or cloth to dry the surface. You can also use a can of compressed air to blow drier air into the keyboard area and gaps between the keys.
If possible, remove the keyboard for better access to dry components underneath. Refer to the laptop’s manual for instructions to safely remove the keyboard.
Allow Plenty of Drying Time
It’s unlikely you’ll be able to fully dry the laptop immediately. Expect to let it dry for at least 24-48 hours before attempting to use it. Remove batteries and leave it powered off in a dry location.
The longer you can leave it to dry out completely, the better chance you have of avoiding any long-term water damage issues.
Drying Out a Laptop Keyboard
After the initial emergency response, you’ll want to thoroughly dry out the laptop’s keyboard and internal components. Here are some steps to help accomplish this:
Remove Power and Batteries
Leave the laptop unplugged from AC power. Also remove any batteries from their bays, as they could still supply residual power from a charge.
Disassemble If Possible
Refer to a service manual to safely disassemble the laptop as far as you can. This allows better access to dry interior components and the backside of the keyboard.
Dry Out Keyboard
Use compressed air to blow between keys and through vents. This clears any pooled moisture from crevices. Letting it air dry thoroughly is ideal. You can also use a blow dryer on low heat to help evaporate water.
Clean Connections
Check for any obvious deposits, corrosion, or grime left by the water. Clean any built-up substances off contacts and connectors with isopropyl alcohol.
Absorb Hidden Water
Place the disassembled laptop parts on towels or paper towels to wick away moisture. Rice is sometimes used but absorbent materials work better. Desiccant packs can help draw out humidity from inside closed components.
Let Dry for Days
Be patient. Drying can easily take 2-4 days or longer. Extended drying time improves your chance of success. Check for any remaining dampness before reassembly.
Using a Separate Keyboard
While your laptop dries out, you may need to use an external keyboard to work on it:
Standard USB Keyboard
A basic USB keyboard can plug into any available USB port to provide temporary functionality. These are inexpensive and work right away with no additional software or setup required.
Wireless Bluetooth Keyboard
A wireless Bluetooth keyboard avoids any cords cluttering your workspace. It needs to pair with your laptop but then operates wirelessly. Just make sure your laptop has Bluetooth capability built-in or via a dongle.
Desktop Keyboard With PS/2 or USB
You can use any working desktop keyboard. Older PS/2 keyboards require an adapter. USB keyboards may need a hub if you don’t have available ports. But any standard keyboard should function temporarily.
Onscreen Keyboard
Your laptop may have a built-in onscreen keyboard you can access through the accessibility options in your operating system settings. This lets you use a mouse or touch screen to type.
Getting Water Out From Under Keys
Water trapped under laptop keys or in other tight areas can be difficult to dry thoroughly. Here are some methods to help dislodge and absorb it:
Compressed Air
Use short blasts from a can of compressed air to blow liquid out from between tight spaces. Don’t use continuous air, as this can condense moisture inside.
Vacuum
Try gently vacuuming around and under keys using a handheld vacuum with a narrow crevice tool. This also helps pull water out from inside the keyboard deck.
Key Removal Tool
You can buy plastic keyboard key removal tools inexpensively. They can pry keys up safely so you can access underneath to clean and dry.
Absorbent Powders
Dusting the keyboard with dry powders like talcum powder helps absorb moisture. Electronic desiccant powders designed to dry circuit boards also work well.
Isopropyl Alcohol
Use 99% isopropyl alcohol sparingly around the edges of keys to help displace water. Be very careful not to spill any inside. Allow time to fully dry afterwards.
Fixing an Unresponsive Keyboard
If drying out your laptop’s keyboard does not restore function, other options include:
Further Disassembly
You may need to remove the motherboard to access components under the keyboard. Further disassembly depends on your technical skill and service manual.
Contact Cleaner Spray
Use an electronic contact cleaner spray to dissolve any substances causing keys to stick or not work properly. Re-seat connections and work keys to distribute the cleaner.
Replace Keyboard
For a laptop with extensive water damage, replacing the entire keyboard assembly may be necessary. Keyboards are often affordable and straightforward to swap out on most laptop models.
Wireless Keyboard Workaround
As mentioned previously, you can use a basic wireless keyboard and mouse with your laptop via Bluetooth or USB dongle. This avoids the built-in keyboard entirely.
External Keyboard Only
If the screen and other components work, an external monitor, keyboard, and mouse allow you to use the laptop without fixing the built-in keyboard.
Logic Board Repair
For severe liquid damage impacting components beyond the keyboard, professional logic board-level repairs may be required. Costs can approach buying a replacement laptop.
Preventing Future Water Damage
To avoid repeat keyboard issues, keep these prevention tips in mind:
Use a Laptop Cover
A laptop sleeve or bag protects it from accidental spills while transporting. Just don’t seal it away wet.
No Eating or Drinking Nearby
Keep food and beverages away from your work area to avoid drips, splashes or spills on the keyboard.
Check For Drainage Issues
Inspect that liquid drains properly out the bottom vents. Clogged vents can make spills worse.
Carry Properly
Don’t carry around an open laptop where a spill could happen. Close it or put it to sleep before moving it.
Use a Protector Skin
Keyboard skins and covers can protect again minor spills and keep liquid away from the keys.
Store Safely
Keep the laptop in a dry place when storing it. Never put it away wet.
Inspect Under Keys
Over time, crumbs and build-up under keys can absorb spills. Check under keys periodically and clean as needed.
Conclusion
Water and laptop keyboards clearly don’t mix well. But if you react quickly after a spill and take proper steps to dry it out, you have a good chance of saving it. Just be ready with a temporary external keyboard as a plan B. Implement some simple precautions to avoid the issue in the first place.
| Liquid exposure issue | Solution |
|---|---|
| Short circuit | Immediately remove power source |
| Corrosion | Thoroughly dry components |
| Key sticking | Blow out moisture from under keys |
| Residue deposits | Clean with isopropyl alcohol |
| Keyboard not functioning | Use external keyboard or replace built-in keyboard |