What is SATA and AHCI?
SATA, which stands for Serial Advanced Technology Attachment, is a computer bus interface that connects storage devices like hard disk drives, solid state drives, and optical drives to a computer’s motherboard (Source: https://techterms.com/definition/sata). SATA is the successor to the older Parallel ATA (PATA) interface.
AHCI, which stands for Advanced Host Controller Interface, is a technical standard defined by Intel that specifies the operation of SATA host controllers (the chips/firmware that allow SATA devices to connect to the system). AHCI provides advanced features like hot swapping and native command queuing compared to older standards like IDE (Integrated Drive Electronics) (Source: https://www.howtogeek.com/272220/whats-the-difference-between-ahci-and-ide-on-my-hard-drive/).
The key differences between AHCI and older standards like IDE are:
- AHCI allows for hot swapping of SATA devices while IDE does not.
- AHCI has native command queuing for optimal performance while IDE handles commands sequentially.
- AHCI offers features like staggered spin-up to manage power better than IDE.
So in summary, SATA is the physical interface that connects storage devices, while AHCI is an advanced protocol that governs the communication between the operating system and SATA host controller for better performance and capabilities.
Why Change to AHCI Mode?
There are several key benefits to changing the SATA mode to AHCI from IDE or RAID:
Better performance – AHCI allows Native Command Queuing which enables drives to optimize command order and queue up to 32 commands at once. This leads to increased read/write speeds compared to IDE mode according to Enterprise Storage Forum.
Native command queuing – As mentioned above, AHCI enables Native Command Queuing allowing drives to optimize command order for faster speeds. This leads to better performance especially for SSDs.
Hot swapping support – AHCI mode allows SATA drives to be hot swapped if the hardware supports it. This means drives can be changed without rebooting the system. IDE does not support hot swapping according to Partition Wizard.
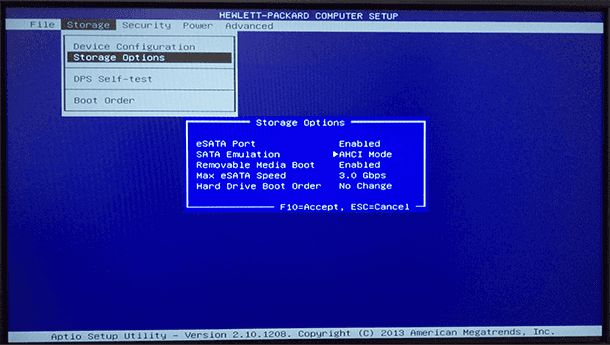
How to Change to AHCI
Changing the SATA mode to AHCI is done in the system BIOS. Here are the steps:
- Restart your computer and press the key to enter BIOS during bootup (F2, Delete, F10, etc. depending on your system). This will open the BIOS setup utility.
- Navigate to the “Advanced” tab and look for the SATA configuration options. There should be a setting labeled “SATA Mode” or something similar.
- Change this SATA mode setting from IDE/RAID to AHCI mode. How to change SATA mode to AHCI
- Save changes and exit BIOS. Allow changes to be applied and restart the PC.
The system will now reboot and operate in AHCI mode. Be aware that switching modes can cause boot issues, so have your Windows recovery media ready in case you need to repair startup.
Install AHCI Drivers
After switching the SATA mode to AHCI in the BIOS, you may get a blue screen error or fail to boot into Windows. This is because Windows was installed with the default SATA drivers for your motherboard, which are incompatible with AHCI mode. To fix this, you need to install the AHCI drivers before booting into Windows.
The AHCI drivers are often available from your motherboard manufacturer’s website. For example, for Intel chipsets you can get the Intel Rapid Storage Technology drivers (Source 1). Alternatively, you can use Microsoft’s default AHCI drivers called “Standard AHCI Controller” which are usually already included with Windows (Source 3).
To install AHCI drivers before booting into Windows:
- Boot from the Windows installation media or recovery partition.
- Press Shift + F10 to open a command prompt.
- Run “pnputil -i -a [path to inf file]” to install the AHCI drivers.
- Reboot into Windows, which should now load successfully with AHCI enabled.
With the proper AHCI drivers installed, Windows will be able to boot and function as normal with AHCI mode enabled.
Change Registry Settings
To enable AHCI mode after Windows is installed, you need to edit the Windows registry. This allows your system to switch from IDE to AHCI mode without blue screening.
Here are the steps to edit the registry to enable AHCI (cite: Enable AHCI in Windows 8 and Windows 10 after Installation):
- Open the Run dialog by pressing Windows + R.
- Type regedit and click OK to open the Registry Editor.
- Navigate to HKEY_LOCAL_MACHINE\System\CurrentControlSet\Services\storahci.
- Add a new DWORD (32-bit) value named Start with a value of 0.
- Navigate to HKEY_LOCAL_MACHINE\System\CurrentControlSet\Enum\IDE.
- Delete both the UpperFilters and the LowerFilters registry keys.
- Close the Registry Editor and restart your computer.
After restarting, the registry changes allow Windows to boot into AHCI mode without crashing. Make sure to install AHCI drivers beforehand.
Verify AHCI Mode
To check if AHCI mode is enabled, you can verify in both the BIOS settings and Windows Device Manager.
First, enter the BIOS setup menu on system boot. The exact steps depend on your specific motherboard, but often involve pressing F2, F10 or Delete during startup. Once in the BIOS, look for the SATA or Onboard Devices configuration menu. There should be a setting for the SATA or onboard storage controller mode – verify it is set to AHCI rather than IDE or RAID. If not, you will need to change this setting to switch to AHCI mode.[1]
You can also check in Windows Device Manager. Open Device Manager and expand the IDE ATA/ATAPI controllers section. If an “AHCI SATA” controller is listed, AHCI mode is enabled. If only a Standard SATA controller shows, AHCI mode is likely disabled.[2]
Benchmark Performance
It’s important to compare system performance in AHCI mode versus IDE or RAID mode before and after switching to see the impact. According to Expertester, tests show AHCI mode improves computer responsiveness, transfer rates, and number of IO operations significantly compared to IDE mode. In their benchmark tests using HD Tach and Everest, sequential read and write speeds increased anywhere from 5-20% after switching to AHCI.
Other sources confirm similar benchmark improvements. According to Techplayboy, using AS-SSD Benchmark, sequential read speeds favor AHCI while write speeds are similar between SATA modes. However, 4K read/write speeds show more substantial gains in AHCI mode. The WinRaid forums also discuss various SSD benchmark tests illustrating the advantages of Intel SATA3 ports in AHCI mode for sequential and 4K performance.
Compatibility Issues
Some older hardware and operating systems may not fully support AHCI mode. This is because AHCI was introduced in 2004 as part of the new SATA 3.0 specification, while older SATA 1.0 devices used the IDE protocol instead. When AHCI support first started appearing on motherboards, compatibility problems arose with operating systems like Windows XP that pre-dated AHCI.
For example, changing to AHCI mode on a system running Windows XP can result in the infamous “blue screen of death” upon boot. This is because Windows XP lacks the AHCI drivers needed to communicate properly with AHCI devices. However, installing updated AHCI drivers first can allow Windows XP to function normally in AHCI mode.
Likewise, very old hard drives may be incompatible with AHCI if they only support the IDE/ATA specification and pre-date SATA. Overall, AHCI compatibility issues are mainly limited to hardware and operating systems from the 2001-2006 period before AHCI gained widespread adoption. Modern hardware and OS released in the past decade generally include full AHCI support.
Troubleshooting AHCI Issues
Changing to AHCI mode can sometimes cause issues like blue screens and failed boots. Here are some tips for troubleshooting common problems:
If you get a blue screen of death (BSOD) after changing to AHCI, it’s likely caused by the SATA driver looking for an IDE controller and not finding one. To fix this:
1. On boot, go into BIOS and change SATA back to IDE mode.
2. Boot into Windows in safe mode.
3. Uninstall the Intel SATA drivers under Programs and Features in the Control Panel.
4. Reboot and go back into BIOS to change to AHCI mode.
5. Windows will detect the new hardware and install AHCI drivers automatically.
If Windows fails to boot after switching to AHCI, you may need to rebuild the BCD store:
1. Boot from the Windows install media into recovery options.
2. Select Command Prompt and enter: bootrec /rebuildbcd (Source: Microsoft Answers)
For driver issues, make sure you have the latest AHCI/SATA drivers installed from your manufacturer’s website based on your motherboard model.
If none of these fixes work, revert to IDE mode in BIOS. AHCI is not required for most users.
Conclusion
Enabling AHCI mode offers several advantages but also some potential drawbacks. On the plus side, AHCI mode improves speed and performance through advanced features like hot swapping and native command queuing. For users running solid state drives, AHCI mode is essential to maximize SSD performance. The cons mainly relate to compatibility – older operating systems like Windows XP may not have AHCI drivers, and enabling AHCI can cause boot issues if not done properly.
Overall, most modern systems should benefit from running AHCI mode. The performance gains outweigh any minor compatibility concerns. Users with SSDs stand to see the biggest improvements by switching to AHCI. For HDDs, the gains are smaller but still worthwhile. Just be sure to check for OS compatibility and follow proper procedures when changing the mode to avoid problems.
In summary, AHCI mode is recommended for most users today, especially those running an SSD. But changing modes does require some care, so be sure to do your homework first.
