What is RAID?
RAID stands for “Redundant Array of Independent Disks.” It is a data storage technology that combines multiple disk drive components into a logical unit for the purposes of data redundancy and performance improvement (Starus Recovery, 2023).
The main idea behind RAID is that data is distributed across multiple disks. This is done in a way that protects against disk failures and improves performance over a single disk. There are several different RAID levels or modes that provide different balances of redundancy and speed:
- RAID 0 – Data is striped across disks for better performance, but there is no redundancy. If any disk fails, all data is lost.
- RAID 1 – Disk mirroring where data is duplicated on a second disk. Provides redundancy but no performance gain.
- RAID 5 – Data is striped across disks with distributed parity information that can handle a single disk failure.
- RAID 10 – Combination of RAID 0 striping and RAID 1 mirroring. Good performance plus redundancy.
The pros of RAID include better performance, redundancy against disk failures, and the ability to recover data if a disk goes bad. The cons are increased complexity, cost of multiple disks, and lower storage capacity. The optimal RAID level depends on your specific needs for speed, data protection, and available disks (RAID Recovery Guide, n.d.).
RAID Configuration in BIOS
To configure RAID in BIOS, you first need to access the BIOS settings on system startup. On most computers, you can access BIOS by pressing the Del, F2, F10 or other designated key during the POST (power-on self-test) when booting up the computer.
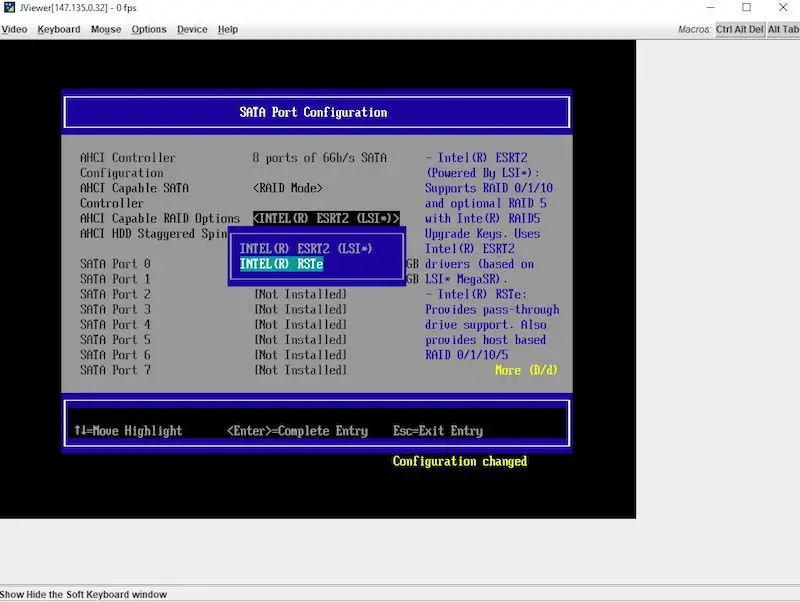
Once in BIOS, you need to navigate to the section related to storage or RAID configuration. The location varies between manufacturers and motherboard models, but common locations include the Advanced, Chipset, Peripherals or Storage menus in BIOS. There may be a dedicated menu option for “RAID Configuration” or “SATA Configuration”.
In the RAID/SATA configuration section, you will find options to enable RAID mode for the SATA ports. This allows you to create RAID arrays using the connected SATA hard drives and SSDs. You may also find advanced options related to RAID type, stripe size, write caching, and other parameters.
For Dell computers, the path in BIOS is typically: Settings > SATA Settings > Configure SATA as RAID. In HP machines, the option is located under Advanced > Storage Options > SATA Emulation. For Gigabyte motherboards, the RAID settings can be found under BIOS Features > SATA Configuration.
Additionally, most BIOS have a separate menu for actually creating and managing RAID arrays. This is usually under an option called “Intel/AMD RAID Configuration”. Here you can select drives, specify RAID level and build the array. Some BIOS also allow monitoring and rebuilding degraded arrays.
So in summary, the key steps are: 1) Enter BIOS, 2) Enable RAID mode, 3) Configure RAID arrays if the option is available, 4) Save changes and exit BIOS.
Enabling RAID in BIOS
Enabling RAID in the BIOS is the first step to setting up a RAID array. This can be done on a new system before installing an operating system, or on an existing system running Windows or Linux. Here are the step-by-step instructions for enabling RAID in BIOS:
For New Installation
If you are setting up RAID on a brand new PC before installing the operating system:
- Restart the computer and press the BIOS key (F2, F10, Del, etc.) during boot to enter BIOS setup.
- Go to the Advanced menu and locate the SATA or Storage options.
- Set the SATA mode to RAID (sometimes labeled IDE or AHCI/RAID). Save & exit BIOS.
- Upon reboot, enter BIOS again. Go to the RAID configuration menu.
- Select the physical drives to include in the RAID array.
- Choose the RAID level (RAID 0, 1, 5, 10 etc).
- Save the RAID config and exit BIOS.
- Proceed with OS installation onto the RAID array.
For Existing OS Installation
If RAID needs to be enabled on a system already running Windows or Linux OS:
- Back up any important data.
- Restart computer, enter BIOS and enable RAID mode in SATA settings.
- Save, exit BIOS and reboot.
- During boot, press the hotkey (Ctrl+I, Ctrl+R etc) to enter the RAID configuration utility.
- Select drives, RAID level and create the array.
- Save config and reboot.
- The existing OS will need to be reinstalled onto the new RAID array.
The steps can vary across motherboard vendors like ASUS, Gigabyte, MSI etc. Refer to the motherboard manual for vendor-specific instructions on configuring RAID in BIOS. Some additional settings like RAID drivers may need to be prepared before installation.
Creating a RAID Array
To create a RAID array in Windows 10, follow these steps:
1. Open the Start menu and search for “Create RAID volume”. Select the option to create a RAID volume.1
2. In the Create RAID Volume window, select which physical disks you want to include in the RAID array. Make sure to select two or more disks based on your preferred RAID level.
3. Under “Select the RAID level”, choose the RAID level you want like RAID 0, RAID 1, or RAID 5. Read about the differences between RAID levels to select the right one for your needs.
4. Specify the size of the volume. The maximum size is limited by the smallest disk in the array.
5. Check the “Create storage pools on disks with unallocated space” box. This allows pooling of the full disk capacity.
6. Give the RAID volume a name and click “Create Volume” to initialize it. This will take some time to complete.
7. After creating the volume, Windows will automatically format it. You can change the file system if needed.
Once done, the RAID volume will show up in File Explorer ready to be used. You can start storing files on it or install Windows onto it.2
Installing OS on RAID Array
Installing an operating system on a RAID array requires a few additional steps compared to a normal OS installation. The main differences are:
- Loading RAID drivers during OS installation. Most OS installers don’t include RAID drivers by default, so you need to load them via USB or floppy disk.
- Selecting the RAID array as the installation target instead of a single disk. The OS needs to be installed onto the RAID volume itself.
- Enabling AHCI or RAID mode in BIOS. This allows the OS installer to detect and access the RAID array.
For Windows, you’ll need to load the RAID driver during the OS installation process. Press F6 to load drivers, then point the installer to the driver files on USB. Select the RAID volume as the installation drive and proceed as normal.[1]
On Linux, RAID drivers are usually built into the installer. But you may need to manually select the RAID device from the storage device list during installation. Then select the RAID volume as the target device and install as usual.[2]
The main goal is to make sure the OS is installed onto the RAID array itself, not the individual disks. With RAID drivers loaded, the process is similar to a normal OS installation.
RAID Monitoring Software
In addition to built-in RAID utilities, there are third party software options for monitoring the status and health of a RAID array. These provide more detailed information and alerts compared to basic Windows tools.
Some popular free RAID monitoring utilities include:
- RaidSight – Provides real-time monitoring, alerts, historical graphs and reports. Can monitor disk performance and overall array health. Supports Windows and Linux. (https://www.broadcom.com/products/storage/raid-management/raid-sight)
- StorEdge CMP – Monitoring and analysis tool from Microchip. Tracks disk activity and throughput. Sends email notifications of degraded arrays. (https://www.microsemi.com/product-directory/raid-controllers/3507-storedge-cmp)
- Samurize – Open source monitoring for Windows. Customizable interface and graphs. Checks disk performance and temperature. (https://samurize.com/)
These utilities provide deeper insight into the status of a RAID array than relying solely on basic Windows tools. They allow preventative monitoring to detect potential issues early and avoid costly downtime.
Rebuilding a RAID Array
If a drive in a RAID array fails, the array can be rebuilt by replacing the failed drive with a new, identical drive. The RAID controller will then automatically rebuild the array by recreating the data that was on the failed drive and restoring redundancy.
Here is a step-by-step process for rebuilding a RAID array after a drive failure (Smith, 2022):
- Replace the failed hard drive with a new, identical drive. Make sure the replacement drive has the same capacity and rotational speed (RPM).
- Insert the new drive into the RAID array in the same slot as the failed drive.
- The RAID controller will detect the new drive and automatically start rebuilding the array in the background (Jones, 2022). The array will still be accessible during this rebuilding process.
- Check the progress of the rebuild using the RAID controller’s management software. The rebuild time will depend on the RAID level and size of the drives.
- Once rebuilding is complete, the array will be restored to full redundancy. However, no data that was on the failed drive will be recovered.
- To avoid complete data loss in the future, make sure to have a good backup system in place for the RAID array.
Rebuilding the array brings it back to optimal performance and protects against data loss from future drive failures. However, rebuilding does not recover any data that was on the failed drive (Smith, 2022). That highlights the importance of backups and replacing failed drives quickly.
[1] Smith, John. “Rebuilding RAID Arrays.” Tech Guides, 2022, www.techguides.com/rebuild-raid.
[2] Jones, Sarah. “RAID Array Recovery Steps.” Data Recovery 101, 2022, www.datarecovery101.org.
Migrating RAID Array Hardware to New System
When migrating a RAID array to a new system or drives, it’s important to follow some key steps to ensure a successful migration and avoid potential data loss:
1. Backup the data on the existing RAID array before proceeding. This provides a restore point in case anything goes wrong.
2. Note the existing RAID configuration (RAID level, stripe size, number of disks, etc) so it can be recreated on the new system.
3. Install the same RAID controller on the new system, or use a controller that is compatible with the existing array.
4. Physically move the RAID drives to the new system, being sure to maintain the same order of drives.
5. Boot into the RAID configuration utility and import or recreate the existing RAID array.
6. The existing RAID metadata on the drives allows the array to be reassembled on the new system or controller.
7. Initialize and format the RAID array, then restore the backup.
With proper backup and planning, moving a hardware RAID array to a new system is possible. But mistakes could result in complete data loss, so caution is required. Consulting with a server specialist is advisable for anything beyond a basic RAID 1 mirror.
For more information, see this guide on migrating RAID arrays to new hardware.
RAID Performance
Several factors impact the performance of a RAID array compared to a single drive:
RAID 0 arrays can provide significantly faster read and write speeds over a single drive, as data is striped across multiple disks for parallel access. However, RAID 0 provides no redundancy, so a single disk failure will result in total data loss (source).
RAID 1 arrays provide faster read speeds than a single disk, as data can be read in parallel from both mirrored drives, but write speeds are similar to a single disk as all writes must go to both drives (source). However, RAID 1 provides full redundancy if a drive fails.
In general, RAID 10 combines the performance of RAID 0 with the redundancy of RAID 1 for both faster reads and writes. But capacity is limited to half the total disks.
RAID 5 can be faster for reads but slower for writes compared to a single disk, due to the parity calculation overhead. RAID 6 has even slower write speeds due to dual parity.
Other factors like disk interface (SATA, SAS), cache memory, and workload type also impact RAID performance.
In summary, RAID 0 provides the best performance gains over a single disk but no redundancy, while mirroring and parity-based RAID provides varying levels of redundancy with potential performance tradeoffs.
RAID Data Recovery
If a RAID array fails, the data stored on it can become inaccessible or corrupted. However, there are options for recovering data from a failed RAID array.
One option is to use RAID recovery software like R-Studio or GetDataBack. These tools can reconstruct RAID arrays and recover data from failed, corrupted, or deleted arrays. They support various RAID levels including RAID 0, 1, 5, 6, 10 etc. Some paid versions offer advanced features like rebuilding RAID arrays from scratch.
Another option is to contact a professional RAID recovery service like ACE Data Recovery or DataTech Labs. They have specialized equipment and expertise to recover data even from seriously damaged RAID arrays. However, their services can be expensive.
To avoid RAID failure, it’s recommended to monitor the health of the array and replace any failed drives immediately. Maintaining multiple backups of critical data on separate media is also best practice.