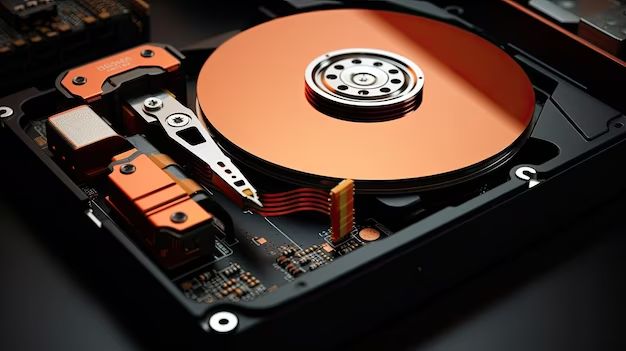
SATA, which stands for Serial Advanced Technology Attachment, is a type of interface used to connect storage devices like hard drives and solid state drives to a computer’s motherboard. SATA allows for faster data transfer speeds compared to older parallel ATA interfaces.
RAID, which stands for Redundant Array of Independent Disks, is a way of combining multiple disk drives together into a logical unit. The main purposes of RAID are to increase storage capacity, performance, and/or reliability of disk storage. There are several different RAID modes that each have their own advantages and tradeoffs.
Some of the most common SATA RAID modes we’ll discuss in this article include:
- RAID 0 – Data striping for increased performance
- RAID 1 – Disk mirroring for data redundancy
- RAID 5 – Block-level striping with distributed parity for fault tolerance
- RAID 6 – Block-level striping with double distributed parity
- RAID 10 – Mirroring + striping for increased performance and redundancy
Understanding the differences between these RAID modes is important for choosing the right configuration based on your storage needs and priorities.
RAID 0
RAID 0, also known as disk striping, is a RAID configuration that uses striping to spread data evenly across multiple disks with no parity or mirroring (Source:https://www.linkedin.com/advice/0/what-pros-cons-raid-0-1-5-storage-virtualization). This means it provides improved speed and performance but no redundancy. The main characteristics of RAID 0 include:
- Data is broken into blocks and striped across multiple disks (Source: https://ttrdatarecovery.com/raid-levels/)
- There is no parity or mirroring, so there is no redundancy
- RAID 0 provides improved performance compared to a single disk, since data can be read/written in parallel
- Failure of any disk causes complete data loss, so RAID 0 has lower reliability than RAID levels with redundancy
In summary, RAID 0 is best for non-critical data where high performance is desired, but should not be used for mission critical data due to the lack of fault tolerance (Source: https://www.ionos.com/digitalguide/server/security/raid-0/). The tradeoff is faster speed for lower reliability.
RAID 1
RAID 1, also known as “mirroring”, provides redundancy by duplicating all data from one drive to a second drive (Source). This means the two drives contain exactly the same data. If one drive fails, the system can instantly switch to the other drive without any loss of data or interruption to service.
A key advantage of RAID 1 is that it provides complete data redundancy. If one drive fails, the other contains an exact copy of the data. This provides maximum fault tolerance and protection for important data (Source). The server can operate seamlessly, even during drive rebuilds.
However, RAID 1 also doubles the hardware cost, since every drive is duplicated. The usable capacity is equal to the size of one drive, with the second drive used solely for redundancy. RAID 1 works best for smaller servers that require high availability and fault tolerance.
RAID 5
RAID 5 is a striping with distributed parity RAID mode that utilizes block-level striping with distributed parity (RAID Types – 0, 1, 5, 6, 0+1, 10, 50, 60 | UnixServerAdmin”). This means the data is striped across multiple disks similar to RAID 0, but parity information is also distributed across the drives. The parity allows for fault tolerance by reconstructing data if one drive fails (What Are The RAID 5 Requirements? – SalvageData Recovery).
RAID 5 requires a minimum of 3 disks (RAID data storage: How to calculate usable space for a … – chegg.com). The parity information is distributed evenly across all drives, so if one fails, the remaining data and parity information can be used to reconstruct the lost data. This provides fault tolerance for one drive failure.
RAID 6
RAID 6, also known as Striping with Double Distributed Parity, utilizes block-level striping with double distributed parity (cite: https://www.techtarget.com/searchdatabackup/tip/RAID-5-vs-RAID-6-Capacity-performance-durability). This means that data is distributed across multiple disks, similar to RAID 0, but parity information is also distributed across multiple disks unlike RAID 5 which stores parity on a single disk.
The key advantage of RAID 6 is that it can sustain up to two disk failures without losing data. Since parity information is spread across two disks, the array can continue functioning normally if one or two disks fail (cite: https://recoverit.wondershare.com/windows-tips/raid-5-vs-raid-6.html). The tradeoff is reduced usable capacity compared to RAID 5. A minimum of 4 disks is required for RAID 6.
RAID 6 is preferable to RAID 5 for mission critical storage or large disk arrays where the risk of multiple disk failures is higher. The added redundancy of RAID 6 provides an extra layer of protection for important data. However, the performance overhead is higher compared to RAID 5 due to the additional parity calculations.
RAID 10
RAID 10 combines mirroring and striping to provide fault tolerance and improved performance (Overview of RAID 10). It creates a mirrored set of drives, and then stripes data across the mirrored sets in segments. This provides the redundancy of RAID 1 with the performance benefits of RAID 0.
RAID 10 requires a minimum of 4 drives and an even number of drives. The drives are mirrored in pairs and then striped. For example, a 4 drive RAID 10 would consist of 2 mirrored pairs striped together. If one drive in a mirrored pair fails, the system can continue operating using the other drive in the pair. This provides fault tolerance.
Performance is improved in RAID 10 because read/write operations can be parallelized across multiple stripes. Unlike RAID 5/6, RAID 10 does not suffer from write penalty. This makes it ideal for applications requiring high throughput like databases, email servers, and high traffic websites (RAID 10 Use Cases).
The downside to RAID 10 is lower overall capacity. Since drives are mirrored, 50% of total capacity is lost to redundancy. The cost per GB is also higher compared to RAID 5/6. So RAID 10 works best when performance and availability are critical.
Choosing a RAID Mode
When selecting a RAID level, you need to consider your specific needs in terms of performance, protection, cost, and ease of use. Here are some guidelines for choosing the right RAID mode:
RAID 0 is best for performance. By striping data across multiple disks with no parity, RAID 0 provides fast read/write speeds. However, it offers no fault tolerance. Any disk failure results in total data loss. RAID 0 is best for non-critical data where speed is the priority.
RAID 1 is ideal for critical data that needs full redundancy. By mirroring data across disks, RAID 1 provides complete data protection and improves read speeds. However, you lose 50% of total capacity to redundancy and write speeds are not improved. Use RAID 1 when data protection is crucial.
RAID 5 provides a balance of speed, capacity, and redundancy. Data and parity is striped across disks, allowing for one disk failure with no data loss. RAID 5 is a good compromise for important data where you need fast access and protection without high cost. However, write speeds are impacted by parity calculation.
RAID 6 offers the highest level of redundancy by using double distributed parity. It can sustain up to two disk failures with no data loss. Use RAID 6 only for mission critical data where redundancy is essential. RAID 6 has slower write speeds than other RAID modes due to parity overhead.
RAID 10 combines both RAID 0 striping and RAID 1 mirroring for increased performance and redundancy. It requires a minimum of four disks. RAID 10 is best for applications that demand speed, protection, and redundancy like transactional databases.
The RAID mode that fits your needs depends on your priorities – speed, redundancy, efficiency etc. Consider the advantages and disadvantages of each level before deciding.
Implementing RAID
There are a few different ways to implement RAID depending on your setup:
Through the operating system – Most operating systems like Windows, Linux, etc. have built-in software RAID that can be configured through the OS itself. This involves going into disk management utilities and selecting your disks to create the RAID arrays.
Third party software – There are also third party software RAID solutions like Intel RST, AMD StoreMI, etc. that can be installed to handle configuring and managing RAID through a dedicated application.
RAID controller card – For hardware RAID, a dedicated RAID controller card needs to be installed in the computer. The disks are connected to the controller, which then handles the RAID configuration and processing. Many server motherboards have RAID controllers built-in.
BIOS/UEFI – Some PC BIOS and UEFI firmware also have the option to enable and configure RAID before the OS loads. This acts similar to a hardware RAID card.
Overall the setup process involves selecting the disks, choosing the RAID level, and assigning them to the array. Additional steps like formatting and mounting the volumes are also required.
Monitoring and Maintaining RAID
It is important to regularly monitor the status of a RAID array to identify and address any potential issues before they cause major problems. Here are some tips for monitoring and maintaining RAID:
Check the RAID status frequently – Most RAID controllers include management software that enables checking the status of the array and individual drives. This allows identifying failed drives or other issues. It’s a good idea to check the status at least weekly if not daily depending on the criticality of the data (1).
Watch for warning signs – Signs like slower performance, unusual noises from drives, increasing frequency of read/write errors, etc. can indicate a potential drive failure before it becomes critical. Monitoring tools can identify these signs (1).
Handle failed drives immediately – As soon as a failed drive is identified, it should be replaced. With redundant RAID levels like RAID 1, 5, 6, or 10, the array will continue operating in a degraded state temporarily. But the array is at risk until the failed drive is replaced (2).
Perform consistency checks – For redundant RAID levels, it’s a good idea to periodically perform consistency checks and repair parity or mirrors. This helps identify any inconsistencies or bad sectors. Many RAID controllers can schedule automatic consistency checks and repair (2).
Backup critical data – While RAID provides redundancy for failure tolerance, it is not a backup. Critical data on the RAID array should also be backed up externally. This protects against catastrophic failure of multiple drives or the array itself.
By staying on top of monitoring and maintenance activities, the uptime, integrity and performance of a RAID array can be maximized.
References:
(1) https://www.reddit.com/r/drobo/comments/12awhri/drobo_5c_alternative/
(2) http://www.morere.eu/IMG/pdf/rcu_ug.pdf
Conclusion
In summary, SATA RAID allows combining multiple hard drives together for improved performance and/or reliability. The main SATA RAID modes are:
- RAID 0 stripes data across disks for faster reads/writes but offers no redundancy.
- RAID 1 mirrors disks for full redundancy but uses double the storage.
- RAID 5 stripes data and parity information across disks for redundancy while optimizing storage usage.
- RAID 6 is like RAID 5 but with double distributed parity for extra fault tolerance.
- RAID 10 mirrors and stripes data for both speed and redundancy.
Choosing the right SATA RAID mode involves balancing performance, fault tolerance, and available disks. RAID improves storage performance and reliability but is not a replacement for backups. Careful setup, monitoring and maintenance is required to gain maximum benefit from SATA RAID.
