The freezer method is a technique sometimes used to try to recover data from a hard drive that is not functioning properly. It involves literally placing the hard drive in a freezer for a period of time in an attempt to get it to temporarily work again so data can be retrieved from it.
How does the freezer method work?
The basic premise behind the freezer method is that cooling the hard drive down can cause any physical issues with the drive, like a stuck spindle or failed components, to temporarily contract and function again briefly. The cold temperature basically puts additional stress on and shocks the drive, which can disrupt whatever issues are preventing it from working correctly.
Some of the ways the freezing temperature can help include:
- Contracting parts inside the hard drive enclosure like the platters and spindle, potentially unsticking them
- Shrinking swollen components like capacitors back closer to their normal size
- Hardening lubricants that may have melted or softened, allowing the drive to spin again
The hope is that when the now frozen drive is quickly connected to power and a computer, it will be able to spin up, be detected, and allow data to be copied off of it before it warms up and ceases functioning again.
When should the freezer method be used?
The freezer method is generally considered a last resort option to attempt to recover data from a fully non-functional hard disk. It should only be tried after other repair and recovery methods have failed, as it has a very low chance of succeeding.
Some signs the freezer trick is worth attempting include:
- The hard drive spins up initially but then stops, indicating a potential physical problem
- You can hear clicks or other odd sounds coming from the drive as it tries to spin up
- The drive powers on but is not detected by the computer
Issues like severe logical file system corruption or a complete electronic failure of the drive’s controller are unlikely to be helped by freezing the drive.
How to try the freezer method
If you decide to experiment with the freezer technique, here are the basic steps involved:
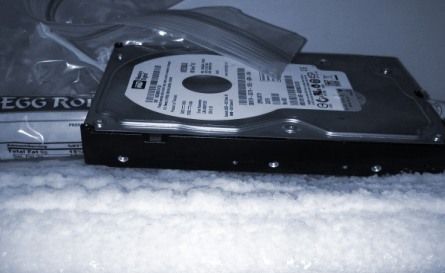
- Remove the hard drive from the computer and place it in a sealable plastic bag. This protects it from condensation when removed from the freezer.
- Wrap the bagged drive in a towel or other insulating material. This slows down warming when removed from the freezer.
- Place the wrapped drive in the freezer for a minimum of 2 hours. Some recommend 24 hours or longer for best results.
- Once adequate time has passed, immediately remove the still-wrapped drive and connect it to a computer system.
- Boot the computer and see if the drive is detected and data can be accessed. Work as quickly as possible before it warms up.
- If needed, try placing the drive back in the freezer for longer periods to repeat the process.
Some other tips for attempting the freezer method include:
- Use a computer you don’t mind risking data loss on, as the dying drive could fail completely at any time
- Make sure you have all necessary cabling, adapters, and enclosures ready to connect the drive quickly
- Only leave the bare drive in the freezer, removing any circuit boards or connectors first
- Set the freezer to the coldest temperature possible for maximum effect
Does the freezer trick actually work?
There are many anecdotal reports online of people successfully using the freezer technique to temporarily revive failing hard drives and recover data from them. However, there are also many cases where it failed entirely. So whether or not it will work for you is uncertain.
Some key statistics on success rates:
- Data recovery experts estimate it works in only about 15% of cases overall
- The technique is most successful on older hard drives, rather than modern high-density ones
- Drives with physical failure symptoms have about a 50% chance, vs. 20% for drives with no signs of physical issues
- The longer the freezer time, the higher the success rates in most cases
There are also dangers and risks to consider with freezing a drive:
- The temperature change can further damage components like the controller or platters
- Any moisture that penetrates the bag can severely damage the drive when frozen
- Repeated freezing and thawing can degrade the drive each time
Alternatives to the freezer method
While the freezer technique is sometimes worth a shot, there are also other options for recovering data from failed drives in many cases:
- Professional data recovery service – The best choice overall, with technicians experienced in specialized techniques like platter swaps and drive repair in dust-free cleanrooms.
- DIY data recovery software – Affordable apps that can restore files if logical corruption is the issue, not physical failure.
- Drive repair – Services that will diagnose issues and attempt fixes like replacing controller boards or motors.
- Data recovery experts – Specialists who possess advanced skills and tools inaccessible to average users.
These alternatives are often much more successful than DIY freezing, even if not cheap. But the freezer method is low cost and worth trying as a desperate last step before discarding the drive or paying for recovery.
Freezer method case studies and examples
Looking at real-world examples can provide more insight into when the freezer trick works, and best practices.
Successful Western Digital recovery
In this case, a Western Digital 1TB hard drive was failing to spin up properly. Upon powering it on, rattling sounds could be heard as the platters struggled to turn but couldn’t gain momentum. The drive was not detected at all by computers it was connected to.
The user removed the drive from its enclosure and placed it in a freezer bag, squeezed out excess air, then wrapped it in paper towels. It was then frozen for a full 48 hours at -4F (-20C).
Immediately upon removal from the freezer, the drive was plugged into a SATA dock and the computer was booted up with data recovery software ready. For approximately 5 minutes, the drive managed to spin up and was detected by the computer. The user managed to image the drive to a separate device before it ceased functioning again after warming up.
In the end, though very temporary, the 48-hour freezing allowed complete data recovery, avoiding expensive professional services.
Failed Seagate recovery attempt
In another example, a 3TB Seagate hard drive experienced serious bad sector corruption, causing read/write head stalls and clicks as the drive tried to access damaged portions of platters. The computer detected the drive, but was unable to access files on it.
The user backed up as much data as possible initially before freezing the drive in a bag for 24 hours at 0F (-18C). Upon removal, the drive powered on but no additional data could be read, with the same detection and head crash issues occurring.
A second 48 hour freezing also produced no change or additional recovery of files. In this case, the physical damage from bad sectors was too severe for the freezer trick to provide any temporary fix or further data access.
Freezer method questions and answers
Here are answers to some common questions people have about using the freezer method on hard drives:
How cold should I get the drive?
The colder the better! For best results, cool the drive as much as possible by setting your freezer to its lowest temperature, generally around 0°F (-18°C). Some people recommend using dry ice to reach temperatures as low as -109°F (-78°C).
Can I plug in the drive while it’s still cold?
No, you should never power on a hard drive while it is still freezing cold. Allow it to warm up slightly first by letting it sit for a minute after removing it from the freezer. If powered on while icy, condensation can form and damage the drive.
How long should I leave the drive in the freezer?
Recommendations range from 2-3 hours to up to a full day or longer. The longer the better in most cases, just be wary of condensation forming once you remove it. 24-48 hours is a good minimum time for drives with physical issues.
Can I freeze a solid state drive?
Freezing an SSD is not recommended, as they do not have moving platters and spindle motors that can potentially be helped by contracting from the cold. The extreme temperature change can actually damage chips and other components on an SSD circuit board.
Is freezing a drive dangerous for it?
Yes, the freezing process can certainly further damage a drive and lower the chances of recovering data from it. Only try the freezer method if you’ve exhausted other options and are willing to risk losing the data for good.
What percentage of drives can be recovered with the freezer trick?
Estimates vary widely, but published statistics report around a 15% success rate on average. For drives with physical problems like stuck spindles, success rates may reach 50% or better.
Conclusion
Freezing a malfunctioning hard disk is sometimes touted as a miracle DIY data recovery technique. But in reality, it is a risky, last resort option with relatively low success rates. However, it can be worth a shot when all else fails and before throwing the drive away or paying thousands for professional recovery. Just be sure to take precautions like bagging the drive and limiting warm-up time when attempting it.