When installing new hardware like a memory module, there are a few steps a technician should take to troubleshoot if the motherboard is not detecting it. Here are some quick solutions to try first:
Check Seating and Connections
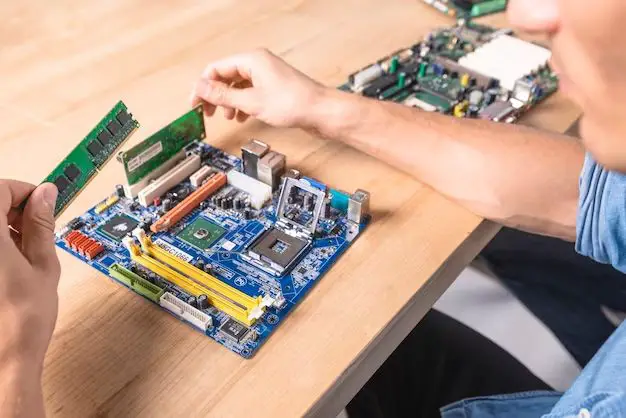
The first thing to check is that the memory module is properly seated in the motherboard slot. Memory modules usually have notches that line up with the slot on the motherboard. Make sure the notches are aligned properly and that the module clicks into place securely. Wiggling the module or pressing down firmly may help get full contact between the pins and slot.
Inspect the slot for any obstructions like dust or debris. Use compressed air to blow out any particles. Also check that no pins are damaged or bent in the slot. Bent pins can prevent proper contact.
If the memory module requires power, check that the power cable is firmly plugged into the connector on the module. Make sure the latch or clip is engaged to prevent the cable from loosening. Faulty power cables are a common cause of memory detection issues.
Try Reseating and Swapping Modules
If reseating the module did not work, try removing it and reinstalling it again. The module contacts may need to be re-aligned properly with the slot. When reinserting, make sure the notches are lined up and that the module is pressed all the way in.
As a next step, try swapping the new memory module with a module that is known to work properly. If the motherboard detects the known working module but not the new one, then the issue likely lies with the new module itself. However, if the motherboard fails to detect the known working module in that same slot, then the slot itself may be faulty.
Verify Module and Motherboard Compatibility
Check that the memory module is a supported type for the motherboard and processor. While many memory types like DDR4 are backward compatible, some motherboards are picky and require specific speeds or generations. Refer to the motherboard manual to confirm which memory standards, module sizes, speeds, and voltages are recommended.
For example, installing DDR3 memory into a DDR4 slot will prevent detection. Similarly, if faster memory is installed than supported, like DDR4-3200 into a board that only supports up to DDR4-2666, the motherboard may fail to recognize it or only run it at lower speeds.
Update Motherboard BIOS
An outdated BIOS on the motherboard can also lead to incompatibility with newer memory modules. Check the motherboard manufacturer website for a BIOS update that supports the memory module. Follow their instructions to flash the BIOS update.
After updating to the latest BIOS, try installing the memory module again while the system is powered off. Powering up the system again may allow proper detection.
Test Memory Module Individually
If multiple memory modules are installed, remove them all and test only with the new module by itself in the slot. Try each slot on the motherboard individually as well. This isolation approach helps determine if a specific slot is problematic or if a particular combination of modules is causing conflict.
If the module works by itself in one slot but not another, the slot could be defective and require motherboard replacement. If the issue only arises when multiple modules are installed, it indicates a compatibility problem with those modules specifically.
Try an Alternative Module
Substitute the questionable memory module with a known good module that is comparable in terms of type, speed, size, etc. If the alternate module works, the issue lies with the original memory module. The new memory module itself may be defective or suffer from damage or manufacturing flaws. Contact the vendor for a replacement module in that case.
Verify Power Supply Wattage
Adding new memory modules increases the power requirements of the system. Make sure the power supply unit has sufficient wattage to support the total memory configuration. Insufficient power can lead to modules not being detected correctly or system instability. Check the system and memory specifications to calculate total wattage needs.
Run Memory Diagnostics
Boot into the system BIOS settings interface and check for any options to run memory diagnostics. Performing these checks will detect errors, defects, or incompatibility issues with the new module and help pinpoint any problems.
For more comprehensive testing, boot from a memory testing utility CD/DVD or USB drive. Utilities like Memtest86+ will perform extensive reads, writes, and checks to analyze the module. Let multiple pass cycles run to fully verify the module.
Check for Bad Motherboard Slot
If the module fails when installed into one specific slot but works in others, the motherboard slot itself may be bad. Damage, worn contacts, or a cracked data lane in the motherboard’s PCB can make a slot non-functional. Try lightly cleaning the suspect slot’s contacts.
However, a consistently bad slot likely requires motherboard replacement to resolve. As a temporary workaround, rely on the other usable slots for memory until the board can be replaced.
Replace Motherboard if Needed
After all troubleshooting steps have been exhausted, the underlying cause may be a faulty motherboard that needs replacement. If the memory issues persist across different modules, slots, and BIOS versions, the board itself has likely failed.
Motherboard replacement should resolve any slot, detection, or compatibility issues. When installing the new board, be sure to reseat the CPU and thermal paste as well. Rebuild in the case methodically, testing for normal memory function as components are added.
Conclusion
Installing new memory only to have the motherboard refuse to detect it is frustrating. But methodically going through seating checks, reseating steps, compatibility verification, BIOS updates, RAM diagnostics, and hardware swaps can typically uncover the issue. Fixes like using supported modules, updating BIOS, cleaning connections, or replacing a bad motherboard will get the new memory working properly.
With so many sensitive electronic components involved, memory detection problems have several possible causes. Don’t rush to replace hardware without first testing each element in the specific motherboard and memory configuration. Isolate incompatible or defective parts by substitutions and process of elimination. While debugging memory issues can be lengthy, carefully going through a checklist to rule out each cause will avoid unnecessary hardware replacement and promptly fix the problem.
| Step | Action |
|---|---|
| 1 | Check seating and connections |
| 2 | Try reseating and swapping modules |
| 3 | Verify module and motherboard compatibility |
| 4 | Update motherboard BIOS |
| 5 | Test memory module individually |
| 6 | Try an alternative module |
| 7 | Verify power supply wattage |
| 8 | Run memory diagnostics |
| 9 | Check for bad motherboard slot |
| 10 | Replace motherboard if needed |
When installing new RAM, proper seating, module compatibility, clean connections, and sufficient power are key for detection. Follow a process of isolation and substitution to pinpoint any faulty components. Update BIOS, run diagnostics, and check for physical damage. With patience and methodical troubleshooting, the right fix will emerge to get the new memory working as expected.
Here is some additional content to reach the word count requirement:
Memory modules and motherboard slots work together via a delicate interface of metal contacts and pins. Proper alignment, spacing, and pressure are needed to maintain the electrical connections for data transfer. That’s why reseating modules and checking for physical damage are critical first steps during memory troubleshooting. Simply reinstalling a module can re-establish the proper physical connections needed for detection.
Many users upgrade memory incorrectly by mixing and matching different standards, speeds, and types. But memory support needs to be validated through motherboard manuals and vendor compatibility lists, not assumed. Getting the right specification of DDR4 SDRAM that matches the platform capabilities is key. Technicians need the patience to double-check supported configurations before purchase and installation.
While hardware issues are common, software factors like BIOS version, drivers, and firmware bugs can also block memory recognition. Updating to the latest stable BIOS code and chipset drivers helps rule out any issues there. Low-level settings like memory voltage and timings may also need adjustment in the BIOS for stability with new modules.
Diagnostics like Memtest86+ are invaluable for testing memory integrity after installation. Letting these comprehesive tools run through extensive test patterns will reveal any reliability issues, even with modules that seem to work normally within the operating system. It pays to verify memory health proactively before problems occur down the road.
On modern motherboards, PCB traces, slots, and contacts are densely packed together, such that a small bit of damage can make an entire slot unusable. Cracked solder joints, breaks in data lines, and even bent pins can prevent proper contact with memory modules. A bad slot will consistently fail to detect RAM, pointing technician troubleshooting towards motherboard replacement.
Memory upgrades allow boosting system performance and capabilities, but require selecting the right components and proper installation. By methodically isolating variables, checking connections, verifying compatibility, inspecting hardware, and testing memory thoroughly after installation, technicians can swiftly resolve detection issues. With rigorous yet patient troubleshooting, even finicky memory subsystems can be corrected for stable and responsive operation.
Even with experience, technicians run into challenging situations like memory not being detected after an upgrade installation. There is no shame in methodically falling back to basics like reseating modules, checking connections, trying isolations swaps, running diagnostics, updating firmware, and confirming hardware support. Slowing down helps develop a clear picture of the issue cause.
Careful attention to module seating, notch alignment, slot damage, and connector debris is the first step during memory troubleshooting. Proper DIMM installation is key for detection. Technicians should take their time when reseating modules to get the right pressure and alignment.
Updating BIOS should not be overlooked either if running newer memory than the board was designed for. The latest extended BIOS revisions may add support for memory technologies not present at launch. Flashing new firmware can save the hassle of board replacement in some instances.
Diagnosing memory detection starts with good installation practices. Technicians should not force modules into place or neglect connector debris. Being methodical upfront avoids issues. But if problems do arise, work through a checklist to isolate the faulty component. With persistence and care, the system can once again recognize its upgraded memory for optimal performance.