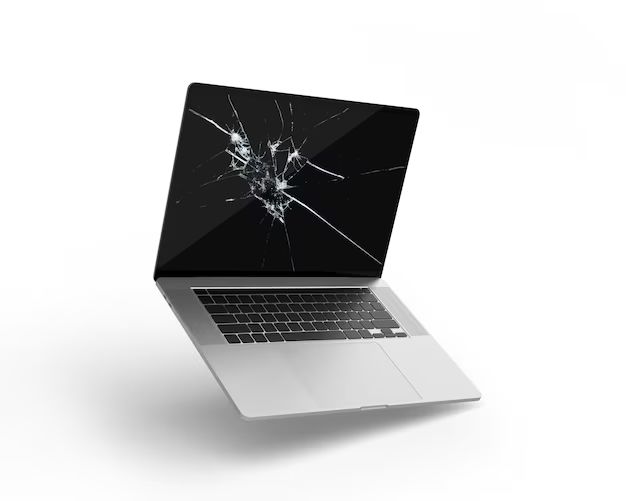
Assess the Damage
The first step is to thoroughly examine your MacBook’s screen to determine the extent of the damage. Carefully look at the screen for any cracks, chips or external damage. Also check if the screen is displaying any distorted or discolored visuals like blurry images, lines, spots or color abnormalities.
Gently run your fingers over the screen to feel for cracks or chips on the glass surface. Check the corners and edges of the frame for any dents or external damage. Examine the screen at different viewing angles and under bright light to see if there are any cracks in the glass or dead pixels.
Try connecting your MacBook to an external display or TV using an HDMI cable. If the image appears normal on the external display, then the issue is isolated to the MacBook’s built-in screen and not a problem with the graphics card.
This initial damage assessment will confirm whether the screen is fully cracked and non-functional or if the underlying LCD is still intact and displaying visual artifacts. Determining the type of damage present will inform the next troubleshooting steps.
Back Up Your Data
Before sending your MacBook in for repair or attempting to replace the screen yourself, it’s crucial to back up your data. Connect an external hard drive to your MacBook using a USB cable or Thunderbolt cable. Then launch Time Machine and select the external drive as the backup disk. Time Machine will automatically back up your entire Mac, including documents, photos, emails, programs, app settings, and more [1]. Let the initial backup complete overnight if you have a lot of data. Once finished, your MacBook data will be saved and accessible from the external drive if needed during the repair process.
Be sure to eject and disconnect the external drive after the backup finishes. Avoid excessive connecting and disconnecting of the drive to prevent any further damage to your MacBook ports. With your data backed up safely, you can proceed with confidence in sending your MacBook for professional screen repair or attempting a DIY fix yourself.
Turn Off and Unplug
Before attempting any repairs, it’s important to properly shut down your MacBook. To do this, click on the Apple logo in the top left corner of the screen and select “Shut Down”. Allow the MacBook to fully power off before proceeding. Force shutting down by holding the power button should only be done if your computer becomes unresponsive.
After shutting down, disconnect all cables and accessories attached to your MacBook including the power adapter, any external monitors, USB devices, and SD cards. Unplugging all connected devices prevents any potential damage during the repair process.
Properly shutting down and disconnecting all accessories ensures your MacBook screen can be safely repaired.
Book a Repair Appointment
If you have AppleCare+ coverage for your MacBook, the best option is to contact Apple support to schedule a repair appointment at an Apple Store or Apple Authorized Service Provider. Without coverage, Apple quotes repair costs around $475-615 for a MacBook Pro display and $475-575 for a MacBook Air display 1. Bring your MacBook to the Apple Store Genius Bar or make an appointment with an authorized service provider to get an exact quote.
When booking your repair appointment, ask the technician for an estimate of the full repair cost and expected timeframe. Standard display replacements through Apple typically take 3-5 business days. Apple Stores can sometimes offer same-day screen repairs, if parts are in stock. Independent and third-party repair shops may have shorter turnaround times and lower costs, but the quality of parts may vary.
Mail In for Repair
If you don’t live near an Apple Store or authorized service provider, you can mail your MacBook directly to Apple for repair. This is often the most convenient option for screen repair if you can’t easily visit a repair shop. Here’s how the process works:
Request packaging from the repair provider. Apple will send you a box specifically designed for shipping MacBooks. This ensures your device is properly protected during transit. Follow the instructions for carefully packing your MacBook.
Ensure your MacBook is protected during shipping. Wrap it in the packaging materials provided and follow all instructions for preparing your device. This prevents further damage from occurring. You may need to remove peripherals like hard drives before shipping.
Purchase insurance and tracking for the package. This gives you peace of mind and the ability to monitor the status of your repair. Sign up for updates from the courier so you know when your MacBook has arrived safely.
Be prepared for 1-2 weeks without your computer. Repair times vary, so make sure you have a backup laptop available if needed for work or school.
Overall, mailing your MacBook directly to Apple is the most hassle-free repair option if an Apple Store isn’t nearby. Just take precautions to keep your device safe during shipping.
Back Up Sensitive Data
If there is any sensitive personal data, private files, or confidential business information on the MacBook, be sure to back these up before proceeding with repairs. Consider manually copying important documents, photos, emails etc. to an external hard drive or cloud storage. For maximum privacy, you may want to completely wipe the hard drive using Apple’s instructions for erasing your Mac: Erase your Mac.
Wiping the hard drive removes all data and returns the computer to factory default settings. This ensures no private information remains on the device during the repair process. Be sure to have backups of anything important before erasing the hard drive, as all data will be deleted. Consider enabling FileVault encryption on your MacBook when you get it back, to protect sensitive data in the future.
Use External Display
If your MacBook screen is broken but the computer is still working, you can connect your MacBook to an external display like a TV or monitor and use that instead. This allows you to see what’s on your MacBook screen and operate the computer even with a cracked or damaged display.
To connect your MacBook to an external display:
- Use an HDMI, DVI, Mini DisplayPort, or VGA cable to connect your MacBook to the TV or monitor. Make sure you have the appropriate adapter if needed.
- Close the MacBook lid to send the display signal to the external monitor instead. The MacBook screen will turn off.
- Use your keyboard and trackpad to control the MacBook as you view the display on the connected TV or monitor.
This makes it possible to backup data, use laptop functionality, and get work done even with a busted MacBook screen, provided the rest of the computer is still in working order. Just connect your MacBook to another display with the proper cable and use the external screen instead of the built-in display.
Replace Screen Yourself
If you’re comfortable with electronics repair, you may choose to replace the broken MacBook screen yourself. Here’s what you’ll need to do:
Purchase a replacement screen and any necessary tools. iFixit sells quality MacBook screens and provides detailed step-by-step repair guides. Refer to their MacBook Air 13″ Late 2020 Screen Replacement guide for exact parts and tools needed for your model.
Follow the repair guide carefully. Taking your time and following each step precisely reduces the risk of further damage. Don’t force or rush disassembly of any components.
Consider the risks of DIY repair. While do-it-yourself MacBook screen replacement can save on repair costs, improperly disconnecting cables or damaging components could make the problem much worse. Take precautions against electric shock. There’s also a chance the replacement screen may not fully restore functionality.
Data Recovery Options
If there is important data on your MacBook that you need to recover, you have a few options even with a broken screen:
You can use data recovery software like Disk Drill (https://www.cleverfiles.com) to scan your Mac’s hard drive and recover lost files. Connect the MacBook to another Mac using Target Disk Mode and run the software from there.
Alternatively, you can take your MacBook to a professional data recovery service. They have sophisticated tools and clean room facilities to open up the MacBook, access the storage, and recover data (https://www.easeus.com/mac-file-recovery/recover-data-from-mac-broken-screen.html). This can be expensive but may be your last resort.
Before attempting recovery, be sure to back up any accessible data on your broken MacBook to an external drive if possible.
Disposal and Recycling
If your MacBook screen is beyond repair, you will need to properly dispose of it. Apple offers a free recycling program where you can send your old MacBook to be recycled responsibly. The Apple Free Recycling program allows you to recycle any Apple computer purchased online or at a retail Apple store. When recycling, select the “Apple Recycling Program” option.
You can also find e-waste recycling facilities in your area that will accept used electronics like MacBooks for recycling. Make sure to remove any sensitive data stored on the device before dropping it off for recycling. Sites like Apple’s Recycling National Services page can help you locate a reputable e-waste recycler.
Properly disposing of your broken MacBook screen keeps e-waste out of landfills and allows the device to be recycled in an environmentally responsible way. Handling disposal carefully also ensures any sensitive personal data is not compromised.