Solid state drives (SSDs) have become increasingly popular in recent years as a storage solution due to their fast speeds and lack of moving parts. However, when it comes time to replace or dispose of an SSD, properly removing the stored data can be a challenge compared to traditional hard disk drives. There are several techniques that can be used to remove data from an SSD, each with varying levels of effectiveness. In this article, we will examine the most common techniques and evaluate which one is the most effective for permanently erasing data from an SSD.
How Data is Stored on an SSD
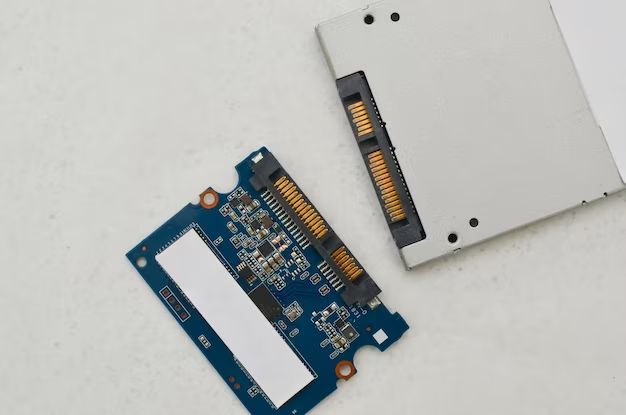
To understand data removal techniques, it is helpful to first understand how data is stored on an SSD. Unlike a traditional hard drive that stores data on a magnetic platter, data is stored on an SSD using flash memory chips. These chips contain individual memory cells that use transistors to store one or more bits of data as an electric charge.
SSDs organize their memory cells into pages, typically 4-16 kilobytes in size. Pages are further organized into blocks, usually 128-256 pages per block. The SSD controller maps logical block addresses from the operating system to physical pages and blocks on the drive.
When new data is written to the SSD, it is programmed into empty pages. However, no data can be directly overwritten at the page level due to the nature of NAND flash memory. Instead, the SSD controller must first erase a block before new data can be written to its pages. This process is known as out-of-place writes.
The original data is not actually deleted during an overwrite, but rather marked as invalid. The SSD relies on the TRIM command from the operating system to identify which blocks of data are no longer needed. The drive can then erase and reuse those blocks more efficiently.
Secure Erase
The most thorough technique for removing all user data from an SSD is to use the drive’s built-in secure erase functionality, also known as sanitization. This will completely reset all memory cells in the flash memory to their factory default state of 1s, effectively overwriting any previous user data.
The secure erase command is built into the firmware of the SSD and performed at the hardware level. It allows the drive to ignore any previously mapped logical block addresses and write directly to the raw flash memory cells. The process overwrites all user data, including any data in queued erase blocks waiting to be trimmed.
Secure erase also reinitializes the SSD’s encryption key if the drive uses hardware-based full-disk encryption. This prevents any possibility of recovering old data based on encryption keys.
The time required to perform a secure erase varies based on the capacity of the SSD. It can range from a few minutes for lower capacity drives to over an hour for high capacity SSDs. The process cannot be interrupted once started, so it’s important to allow it to complete fully.
Most SSDs support the ATA Secure Erase command built into the hardware specifications. SSDs designed for business and enterprise use often include additional enhanced secure erase capabilities. Software utilities from the SSD vendor can also securely erase drives.
Advantages
– Overwrites all data at the flash memory level, making recovery impossible
– Resets all internal SSD data mappings and encryption keys
– Fastest method to securely erase higher capacity SSDs
– Supported as a standard feature on most SSDs
Disadvantages
– Requires OS support for the ATA Secure Erase command
– May not be possible if the SSD controller or firmware is damaged
– Requires connecting the SSD directly via SATA or other interface
Encryption and Sanitization
Many SSDs, particularly those designed for business use, offer encryption capabilities to secure data at rest on the drive. When enabled, all user data written to the drive is automatically encrypted in real-time using an AES encryption algorithm and a hardware encryption key.
To sanitize an encrypted SSD, the encryption key needs to be securely deleted. This can be accomplished by issuing the appropriate ATA command to reset the encryption key or by performing a full secure erase which reinitializes encryption. Without the key, any encrypted data on the drive becomes inaccessible and irrecoverable even if the flash memory is imaged.
Self-encrypting SSDs that meet the TCG Opal standard allow you to independently sanitize ranges of logical blocks without affecting the rest of the data. This selective data purge only resets encryption keys for designated regions. A full secure erase is still required to overwrite all data, but key sanitization provides a targeted data removal tool.
TCG Enterprise SSDs extend this with the concept of cryptographic erasure. The controller generates a new encryption key to re-encrypt existing data in place. The old key is then securely deleted, rendering the previous encrypted data unreadable. This allows sanitization of individual pages or blocks without the lengthy process of overwriting the entire SSD.
Advantages
– Enables selective sanitization of portions of encrypted SSDs
– Cryptographic erasure re-encrypts data faster than overwriting entire drive
– Built-in encryption eliminates need for separate software encryption
Disadvantages
– Requires SSD with hardware-based encryption capabilities
– Full drive overwrite still required for complete data removal
– Encrypted drive data remains recoverable if key is compromised
Block Erase
Performing a block erase is another technique supported by most SSD firmware. This allows you to directly target and sanitize individual blocks on the flash memory.
Block erase works by issuing a low-level command to the SSD that tags specific data blocks for erasure. The contents of the erase blocks are then overwritten by the controller with binary 1s to remove any residual voltage representing the old data.
Unlike secure erase which resets the entire drive, block erase allows you to select portions of the SSD for data removal. The process can be faster than overwriting the full drive capacity. However, only directly addressed blocks will be sanitized, leaving user data in other blocks untouched.
The effectiveness of block erase varies based on the granularity of addresses used. Erasing at the block level using 4096 byte sectors leaves a high chance of recoverable data remnants. Specifying 512 byte sector addresses improves the chances of data removal across pages.
Advantages
– Allows targeted erasure of specific blocks of data
– Much faster than rewriting the entire SSD capacity
Disadvantages
– Does not overwrite all user data like secure erase
– Remaining data may still be recoverable by forensic methods
– Requires ability to directly address flash memory blocks
Trim Command
The TRIM command is an essential part of managing data and performance on SSDs. It allows the operating system to notify the SSD which blocks of data are no longer in use and can be erased.
Executing the TRIM command on an SSD does not actually erase any data – it simply tells the controller which pages contain stale data waiting to be purged. The SSD can then perform garbage collection to erase those pages and blocks in the background to prepare them for reuse.
Using TRIM to mark data blocks for erasure will prevent remnant data from being accessible to the operating system. However, it does not actively overwrite data at the flash memory level like secure erase. Portions of old data may remain intact at cells until directly overwritten by new writes.
Due to this lack of guaranteed erasure, the TRIM command alone should not be relied upon for securely removing data from an SSD. It serves an important role in tuning performance, but other methods like secure erase are required to permanently purge data.
Repeatedly filling the drive with new non-sensitive data and TRIMming unused blocks may eventually cover more remnants of deleted data. But this is inefficient compared to block erase and provides less certainty than drive-level overwrites.
Advantages
– Native command built into operating systems and SSDs
– Essential for maintaining SSD performance
Disadvantages
– Does not directly overwrite or erase any flash memory cells
– Old data may remain until blocks are reused
– No guarantee all original data is made inaccessible
Drive Wipe Software
A number of third-party software tools exist to assist with erasing data from SSDs. These drive wiping utilities work by repeatedly overwriting the flash memory cells with patterns of 1s and 0s or random data.
Most tools will write multiple passes using different data patterns:
– Initial pass: All 1s
– Second pass: All 0s
– Third pass: Random data
– Additional passes: More randomized data
The verification process checks that the SSD accurately stored the wipe pattern and overwrote the original data.
Well-designed SSD wiping software will issue the TRIM command between passes to mark unused pages ready for erasure. The tools also typically integrate with the SSD controller to directly target different pages and blocks.
However, extensive overwrite passes are generally excessive for properly sanitizing modern SSDs. The additional passes yield diminishing returns compared to secure erase. More passes take considerably longer to complete against higher capacity drives.
Advantages
– Thorough overwrite reduces chances of remnant data
– Allows targeting specific disk ranges or whole drive
Disadvantages
– Excessive overwrite passes waste time vs. secure erase
– Requires software compatible with SSD controller
– May fail to sanitize SSD if flash memory is damaged
Degaussing/Destruction
Physically degaussing or destroying an SSD will render all data irretrievable by severely damaging the NAND flash memory chips. However, this is an extreme last resort option that should only be considered if no other sanitization options are available.
Degaussing exposes the SSD to a strong magnetic field that realigns or randomizes the voltage states representing data stored in the flash memory cells. But SSD components like capacitors and onboard RAM may still retrain data. Total physical destruction is the only way to ensure no data can ever be recovered.
Specialized companies offer degaussing services to render data recovery impossible without completely destroying the SSD hardware. But the techniques involved may still fail against certain types of chips. There are also environmental concerns around properly disposing of the degaussing waste.
Physically damaging the NAND chips through abrasion, pulverizing or incineration will prevent forensic experts from ever reading out their data again. However, this level of irreversible destruction means the SSD is no longer functional and must be entirely replaced.
Advantages
– Strong degaussing fields may scramble cell data
– Physical destruction guarantees unrecoverable data
Disadvantages
– May still fail to remove all recoverable data remnants
– Permanently damages SSD rendering it unusable
– Degaussing requires specialized tools and training
Comparison of Techniques
| Technique | Ease of Use | Speed | Security |
| Secure Erase | High | Fast | Excellent |
| Encryption Sanitization | Medium | Fast | Good |
| Block Erase | Low | Medium | Medium |
| TRIM Command | Medium | Slow | Low |
| Drive Wipe Software | Medium | Very Slow | Good |
| Degaussing/Destruction | Difficult | Fast | Excellent |
Conclusion
When it comes to permanently removing confidential data from an SSD, the most effective technique is to use the drive’s built-in secure erase functionality. Executing the ATA Secure Erase command will completely reset all memory cells to their factory state, overwriting any user data.
Secure erase is supported as an industry standard command across most SSDs and efficiently sanitizes the entire drive. It outperforms excessive software overwrites or trying to manually target individual blocks. Secure erase also resets encryption keys and remapping tables, eliminating any chance of recovering old data.
For SSDs that support encryption, sanitizing the encryption key provides a fast method for rendering encrypted data irrecoverable without overwriting all drive contents. This is a useful technique for selectively erasing portions of self-encrypting SSDs. Still, secure erase should be applied for maximum data removal assurance when repurposing or retiring SSD storage.
By following industry best practices around secure erase, you can effectively sanitize your SSDs. This will prevent unauthorized access to any confidential data when disposing or reassigning SSD drives.
