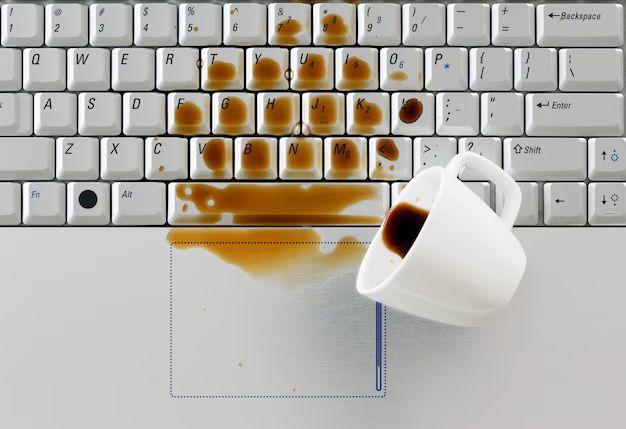
Assess the Spill and Your MacBook
When a spill occurs on your MacBook, it’s important to quickly assess the extent of the damage. Carefully examine where the liquid spilled – was it mostly on the keyboard, trackpad, or did it seep into any ports or vents? Also note if your MacBook was on or off when the spill occurred. Spills happening while the machine is powered up increase the likelihood of short circuiting and component damage.
Check for any signs that point to damage that has already occurred from the spill. Are any keys not responding when pressed? Is the trackpad behaving erratically or not at all? Do you notice any flickering, distortion, or discoloration on the screen? Listen for any odd sounds like crackling or popping noises. These can indicate short circuiting or irreversible damage, though not all spill damage leads to immediate symptoms.
If possible, allow your MacBook to air dry open and upright for at least 24 hours before attempting to turn it on again. This gives time for any residual liquid to evaporate and helps prevent further damage when powering up. Promptly assessing the spill situation right when it happens allows you to quickly proceed with drying and cleaning steps before permanent damage sets in.
Act Quickly to Minimize Damage
As soon as you spill liquid on your MacBook, it’s important to act fast to try to minimize any potential damage. The first thing you should do is immediately unplug the AC adapter and turn the MacBook off if it is still powered on. Having any electricity running through the machine with liquid present greatly increases the chances of a short circuit and irreparable damage to components.
Next, turn the MacBook upside down to help drain as much liquid out through the keyboard as possible. Tilt and angle the laptop to encourage the liquid to flow out. Be careful not to shake the computer as that can spread the liquid around internally.
Use a dry, soft towel to gently dab and absorb any excess moisture on the surface and around the keys. Avoid rubbing or pressing hard as that can further push the liquid into tiny crevices. The goal is to soak up as much of the spill as you can.
According to experts, water damage occurs instantly when liquid hits the inner workings of a laptop. However, the quicker you can remove the moisture, the better chance your MacBook has of surviving with minimal issues. Work carefully but swiftly in these initial moments after the spill to improve the outcome.[1]
Disassemble and Dry Out the MacBook
Once you’ve wiped away any excess liquid, the next step is to disassemble the MacBook to thoroughly dry out all internal components. Use a Phillips head screwdriver to remove the bottom case and expose the inside of the laptop.
With the bottom case removed, gently shake out the chassis to dislodge any drops of liquid that may have seeped inside. Tilting the laptop at different angles can help drain any collected moisture.
According to experts, you’ll want to let the laptop’s internal components air dry for at least 24 hours before attempting to turn it on again. Leaving it longer (up to 48 hours) is recommended if there was significant liquid spilled (1). This gives time for any lingering moisture to fully evaporate.
Place the disassembled laptop in a dry, warm (not hot) location while drying. Do not attempt to dry components with a hairdryer or other heat source, as this can cause damage.
Inspect and Clean Internal Components
Once you have fully disassembled your MacBook, it’s important to thoroughly inspect all internal components for any signs of corrosion or residual moisture from the spill. Pay particular attention to the logic board, keyboard, trackpad, and ports, as these areas often suffer the most damage from liquid exposure.
Use a can of compressed air to blow out any lingering droplets of coffee or moisture. Then, dip a soft toothbrush into 90% isopropyl alcohol and gently brush any corrosion or sticky residue away from the logic board and components. The high alcohol content helps displace moisture and sanitize the parts. Take your time and be very delicate, especially around any exposed circuits or ribbon cables.
It’s crucial to fully clean every nook and cranny, as even a small amount of uncleaned coffee residue can lead to component failure down the road. Check all flexible cables and sockets for any trapped moisture as well. If any component shows signs of permanent damage like corroded traces or connections, it may need to be replaced.
Once everything is cleaned, let the components air dry for at least 24 hours before reassembling your MacBook. This allows any lingering moisture to fully evaporate. With careful inspection and cleaning, you can remove coffee damage and extend the life of your laptop’s internal components.
Sources:
https://www.sewelltech.net/2022/10/20/top-10-liquid-spills-kill-laptop-computers/
Consider Replacement Parts
If the keyboard, trackpad, or battery have signs of corrosion after cleaning, they may need to be replaced. When replacing parts, it is best to use genuine Apple parts to maintain the integrity and functionality of your MacBook.
Liquid damage can corrode the keyboard’s underlying circuitry or cause sticky/unresponsive keys. A replacement keyboard for a 13-inch MacBook Pro costs approximately $500-$600 from Apple.
The trackpad may also be unresponsive if liquid seeped underneath. Replacing a MacBook Air trackpad will run about $175. Use a plastic spudger to safely detach it from the battery without damaging connections.
Finally, you may need a new battery if it was in direct contact with the spill. Batteries cost $200-$600 from Apple depending on the model. Handle lithium-ion batteries carefully and dispose of damaged batteries properly.
Reassemble MacBook
Once all internal components have been thoroughly cleaned, dried, and inspected, it’s time to reassemble the MacBook. This step requires care and patience to avoid further issues. Double check that all ribbon cables, connectors, screws, and components are seated and connected properly before closing up the case.
In particular, pay close attention to the following:
- Reconnect the battery cable firmly.
- Reattach any small ribbon cables that were removed, making sure they lock in place.
- Reseat RAM and SSDs properly.
- Carefully reattach any protective shielding that was taken off.
- Double check that no cables or components are trapped under anything before closing.
Once fully reassembled internally, replace the bottom case cover evenly and gently. Insert and lightly tighten all screws working around the edges first, then filling in the middle. Be very careful not to overtighten the screws and strip them. Uneven pressure when closing the case could damage components.
After screws are inserted, give the MacBook a gentle shake to check for any rattling that could indicate a loose component. Tighten any problem screws before proceeding.
Test MacBook Functionality
After fully reassembling your MacBook, it’s crucial to thoroughly test it for any lingering issues. First, plug it in, turn it on, and check basic functionality of the keyboard, trackpad, screen, and ports. Verify all keys are working properly and the trackpad accurately responds to gestures.
Next, run Apple’s onboard diagnostics to check vital components like the battery, SSD, and logic board. On Macs with Apple silicon, go to System Preferences > Software Update and choose “More info” under Diagnostics. For Intel-based Macs, restart your computer and press D. Follow the onscreen prompts to run diagnostics and identify any hardware issues.
According to discussions on Apple’s Support Communities, diagnostics can sometimes detect liquid damage on components like the logic board even if the MacBook is operational. If any issues are found, you may need to replace damaged parts or get professional repair service.
Source: https://discussions.apple.com/thread/5200434
Data Backup and Recovery
If your MacBook still powers on, immediately backup your data to an external hard drive or cloud storage service if possible. This will save you the hassle of trying to recover data from a dead SSD later.
If your MacBook no longer powers on or you are unable to backup the data, try using data recovery software like Stellar Data Recovery to scan the SSD and recover data before reformatting or wiping the drive. Professional data recovery services like Secure Data Recovery also have high success rates for liquid damaged Mac SSD recovery.
Recovering data from a dead or corrupted SSD can be challenging, so try all software recovery options before wiping the drive. But keep in mind water damage may make data recovery impossible, so regular backups are essential.
Apple Repair Options
If the damage from the coffee spill is extensive, you may need to take your MacBook to an Apple Store or Apple Authorized Service Provider for full repair. An Apple Genius Bar technician can diagnose the issues and provide a repair estimate.
For liquid damage repairs, Apple can fully replace any damaged parts like the logic board, trackpad, keyboard, etc. According to discussions on Apple support forums, the estimated cost for liquid damage repairs ranges from $500-$600 depending on the model and extent of damage (https://discussions.apple.com/thread/251416697). The Apple Store may be able to clean and dry out minor spills for a lower cost.
If you purchased AppleCare+ for your MacBook, some costs of liquid damage repairs may be covered. AppleCare+ extends the standard 1-year limited warranty to 3 years and provides up to two incidents of accidental damage coverage. Each incident is subject to a service fee such as $299 for a MacBook or $499 for a MacBook Pro.
Preventing Future Spills
There are several steps you can take to help prevent liquid spills on your MacBook in the future:
Use a spill-proof keyboard cover for added protection. These covers fit over your keyboard and protect it from spills, crumbs, and other debris. They are inexpensive and easy to install.
Avoid eating or drinking around your laptop. It’s easy for a spill to happen when you’re multitasking. Designate a separate area for food and beverages.
Keep your MacBook away from sinks, tubs, pools, or other sources of water. Don’t place it anywhere it could get splashed.
Handling liquids carefully around your laptop and being mindful of its proximity to spills can go a long way in preventing damage.