Assess the Damage
The first step is to assess the extent of the water damage to your computer. Try turning on your computer and see if it powers on and functions normally. If it does not turn on at all or is intermittent, then the damage is likely quite severe.
Examine the exterior and interior of the computer for any visible signs of water intrusion or corrosion. Look for water stains, mineral deposits from evaporated water, corrosion around ports and connectors, or any frayed or ripped cables. Pay special attention to the motherboard and internal components for oxidation or corroded traces and connectors. The more extensive and widespread the visible damage, the more repairs will likely be needed.
If the computer powers on and seems to work fine initially, it still may have unseen damage that can cause problems down the road. Water could be trapped under chips or saturate insulating materials, leading to short circuits or degraded performance over time. Test all functions thoroughly to uncover any underlying issues.
For guidance, see this article on inspecting water damage in electronics: https://healthvib.icu/how-to-fix-a-water-damaged-ps4-controller/
Remove Power Source
The first step you should take when your computer gets soaked is to remove the power source to prevent short circuits or other damage. If your computer is plugged into an outlet, unplug it immediately. Be extremely careful not to touch any wet components while doing this, as you could get electrocuted. If the computer has a removable battery, take it out right away as well. Removing the power source will stop electricity from flowing through the water-logged components and minimize further damage. Just be sure to avoid getting zapped in the process!
According to the Electronics Water Damage article on iFixit, “Removing power is the most important step you can take to prevent further damage” when electronics get wet. They caution that you should never plug in or turn on wet electronics, as that dramatically increases the chances of short circuiting.
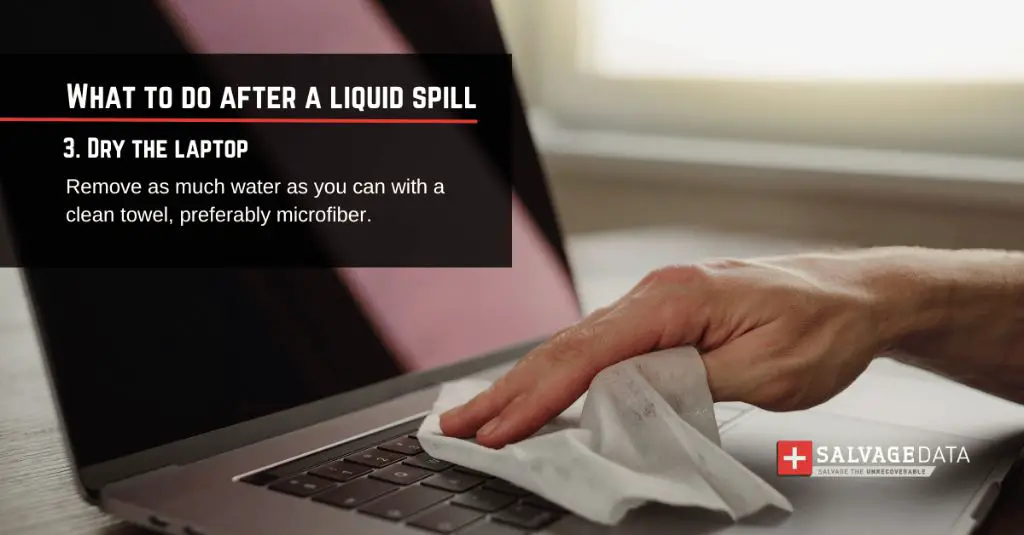
Dry the Computer
After removing any residual moisture, the next step is to thoroughly dry the computer’s exterior and interior. Here are some tips for properly drying a wet laptop or desktop computer:
Wipe down the exterior of the computer with a dry, soft towel. Carefully blot moisture from the keyboard, ports, vents, and other openings. Be gentle as to not damage any components.
Place the computer in a dry, well-ventilated area. Position it near a fan or dehumidifier to help eliminate lingering moisture. Do not use a hairdryer or other direct high heat source, which could cause damage.
If possible, open up the computer to access the interior. Use compressed air to blow out any water droplets. Check components like the RAM, hard drive, and motherboard for moisture. Allow the inner parts to fully air dry before reassembling.
Be patient and allow the computer to dry completely before attempting to turn it on again. This may take 24-48 hours if moisture penetrated inside. Rushing the drying process risks short circuiting components.
Check Interior Components
After drying the exterior, the next step is to carefully open up the computer’s case to inspect the interior components. Take care when opening the case, as you don’t want to cause any further damage. Look closely at the motherboard, ports, drives, fans, and other internal parts for any signs of moisture or corrosion. According to How to Detect if a Computer Has Water Damage, inspect for mineral deposits, corrosion, or discoloration on internal components which can indicate water exposure and damage (https://smallbusiness.chron.com/detect-computer-water-damage-71330.html). Pay special attention to areas like USB ports which are vulnerable. If you spot any moisture or corrosion, make note of where it is and how extensive it is. This inspection will help you determine the next steps such as cleaning or professional repair.
Clean with Isopropyl Alcohol
One of the most effective ways to clean electronics after water damage is by using high percentage isopropyl alcohol (90% or higher) and cotton swabs. Be very gentle when cleaning accessible components and avoid getting liquid down into other areas.
Use a cotton swab dipped in isopropyl alcohol to gently wipe down the exterior and accessible interior parts. The alcohol helps displace water and dissolve contaminants. Focus on cleaning corrosion-prone areas like contacts and connectors. Let each section dry fully before moving on.
Take care not to get any liquid down into other components, as you want to avoid further water damage. It’s ideal to clean just a small section at a time. Wipe slowly and do not scrub hard on delicate parts.
Cleaning with isopropyl alcohol can help revive electronics after water damage, but be cautious and strategic during the process. Using at least 90% concentration alcohol and cleaning gently is key.1
Let Dry Completely
It is crucial to allow adequate drying time after a laptop gets wet. Water and moisture damage electronics, so you need to be patient and let the laptop dry out completely before attempting to turn it on again.
Experts recommend allowing 1-3 days minimum for the laptop to dry out (Source). Leaving it 5-7 days is ideal if possible. Do not rush this step – a laptop that seems dry on the outside may still have moisture inside.
To help speed up drying, place the laptop in a room with low humidity near a fan or dehumidifier (Source). Air circulation will remove the moisture faster. Avoid any heat sources. Do not attempt home remedies like placing it in rice, which are not effective.
Patience is key during the drying period. Once 1-3 days have passed, you can reconnect the battery and power source and attempt to turn on the laptop. If it does not power on, let it dry longer before trying again.
Reconnect Power
Once the computer is completely dry, it’s time to reconnect the power source and test the device. Be sure the battery is fully reinstalled if it was removed. Before plugging in the computer, inspect the AC adapter for any moisture or damage. Allow the adapter to fully air dry if needed. When ready, plug the computer into an outlet and press the power button to turn it on. If the computer powers up and functions normally, the drying efforts were successful. However, do not be surprised if it does not work on the first try. It may take multiple attempts to get the device operational again after water exposure. Be patient and try turning it on a few times. If it still does not power on, there may be residual moisture inside that requires more drying time.
After getting the computer to turn on, thoroughly test all functions – keyboard, trackpad, screen, speakers, ports, camera, etc. Verify all programs, apps, and files open properly without error messages. If everything appears to work correctly, you can resume normal use of the device. However, it’s wise to immediately backup all data in case problems arise down the road. Water damage can lead to corrosion over time, so ongoing issues may still occur. Be proactive about backing up data and watch for signs of deteriorating performance.
Backup Data
If possible, it is critical to backup your important files and data in case the water damage is severe enough to make your computer unusable or require replacing your hard drive. There are a couple options for backing up your files:
Copy important files to an external drive: Connect an external hard drive or USB flash drive to your computer while it still functions. Use this to copy and save your valuable documents, photos, media files, and other data that you don’t want to lose. This creates a physical backup you can access from another computer if needed.
Use cloud storage as a backup: Services like Google Drive, Dropbox, iCloud, OneDrive, etc. provide cloud storage space to backup files. Make sure important folders and files are synced and up-to-date in your cloud storage account. This gives you access to your data from any internet connected device if your computer is damaged.
It’s always a good idea to routinely backup your computer, but it becomes critical if it gets water damage. Saving a copy of your important files provides a way to restore them if your computer is unusable or needs repairs. For more on data recovery from water damage see [url]https://www.gcit.net/blog/7-steps-to-recover-data-from-a-water-damaged-hard-drive[/url]
Professional Repair
If the computer fails to turn on or exhibits signs of corrosion after drying, it likely requires professional repair. Water damage can short circuit components, cause corrosion, or trigger other issues that prevent a computer from powering on or functioning properly. In these cases, do not continue troubleshooting on your own, as you risk causing further damage. Instead, bring the computer to a qualified repair shop specializing in water damage and data recovery.
Professional repair technicians have the skills, tools, and parts to fully disassemble a water-damaged computer, thoroughly clean or replace damaged components, and attempt restoration. This gives the computer the best chance for a successful repair. However, costs can range from $100-$1000+ depending on extent of damage. Also, some older computers may not be worth the repair investment. Evaluate the computer’s value before committing to professional repair.
Importantly, a professional shop may be able to recover data from a water-damaged hard drive or SSD, even if the computer won’t power on. Data recovery services can retrieve lost files, documents, and photos – minus those corrupted beyond repair. Expect high costs for extensive data recovery – up to $3000 or more based on drive size and damage level. But for irreplaceable data, the investment is often worthwhile.
When selecting a repair shop, look for experience with water damage issues specifically. Check reviews and ask about their repair process and success rates. An established, specialist repair shop gives the best chance to get a water-damaged computer working again.
Prevent Future Damage
The best way to prevent water damage to electronics is to keep liquids away from them in the first place. Be very careful when drinking beverages near electronics. Make sure to keep a safe distance between drinks and devices or use coasters and placemats. Also take care not to place electronics near sinks, bathtubs, pools, or other sources of water.
When traveling with electronics, use waterproof bags or protective cases. There are many affordable options available, like waterproof pouches, hard cases, and backpack rain covers. Putting a device inside a sealed bag or case will protect it if you get caught in the rain or have an accidental water spill. Consider using waterproof protection even for quick outings to be on the safe side.
Citing sources:
https://www.panelfastenercn.com/industry-information
https://www.lemon8-app.com/discover/preventing%20water%20damage%20to%20electronics%20at%20Disney%20World?region=id