What Does It Mean When a Disk Is Not Initialized?
Disk initialization is the process of preparing a new disk for use by formatting it and creating partitions. An uninitialized disk is a disk that has not gone through this process yet. When a disk shows up as not initialized in Disk Management on Windows or Disk Utility on Mac, it means the disk is not ready to store data.
Initializing a disk is important because it allows the operating system to structure the storage space and assign it a drive letter. Without initializing, the OS would not be able to access and write data to the disk. An uninitialized disk will not show up as available storage space.
Some symptoms of an uninitialized disk include:
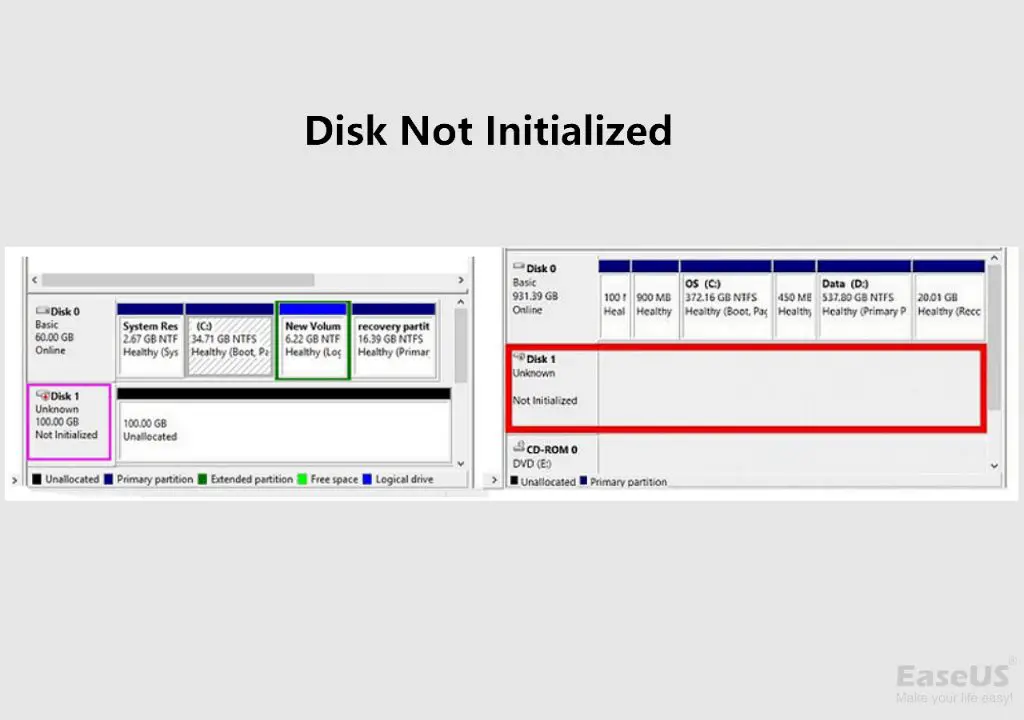
- The disk appears as “Unknown” or “Not Initialized” in Disk Management/Disk Utility.
- No drive letter is assigned to the disk.
- The full storage capacity does not show up as available space.
- You cannot access or open the disk to view files.
Common causes of an uninitialized disk include:
- Brand new HDD or SSD that has never been formatted.
- Drive was erased/wiped completely so it lost its formatting.
- Disk partitioning structures or tables were damaged or corrupted.
- Changing motherboard without reinitializing drives.
Overall, an uninitialized disk simply means it lacks the necessary file system structure for the OS to use it without taking further action to set it up.
Verify the Disk Is Actually Uninitialized
Before initializing a disk, you’ll want to verify that it is actually in an uninitialized state. The main tool to use for this on Windows is Disk Management.
To open Disk Management, right-click the Start menu and select “Disk Management.” This will open a window showing all connected disk drives and their status.
Locate the concerning disk in the list. Check its properties or details to view its status. If it is listed as “Unknown” or “Not Initialized,” then the disk does need to be initialized before it can be used.
You can also view disk properties by right-clicking the disk and selecting Properties. Confirm the status shows as “Not Initialized.” If you do not see the expected status, it’s possible the disk may not actually need initialization.
For further confirmation, refer to the drive in Windows Explorer. If it does not have a drive letter assigned and cannot be accessed, initialization is required. Using Disk Management to verify uninitialized status can prevent errors from trying to initialize disks that don’t actually need it.
For more information, refer to: https://learn.microsoft.com/en-us/windows-server/storage/disk-management/initialize-new-disks
Initialize the Disk
The easiest way to initialize a disk in Windows is to use the built-in Disk Management utility. Here are the steps:
1. Open Disk Management by pressing the Windows key + R, typing diskmgmt.msc, and clicking Run.
2. The new disk should appear in the list without a drive letter assigned. Right-click on the disk listing and select Initialize Disk.
3. This will launch the Initialize Disk window. Here you need to choose between MBR (Master Boot Record) or GPT (GUID Partition Table). MBR is the older standard and supports disks up to 2TB. GPT is newer and supports larger disks. Most users should choose GPT unless you specifically need MBR for compatibility reasons.
4. Once you’ve selected MBR or GPT, click OK. Windows will now initialize the disk.
For more details, refer to Microsoft’s guide on Initializing new disks.
Troubleshoot Initialization Errors
Hardware issues like bad sectors or faulty components can prevent a disk from initializing properly. Check that cables are firmly connected between the disk and motherboard. Try connecting the disk to another SATA port or replacing the SATA cable if issues persist. Faulty drivers may also interfere with initialization, so update your storage drivers to the latest stable versions.
Data corruption is another common cause of initialization failure. Run chkdsk /f to scan for and repair errors on the disk. If too much corruption is detected, initialization will fail. You may need to reformat the disk entirely if chkdsk cannot fix the errors. As a last resort, initialize a replacement disk and attempt data recovery of your files.
For more help troubleshooting, refer to the Diskpart and EaseUS articles on initialization errors and chkdsk usage [1] [2].
Initialize a New Replacement Disk
When replacing an old hard drive with a new one, the new disk will need to be initialized before it can be used. Here are the steps to initialize a new replacement disk in Windows:
First, physically install the new disk in the computer. Refer to the computer or drive manufacturer’s documentation for instructions on properly mounting and connecting the new drive. Typically this involves opening up the computer case, mounting the drive in a drive bay, and plugging in the drive’s SATA and power cables.
After the new disk is physically installed, restart the computer and enter the system BIOS setup menu, usually by pressing a key like Delete or F2 during boot. In the BIOS, verify that the new disk is detected and enabled as an available disk drive. Save changes and exit BIOS.
Once in Windows, bring up Disk Management (press Windows Key + R then type “diskmgmt.msc”). The new disk should appear but show up as “Offline” and “Not Initialized”. Right-click on the disk and select “Online”. Then right click it again and click “Initialize Disk”.
This will launch the Initialize Disk wizard. Select either MBR or GPT partitioning style, depending on your preferences and requirements. It’s also recommended to check the box to overwrite the disk with zeros to fully erase and prepare it.
The disk should now display as “Online” with the full storage capacity available and listed as “Unallocated”. You can now create new volumes on the disk or format it as required.
The new replacement disk is now initialized and ready to be used as a new storage drive in Windows.
Recover Data from Uninitialized Disk
Recovering data from an uninitialized disk can be challenging, but is possible in many cases using disk recovery software or data recovery services.
Recovery software such as Pandora Recovery, EaseUS Data Recovery, or Recuva may be able to scan the disk and rebuild its file structure to regain access to files. These tools can recover deleted files or locate existing files on a drive with corrupted partitions. Follow the step-by-step process in the software to scan, select and recover files to another disk.
For more complex cases like physical damage, send the disk to a data recovery service. They use specialized tools in a dust-free cleanroom to attempt extracting data. However, this can be expensive and not guarantee success.
Challenges arise because the operating system can’t interact with an uninitialized disk to access file data. The recovery process involves scanning raw platters and trying to rebuild file tables. With an uninitialized disk, critical file allocation information has been lost or corrupted. So recovery is not always possible, depends on the specific disk issue.
Common Causes of Disk Not Initialized
There are several common causes that can lead to a disk not being initialized properly:
Disk corruption: Corruption in the master boot record (MBR) or other disk structures can prevent Windows from recognizing the disk properly. This can happen from sudden power loss, drive failure, or malware infection (Fixed: Disk 1 Unknown Not Initialized in Windows 11/10/8/7).
Drive letter conflict: If two disks are assigned the same drive letter, Windows may have trouble identifying one of the disks, leaving it uninitialized. This is more common when connecting an external drive or hot-swapping drives.
Connection issues: Damaged ports, cables, controllers, or drivers can interrupt the connection between a drive and the system, causing initialization issues. This may happen after a hardware change or cable damage.
Damaged partition: If the partition information or file system structures are corrupted or erased, Windows may not detect an existing partition. This can be caused by disk errors, accidental reformatting, or partition deletion (Solved: Disk Unknown Not Initialized).
When to Contact a Professional
If you’ve exhausted all the basic troubleshooting steps and your disk is still not initializing properly, it may be time to contact a professional for advanced assistance. There are a few instances where professional help is recommended:
Advanced Troubleshooting Needed – If you’ve tried initializing the disk in Disk Management, using diskpart commands, changing cables, updating drivers, etc. and it still won’t initialize, a technician may be able to dig deeper and try more advanced troubleshooting to determine the cause.
Data Recovery Services – If your uninitialized disk contains important files and data that you need to recover, a professional data recovery service may be able to help retrieve your data even from an unreadable drive. However, this can be a costly process so only pursue it if the data is absolutely essential.[1]
Hardware Replacement/Repair – If you determine the disk itself is faulty or damaged and unable to be initialized, you may need professional assistance with repairing or replacing the physical disk. Technicians have the expertise to troubleshoot hardware issues and recommend the best solution.
In summary, if DIY troubleshooting is unsuccessful and your data/hardware is at risk, seeking professional help can provide more advanced diagnostics and solutions when dealing with an uninitialized disk.
[1] https://www.easeus.com/storage-media-recovery/recover-data-from-uninitialized-disk.html
Preventing Disk Initialization Issues
There are some best practices you can follow to help prevent disk initialization issues from occurring in the first place:
Safely eject drives – Always use the “Safely Remove Hardware” option when disconnecting an external drive from your computer. Abruptly unplugging a drive while it’s still in use can cause corruption and initialization problems.
Monitor SMART status – Use a disk monitoring tool to keep an eye on your drive’s SMART attributes. The SMART status can alert you to potential disk problems before they escalate into more serious issues like not being initialized. Replace aging drives before failures occur.
Maintain up-to-date backups – Regularly backing up your data provides a safety net in case of disk failures. Should your disk become corrupted or uninitialized, your data will still be protected on another drive or backup media. Test backups periodically to verify they are working.
Following these best practices will help minimize the chances of experiencing that dreaded “disk not initialized” situation. But if issues do arise, use the troubleshooting steps outlined in this guide to get your drive back up and running again.
Initializing Disks on Other Operating Systems
Disks can be initialized in different ways depending on the operating system. Here are some tips for initializing disks on Mac, Linux, and other non-Windows systems:
On Mac OS, you can use the Disk Utility application to erase and format disks. Select the uninitialized disk, click “Erase”, choose a format like APFS or ExFAT, name the disk, and click “Erase” again. This will reformat and initialize the disk for Mac [1].
For Linux, you can use command line utilities like fdisk, gdisk, or parted to create a new partition table and filesystem. For example, using fdisk: sudo fdisk /dev/sdX, then run commands like “o” to create a new empty DOS partition table, “n” to create partitions, “w” to write changes. Then format with mkfs.[2]
Cross-platform filesystems like ExFAT or ext4 can be used to share data between Linux, Mac, and Windows. But native filesystems like NTFS or APFS may have better performance on each OS.[3]