Having a new solid state drive (SSD) installed can be exciting, but also a bit overwhelming if you’re not sure how to set it up properly. An SSD can dramatically improve your computer’s performance by increasing speed and responsiveness. However, there are some steps you should take to ensure your SSD is optimized for peak performance. Let’s look at some frequently asked questions and answers about what to do with a newly installed SSD.
How to install operating system on new SSD?
The very first thing you’ll want to do with a new SSD is install your operating system, like Windows or MacOS. This ensures that your OS will benefit right away from the SSD’s faster speeds compared to a traditional hard disk drive (HDD). Here are the basic steps for installing your OS on the new SSD:
- Back up any important data from your old drive if possible.
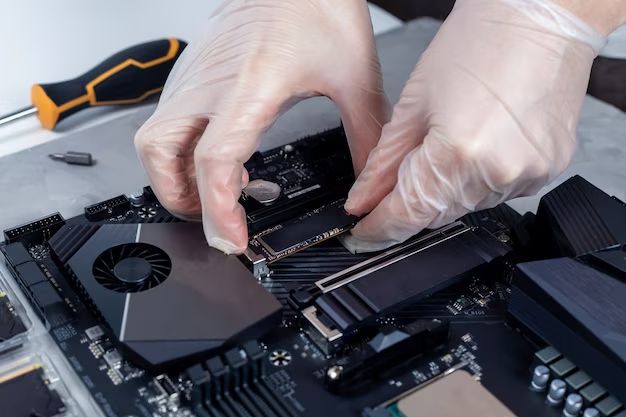
- Physically install the SSD into your computer if not already done.
- Boot from the OS install disk for your computer and follow the prompts to install the OS onto the SSD.
- Set the SSD as the primary boot drive in your BIOS settings.
- Reinstall other programs and restore data from backup.
Following these steps allows for a fresh OS install optimized for SSD. Be sure to check your motherboard manual for specific instructions on setting the SSD as the boot drive if needed.
How to transfer programs and files to new SSD?
After installing your operating system on the SSD, you’ll likely want to transfer over applications, files, and settings from any old hard drives. Here are a few options for migrating data to the new SSD:
- Cloning software: Programs like Macrium Reflect or Samsung Data Migration can clone your old drive to the new SSD, migrating everything over seamlessly.
- Manual copy: You can manually copy files and folders from the old drive to the SSD. This works well for media files and personal documents.
- Reinstall apps: For a fresh start, manually reinstall applications on the SSD and transfer over relevant settings and files.
We recommend a combination of approaches. Use cloning for most applications and files. But reinstall particularly large programs fresh on the SSD and transfer over settings. Check for any incompatible files on the old drive.
How to enable TRIM on SSD?
Enabling TRIM support on your SSD is highly recommended. TRIM is a command that allows the SSD to more efficiently handle how data is written, stored, and deleted. It helps maintain the SSD’s performance over time.
Here’s how to make sure TRIM is enabled:
- For Windows, open the Command Prompt as admin and enter “fsutil behavior set DisableDeleteNotify 0”. This enables TRIM.
- On Macs, TRIM is automatically enabled for Apple SSDs. For third party drives, you may need to install the manufacturer’s toolkit to activate TRIM.
- On Linux, you’ll need to mount filesystem partitions with “discard” option enabled to use TRIM.
Running the TRIM command periodically, like each month, will optimize the SSD’s performance. You can also use third-party utilities that automatically TRIM SSDs regularly.
How to benchmark and monitor SSD performance?
To make sure your SSD is performing as expected, benchmarking and monitoring utilities are useful. Here are some good options:
- CrystalDiskMark: Tests sequential and random read/write speeds for benchmarking.
- AS SSD Benchmark: Provides an overall performance score and tests various file sizes.
- Samsung Magician: Monitoring and maintenance for Samsung SSDs specifically.
- DiskMon: Free utility to monitor disk activity and read/write speeds in real-time.
Run benchmarks right after installing your OS and applications to establish a baseline. Re-run them periodically to check for performance changes over time. Monitor real-time disk activity as you use different applications.
How to update SSD firmware?
SSD manufacturers will periodically release updated firmware for their drives to fix bugs and improve performance. It’s a good idea to update your SSD’s firmware to take advantage of improvements. Here’s the process:
- Go to the manufacturer’s website and search for firmware updates for your specific SSD model.
- Download the firmware file and any required utility programs.
- Backup important data in case something goes wrong.
- Run the firmware update utility. Often you’ll need to boot into a special mode.
- Follow the prompts to update the firmware to the new version.
- Reboot once the update completes.
Updating normally only takes a few minutes. Check the release notes so you know what changes or enhancements the firmware update includes. Overall, keeping your SSD firmware up-to-date helps it run as designed.
How to optimize Windows for SSD?
Windows includes some optimization options specific to SSDs that you should enable for maximum performance. Here are key settings to configure:
- Enable AHCI mode: AHCI allows hot swapping and native command queuing for SSDs. Check in BIOS and Device Manager.
- Disable defragging: Defragmenting is unnecessary for SSDs and will only cause additional wear. Disable in settings.
- Turn off Superfetch and Prefetch: These features that preload data are not useful for SSDs. Disable in Registry Editor.
- Enable write-caching: Turn on write-caching buffer in Device Manager for the SSD to allow faster writes.
There are also tweaks to minimize writes, like disabling hibernation and pagefile, and optimize file indexing and clearing of system files. Adjusting a few key settings makes a difference in SSD performance on Windows.
How to secure erase SSD before disposal?
When it’s time to replace or upgrade your SSD, you’ll want to perform a secure erase of the drive before physically disposing of it. This wipes all data from the drive and resets it to factory settings. Here’s how to securely erase an SSD:
- Backup any data you wish to keep from the SSD.
- Use disk utility software like Parted Magic to overwrite all cells with zeros.
- For drives that support it, use “secure erase” command built into the SSD firmware.
- Physically destroy the SSD if you’re concerned about data security.
Securely erasing protects your personal information from ending up in the wrong hands. It also wipes the drive to factory fresh state so it’s ready for a new owner to use. Be sure to research your specific SSD model for the best way to do a secure erase.
What are common SSD problems and troubleshooting tips?
Like any storage device, SSDs can sometimes run into technical issues. Here are some common SSD problems and troubleshooting suggestions:
| Problem | Troubleshooting Tips |
|---|---|
| Slow performance | Enable TRIM, update firmware, check for malware |
| Free space reporting issue | Run disk check and optimization tool to fix |
| Errors or crashes | Scan for bad sectors, check cables, test hardware |
| BSOD errors | Test with new SATA cable, update drivers |
| Reduced lifespan | Monitor wear level, keep 25%+ free space |
An SSD dying completely is rare. But issues like corrupted files or fragmented data can arise over time. Following best practices for setup, maintenance, and monitoring helps avoid most problems. But technical issues can still occur, often requiring firmware updates or replacement cables/hardware.
How to improve longevity and lifespan of SSD?
SSDs have a limited lifespan based on program/erase cycles before drive sectors begin failing. But you can maximize the life of your SSD and avoid premature failure. Here are tips to improve longevity:
- Enable TRIM: TRIM optimization keeps cells ready to write new data efficiently.
- Limit unnecessary writes: Disable features causing extraneous writes like pagefile.
- Reduce drive writes: Store media files, downloads, caches on a secondary HDD instead.
- Maintain free space: Keep at least 25% of your SSD free from stored files.
- Monitor health: Keep an eye on lifespan metrics like total data written.
With proper setup and maintenance, modern SSDs can last 5-10 years in normal consumer use. Enterprise-class drives used in data centers can operate reliably for 1-2 decades with sufficient free space, controlled workloads, and comprehensive monitoring.
Should You Buy SSD With DRAM cache?
SSDs with a DRAM cache provide faster read/write performance compared to SSDs without DRAM. The DRAM acts as a buffer, enabling faster transfer of data from the host to the SSD’s NAND flash storage. Here are the advantages of an SSD with DRAM cache:
- Faster sequential read and write speeds
- Greatly improved random access performance
- Higher sustained performance during large file transfers
- Reduced latency and increased responsiveness
The downsides are increased cost per GB vs SSDs without cache and marginally higher power consumption. Overall, the performance benefits make SSDs with DRAM cache worthwhile if within your budget. It provides a better user experience, especially for heavy workloads.
SSD Cache Size Recommendations
For optimal performance, look for the following amounts of DRAM cache on an SSD based on capacity:
| SSD Capacity | DRAM Cache |
|---|---|
| 128GB-256GB | 2GB |
| 512GB | 4GB |
| 1TB | 8GB |
| 2TB | 16GB |
Aim for 1-2% of total SSD capacity in DRAM for the most cost-effective cache to benefit performance. For heavy workstation use, opt for the higher 2% cache ratio.
Cheap SSDs Without DRAM?
It’s possible to get by with a budget SSD without DRAM cache for lighter workloads. These DRAM-less SSDs use the SSD’s internal NAND as temporary cache instead. Performance is still improved over hard drives. Consider cheap DRAM-less SSDs for:
- Older systems
- Boot drives
- Secondary storage / data drives
- Light consumer use like web browsing
For primary drives or performance PCs, invest in an SSD with quality DRAM cache proportional to its capacity. But DRAM-less SSDs work fine for basic tasks at a lower price point.
Should you buy SATA or NVMe SSD?
For most consumer use cases today, both SATA and NVMe SSDs provide excellent performance. But NVMe SSDs are emerging as the new standard with faster speeds. Here’s how the two SSD interface types compare:
| SATA SSD | NVMe SSD | |
|---|---|---|
| Interface | SATA 3 – 6Gbps | PCIe 3.0 x4 – 32Gbps |
| Sequential Reads | Up to 550MB/s | Over 3500MB/s |
| Sequential Writes | Up to 520MB/s | Over 3000MB/s |
| 4K Random Reads | Up to 100K IOPS | Over 750K IOPS |
| 4K Random Writes | Up to 90K IOPS | Over 750K IOPS |
| Latency | 0.1 ms or higher | Around 0.02 ms |
As you can see, NVMe SSDs offer vastly improved bandwidth and latency compared to SATA SSDs. They’re the performance choice for high-end gaming PCs and workstations.
However, SATA SSDs still deliver excellent real-world speed for most routine tasks at a lower price point. Either SSD type will feel lightning fast coming from a hard drive. But for peak speed, NVMe rules.
Conclusion
Installing a new SSD is exciting, but you’ll want to take a few key steps to ensure it’s set up properly. Some best practices include migrating your OS and files to the SSD, enabling TRIM, updating firmware, and monitoring health metrics. Fine-tuning operating system settings, maintaining sufficient free space, and limiting unnecessary writes will optimize performance and extend the lifespan of your SSD.
While SSD technology continues advancing rapidly, even DRAM-less SATA SSDs deliver a major speed boost over hard drives. However, choosing an SSD with quality DRAM cache and the NVMe interface provides the highest speeds and lowest latency. With some guidance on setup, maintenance and choosing the right SSD type, your new solid state drive will deliver blazing fast speeds and responsive computing for years to come.