Saving your work regularly is one of the most important habits when working in Microsoft Excel. Failing to save can lead to lost data and wasted time if your computer crashes or Excel encounters an error before you’ve hit “save.” This article covers where Excel stores unsaved files, how to recover unsaved work, and tips for avoiding data loss when using Excel.
Excel AutoRecovery
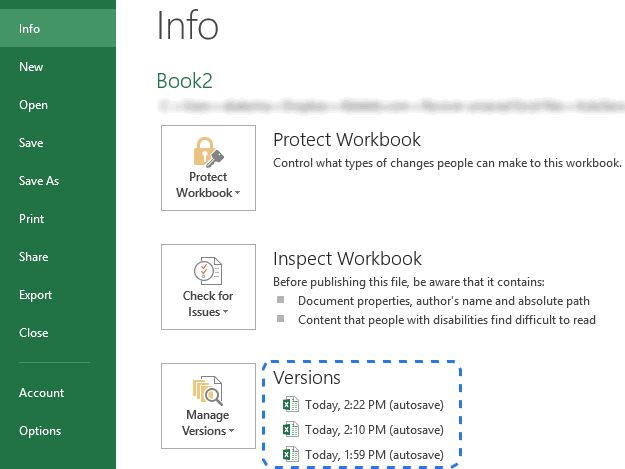
Excel includes an AutoRecovery feature that automatically saves versions of an unsaved workbook at regular intervals. This helps prevent data loss if Excel crashes or your computer loses power unexpectedly.
By default, AutoRecovery saves unsaved workbooks every 10 minutes. You can adjust this auto-save interval in the Excel Options. Go to File > Options > Save and set the “Save AutoRecover information every” option to a different number of minutes.
The AutoRecover versions are stored in a temporary folder and act as a backup in case your unsaved workbook does not get manually saved. If Excel crashes while you’re working on a file, the next time you open Excel it will display a Document Recovery pane allowing you to restore unsaved workbooks.
AutoRecover is enabled by default, so any unsaved Excel workbook you have open will be periodically saved to a temporary location. This helps avoid lost work if you forget to manually save or an unexpected shutdown occurs.
Sources:
Temporary Files
When you create or edit an Excel file without saving it first, Excel stores your changes in a temporary file on your computer. These unsaved Excel files are stored as temporary files so that your work is not lost if Excel crashes or your computer loses power.[1] The temporary files allow you to recover your unsaved work when you reopen Excel.
On Windows machines, Excel temporary files are stored in the following default location:
C:\Users\
The temporary files use the .TMP file extension. For example, if you have an unsaved Excel file called Budget.xlsx, the temporary file would be named ~$Budget.xlsx.tmp.
On Mac computers, Excel temporary files are stored here by default:
/Users/
The temporary files on Mac use the .xlk file extension instead of .tmp. So an unsaved Budget.xlsx would have a temp file named Budget.xlk in that location.
Knowing the default locations for these temporary Excel files allows you to find and recover your unsaved work if needed.[2]
File Locations
By default, unsaved Excel files are stored in temporary folders on your computer. The specific locations depend on whether you are using Windows or Mac:
On Windows, unsaved Excel files are stored in:
C:\Users\YourUserName\AppData\Local\Microsoft\Office\UnsavedFiles
On Mac, unsaved Excel files are stored in:
/Users/YourUserName/Library/Containers/com.microsoft.Excel/Data/Library/Application Support/Unsaved Files
So in summary, unsaved Excel files are stored in the “UnsavedFiles” folder under the Microsoft Office or Excel application data folders. The exact path will contain your user name and depend if you are on Windows or Mac.
Source: https://ios-data-recovery.com/excel-temporary-files/
Custom File Locations
The temporary file location where Excel stores unsaved files can be customized in the Excel options or preferences.
To change the temp file location in Excel:
- Open Excel and click on the File tab.
- Select Options.
- Go to the Save section.
- Under “Default local file location”, click on the Browse button.
- Navigate to the desired folder location and select it.
- Click OK to set the new temp file location.
This will now be used for storing Excel’s temporary files like unsaved workbooks. Just be sure the folder has permissions for Excel to read and write files.
Additionally, the temporary file location can be set via Group Policy for all Excel users in an organization. The policy path is: User Configuration > Policies > Administrative Templates > Microsoft Excel xxx > Options > Save and set the “Alternate startup file location” policy.
Setting a custom file location for unsaved Excel files can help organize them separate from the default temp folders. It also makes it easier to find and recover unsaved Excel files if needed.
File Recovery
If you close an Excel file without saving, there are a couple ways you may be able to recover the unsaved file:
AutoRecovery Backups: Excel automatically saves backup versions of your file every 10 minutes by default. You can access these files to try to recover your work. To find AutoRecovery files, open Excel and click “File” > “Open” > “Recent” then look for files that say “AutoRecovery” in the file name. You can open an AutoRecovery file to view the contents and save it with a new name if needed. However, AutoRecovery only retains the last few versions, so if you wait too long the unsaved file may get overwritten[1].
Temporary Files: Excel also saves temporary versions of your files in the Temp folder as you work. You may be able to recover an unsaved file from your Temp folder before it gets overwritten. To find the Temp folder location, go to File Explorer and in the address bar type %temp% and hit Enter. Search for files that start with ~$ (representing unsaved Excel files). However, these versions don’t get updated as frequently as AutoRecovery files.[2]
If you can’t find your unsaved file using these methods, recovery software is available that can scan your hard drive to try to find lost or deleted Excel files. However, the chances of recovery decrease over time as files get overwritten by new data, so act quickly if possible.[3]
AutoSave Options
Excel’s AutoSave feature allows you to adjust how frequently your work is automatically saved. This helps safeguard against data loss in case of application crashes or power outages. You can adjust the AutoSave frequency in Excel’s Options menu:
Go to File > Options > Save and check the “Save AutoRecover information every” box. The default is 10 minutes, but you can adjust it to as frequent as 1 minute or as long as 60 minutes between AutoSaves. The more frequent the AutoSave, the more protected your data, but more frequent saves may impact performance.
Other AutoSave settings in this menu include:
- “Keep the last AutoSaved version if I close without saving” – Keeps your unsaved changes even if you close Excel without an explicit save.
- “AutoRecover file location” – Specifies where to save AutoRecover files. The default is your temporary files folder.
Adjusting these options, especially shortening the AutoSave frequency, helps safeguard your work from loss. Just be aware that increased frequency may impact performance if working with very large Excel files.
For more details see: Excel AutoSave Options On Client Server Network
Save Reminders
Excel includes a handy Save Reminder feature that can help prevent data loss by prompting you to save your workbooks if they have unsaved changes. This feature is not enabled by default, but can easily be turned on.
To enable Save Reminders in Excel:“How to suppress Save Changes” prompt when you close …
- Go to File > Options > Save.
- Under “Save workbooks”, check the box next to “Remind me to save after every 5 minutes”.
- You can adjust the time interval as needed, from every 1 minute up to 120 minutes.
Once enabled, Excel will display a prompt after the set time interval when you have unsaved changes, reminding you to save your work. You can enable or disable this feature at any time. Some users may find the popups annoying, in which case the reminders can simply be turned off. But for those who tend to forget to save periodically, the Save Reminders can help avoid losing work.
Best Practices
When working in Excel, it’s important to save your work frequently to avoid losing data. Here are some best practices for saving Excel files:
Set auto-save reminders – Go to File > Options > Save and check the “Remind me every x minutes to save my work” box. Set the frequency to 5-10 minutes as a reminder to manually save your work.
Save versions of your file – Use File > Save As to create new versions of your Excel file periodically as you work. Add version numbers like “budget spreadsheet v1” to the filenames.
Save at natural break points – Save your work after completing a major task or section. Don’t wait until the entire project is finished.
Backup important files – Copy important Excel files to an external hard drive, cloud storage, or file hosting service. This protects against data loss if your main device fails.
Limit edits on shared files – When collaborating, have one person serve as the “master editor” to avoid conflicting changes. Other users should save a separate copy before making edits.
Turn on AutoRecover – Go to File > Options > Save and check “Save AutoRecover information every x minutes” to restore lost data after a crash. Set to 10 minutes or less.
By saving frequently and utilizing AutoRecover, you can minimize lost work if an Excel file becomes corrupted or fails to save properly. Protect your data with proactive save habits.
Conclusion
In summary, Excel automatically saves unsaved workbooks as temporary files to help prevent data loss in case of application or system crashes. These temporary files are stored in hidden temporary folders based on your Windows user profile and version of Office. You can customize the Autosave location if desired. While AutoSave offers a safety net, it’s still critical to manually save your workbooks regularly to ensure no data loss. Save your workbook after any major changes and use Save Reminders if you tend to forget. Developing strong saving habits will protect your work and prevent headaches down the line.
Understanding where unsaved Excel files are stored and how to recover them gives you peace of mind. But manual saves are still the best practice for maintaining your hard work. Save early and often!
