Partitioning a disk divides it into separate volumes that function independently, with their own file system structures. Users may want to partition their external SSD on a Mac for various reasons like running different operating systems, keeping personal data separate from work files, or organizing projects and workflows.
However, there are some limitations that can prevent partitioning external SSDs on Macs. This article will explain the common issues and how to resolve them.
Common Reasons Partitioning Fails
There are a few common reasons why you may not be able to partition your external SSD on a Mac:
File System Incompatibility
The external SSD may be formatted with a file system that is incompatible with partitioning on Mac. For example, drives formatted with Windows-only NTFS file system cannot be partitioned on Mac [1]. To partition, the drive needs to use a Mac compatible format like APFS, Mac OS Extended, or ExFAT.
Disk Errors
Errors or corruption on the external SSD can also prevent partitioning. If the drive has bad sectors or file system problems, Disk Utility may not allow partitioning or even mounting the drive. Running First Aid in Disk Utility can check for and repair errors like directory damage or file system corruption [2].
Partition Map Scheme Limitations
Drives formatted with Master Boot Record (MBR) partition scheme cannot have more than 4 partitions. So if your external SSD already has the maximum MBR partitions, the Partition option will be greyed out in Disk Utility. To add more partitions, the drive would need to be reformatted with GUID partition map [3].
Requirements for Partitioning
There are a few requirements that need to be met in order to successfully partition an external SSD on a Mac:
The SSD needs to have a compatible file system. By default, most external SSDs use the exFAT format which does not support partitioning. The drive needs to be formatted to Mac OS Extended (HFS+) or APFS in order to partition the drive. See Apple’s guide on supported file systems.
The disk should be healthy and free of errors. Any disk errors can prevent partitioning. Use the First Aid tool in Disk Utility to verify and repair disk errors. See Apple’s instructions for checking and repairing disk errors.
There needs to be sufficient free space on the disk to create partitions. If the disk is almost full, there may not be enough room to divide it up. Free up space by deleting unnecessary files or moving them to another disk.
How to Check File System
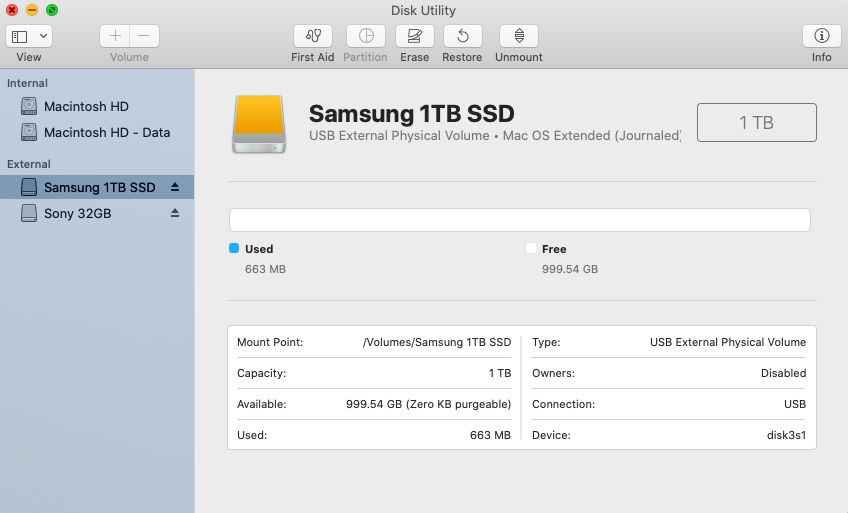
The easiest way to check the file system format of an external SSD on Mac is to use Disk Utility. Disk Utility is an app that comes pre-installed on all Macs and provides information about storage devices connected to your computer.
To check the file system of your external SSD using Disk Utility:
- Connect your external SSD to your Mac if you haven’t already.
- Open Disk Utility. You can find it using Spotlight or by going to Applications > Utilities.
- Locate your external SSD in the sidebar on the left. It will likely be labeled something like “External” or have the manufacturer name.
- Select the disk, not the volume underneath it.
- Click the Info button at the top of Disk Utility.
- Look next to “Format” to see the file system format. This will typically show APFS, Mac OS Extended (HFS+), exFAT, or FAT32.
Using Disk Utility is the simplest way to quickly identify the file system of an external drive on a Mac. This can help determine if the file system is compatible for partitioning or if it needs to be reformatted before partitioning the drive.
For more details, see this guide: How to Determine File System of a Drive on Mac
How to Check for Disk Errors
One way to check for disk errors on an external SSD on Mac is by using the First Aid feature in Disk Utility. Disk Utility is an application included with macOS that allows you to manage disks and volumes. The First Aid tool can check the disk for errors and then attempt to repair them.
To run First Aid on an external SSD in Disk Utility:
- Open Disk Utility, located in Applications > Utilities
- Select the external SSD from the sidebar
- Click “First Aid” in the top center of the Disk Utility window
- Click “Run” to begin checking for errors
First Aid will verify the disk and attempt to fix any issues it finds. This can help resolve problems caused by disk corruption or damage that may be preventing partitioning of the external SSD on a Mac. If First Aid is unable to repair the disk, it may need to be reformatted before partitioning will be possible.
According to Apple’s Disk Utility guide, running First Aid regularly can help prevent and identify minor disk issues before they become major problems. Using Disk Utility’s First Aid to check for disk errors is often one of the first steps recommended when troubleshooting an unresponsive external drive on Mac.
Checking Partition Scheme
The partition scheme used on an external SSD determines whether it can be partitioned in macOS. The two main partition schemes are Master Boot Record (MBR) and GUID Partition Table (GPT).
MBR is an older partition scheme that is not fully compatible with macOS. With MBR, you are limited to a maximum of 4 partitions and partition sizes of 2TB. MBR does not properly support partitions larger than 2TB.
GPT is the newer recommended partition scheme for use with macOS and does not have the size and partition limitations of MBR. GPT allows for more partitions and larger partition sizes and is required to install and boot macOS from external drives (source).
To check the partition scheme on an external SSD in macOS:
- Open Disk Utility
- Select the external disk
- Check the “Partition Map Scheme” listed for the drive
If it shows “Master Boot Record” you will need to reformat the drive to change to a GPT partition scheme to remove the partitioning limitations.
Converting File System
To convert an external hard drive from HFS+ to APFS or from FAT32 to exFAT, you can use Disk Utility on your Mac.
First, connect your external hard drive to your Mac and launch Disk Utility. Select the external drive from the sidebar and click “Erase” at the top. This will bring up a dialog where you can choose APFS or exFAT as the format. Make sure to back up any important data first, as erasing will delete all data on the drive.
If you need to convert without losing data, you can use a third party tool like iBoysoft NTFS for Mac. This allows converting from HFS+ to APFS or FAT32 to exFAT non-destructively. Simply install the software and open it to select your external drive and convert it [1].
Converting from HFS+ to APFS provides advantages like strong encryption and space efficiency. Moving from FAT32 to exFAT removes the 4GB file size limit. Just be sure to back up your drive first before attempting any file system conversion.
Fixing Disk Errors
One of the most common causes for being unable to partition an external SSD on Mac is underlying disk errors. The macOS Disk Utility includes a feature called First Aid that can check the disk for errors and then attempt to repair them.
To run First Aid on an external SSD in Disk Utility:
- Open Disk Utility (located in Applications > Utilities)
- Select the external SSD disk (not a volume/partition)
- Click “First Aid” in the top toolbar
- Click “Run” to begin the repair process
First Aid will verify the disk structure and scan for errors. If any errors are found, it will attempt to repair them automatically. This includes fixing issues like bad sectors, directory damage, and lost clusters. Running First Aid regularly can help prevent and fix minor disk problems before they cause serious issues like being unable to partition a disk.
If First Aid is unable to repair the errors, it may suggest reformatting or replacing the disk. Reformatting will erase all data on the disk. In some cases, third party disk repair tools like DiskWarrior may be able to repair disks that Apple’s First Aid cannot.
Changing Partition Scheme
To convert from Master Boot Record (MBR) to GUID Partition Table (GPT) on an external SSD on Mac:
1. Open Disk Utility and select the external SSD from the left sidebar.
2. Click the Erase button at the top. This will delete all data on the drive so make sure to backup first.
3. Under Scheme, select GUID Partition Map.
4. Name the SSD and click Erase to reformat it.
The drive will now use the GPT scheme allowing you to partition as needed (source). Converting from MBR to GPT avoids the limitations of MBR and enables features like Boot Camp on macOS.
Conclusion
In summary, the key steps for allowing partitioning of an external SSD on a Mac are:
1. Check the file system of the drive using Disk Utility – it must be APFS, HFS+, or exFAT. Older formats like FAT32 do not support partitioning.1
2. Scan for and repair any disk errors using First Aid in Disk Utility. Errors can prevent partitioning.2
3. Verify the partition scheme is GUID Partition Map, not MBR or APM. The latter two do not support partitioning external drives.3
4. If needed, convert the file system to APFS and change the partition scheme to GUID using Disk Utility.4
Following these steps allows the external SSD to be partitioned correctly using Disk Utility on Mac.
