One of the most common errors with security camera systems is the “No HDD” or “No Hard Drive Detected” message. This simply means that the DVR or NVR is not detecting a hard drive installed in the system.
Security cameras record continuous video footage which gets saved onto a hard drive inside the DVR or NVR. So if this recording device cannot detect a hard drive, it has nowhere to store and save the video footage from the cameras.
Checking Physical Hard Drive Connections
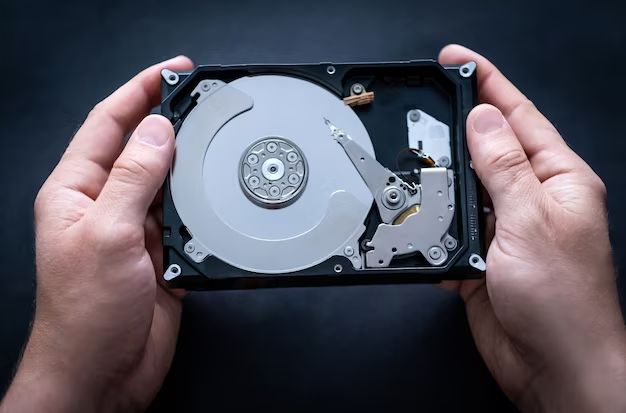
One of the first troubleshooting steps when a security camera is reporting no HDD is to open the camera case and check that the SATA and power cables are properly connected to the hard drive inside. If the cables have come loose or are not fully seated in their respective ports, this can cause the error message. According to 123-cctv.com, you should check “the SATA and power connectors to the hard drives to ensure firmly seated connections.”[1]
First unplug the power cable and remove the screws or other fasteners on the security camera case to access the internal components. Carefully inspect where the SATA data cable and the power cable connect to the hard drive. Press gently on the connections to confirm they are snug and properly mated with the SATA and power ports. If either cable seems loose, unplug it completely and then firmly reconnect it to the hard drive. Secure the camera case and restore power to see if this resolves the missing HDD error.
Reseating loose SATA and power connections is a quick fix that can get your security camera operational again. However, if the cables were properly connected, you’ll need to investigate other potential causes for the error message.
Sources:
[1] http://www.123-cctv.com/how-to-diagnose-fix-dvr-hard-drive.html
Trying a Different Hard Drive
One of the easiest ways to determine if the issue is with the existing hard drive or another component is to replace the current hard drive with a known working one. You can swap in a hard drive from another security camera system or use a new hard drive that you have confirmed functions properly.
To replace the hard drive, simply open up the security camera system housing and locate the hard drive. Depending on the model, you may need to detach cables or remove screws to pull out the old hard drive. Then insert the new replacement hard drive, reconnect any cables, and put the housing back together.
Once the security camera system is powered back on, check if the “no HDD” error has gone away. If the error is still showing with the new hard drive in place, then the issue is likely with something else like the SATA port, cables, or camera firmware. But if the system now detects the new hard drive and operates normally, then the original hard drive was faulty.
According to World Star Security Cameras, one of the most common reasons a security camera may stop recording video footage is due to insufficient storage space from a failing hard drive. Replacing the hard drive is often an effective solution in this case. https://worldstarsecuritycameras.com/troubleshooting-dead-dvr-nvrs-and-cameras/
Updating Camera Firmware
One potential fix is to update your security camera’s firmware. Firmware is the basic operating software that runs your camera’s core functions. Camera manufacturers periodically release firmware updates to fix bugs, improve performance, and add new features.
To update your firmware, first identify the exact model number of your security camera. Then visit the manufacturer’s website and download the latest firmware update for that model. Make sure to carefully follow all instructions provided by the manufacturer for installing the firmware update. This usually involves uploading the firmware file to the camera through its web interface, then rebooting the camera to complete the installation.
According to this tutorial video, updating to the latest firmware can often resolve issues like the “no HDD” error. The new firmware may optimize the camera’s processes for detecting and interfacing with the hard drive. So after updating, reboot your camera and check if the error still appears.
Formatting the Hard Drive
One potential solution is to format the hard drive in the security camera’s settings menu. This will erase all existing data on the drive and create a fresh file system, which can resolve corrupted system files or other issues preventing the camera from detecting the HDD. To format the hard drive:
1. Access the camera’s settings menu, often by using the mouse or connected monitor. Look for options like “HDD Management” or “Storage.”
2. Select the option to format or initialize the hard drive. This may require confirming the action.
3. After formatting is complete, reboot the security camera and check if the error message persists. Formatting creates an empty, properly structured drive for the camera to store footage again [1].
If the camera still does not detect the hard drive after formatting, the drive itself may be damaged or non-compatible. Try replacing the hard drive with a verified compatible model. Formatting eliminates software issues as the cause.
Corrupted System Files
System file errors can also be the cause of the “no HDD” message on a security camera. The system files contain key data needed for the camera to function properly, including recognizing and interfacing with the hard drive. If these get corrupted or damaged, it can lead to issues like the camera not detecting the hard drive.
There are a few potential causes of corrupted system files on a security camera:
- Faulty firmware updates – If a firmware update gets interrupted or doesn’t install properly, it can cause system file errors.
- Power surges – Power fluctuations can potentially corrupt system files.
- General file system damage – Long term use along with fragmentation can damage the file system over time.
If system file corruption is the culprit, the solution may be to reset the security camera back to factory default settings. This will wipe the system and reinstall a clean, unaffected set of system files. Just be aware that resetting will also erase any custom settings, so they would need to be reconfigured after the reset.
Overall, corrupted system files are one potential cause of the “no HDD” error on security cameras. Resetting the camera can wipe out the damaged files, but preventing the corruption in the first place is ideal via smooth firmware updates and surge protection.
Faulty Hard Drive
If your security camera is displaying a “no HDD” error, it could indicate that the hard drive has failed or is not functioning properly. Some signs of a faulty hard drive in a security camera system include the DVR not detecting the hard drive, the DVR continuously beeping, or frequent hard drive errors showing up in the system logs.1
When a hard drive fails, it is usually caused by mechanical or electronic issues within the drive. This can lead to data corruption, freezing, or the drive not being detected by the system at all. Some of the most common causes of hard drive failure include:2
- Bad sectors developing on the drive platters
- Failure of internal components like the read/write heads
- Overheating due to poor ventilation or high operation temps
- Firmware corruption or physical damage to the drive
If you suspect the hard drive is causing the “no HDD” error, the best way to confirm is to remove it and test it in another system or with a docking station. If the drive fails to mount or is not recognized, then it likely has a hardware failure and needs to be replaced. It’s recommended to replace a potentially faulty drive right away to avoid losing critical surveillance footage.3
Damaged SATA Port
The SATA data and power cables connect your security camera’s hard drive to the system board. A damaged port can prevent the DVR from detecting the hard drive properly.
Check that the SATA cables are securely attached at both ends – to the hard drive and system board. If wiggling the cable causes the drive to disappear or reappear, the connection is faulty. Try connecting the HDD to a different SATA port if available. According to CCTV Camera Pros, the same troubleshooting steps apply for various security camera DVR brands when diagnosing hard drive issues.
Inspect the SATA ports for any bent or broken pins. If pins are damaged inside the port, it will need to be replaced or repaired. Contact the security camera manufacturer for further troubleshooting if the HDD is still not recognized after trying different SATA cables and ports.
Conclusion
In summary, there are a few main reasons why your security camera may display a “no HDD” error message.
First, double check that the hard drive is properly connected to the security camera. Loose cables or faulty connections can prevent the camera from detecting the hard drive.
Updating the camera firmware can also help resolve HDD detection issues. Check the manufacturer’s website for the latest firmware version and instructions on upgrading.
If the hard drive itself is corrupted or damaged, formatting it or replacing it with a new drive may be necessary to get your camera fully functional again.
By methodically checking connections, firmware, and the hard drive itself, you should be able to resolve the “no HDD” error in most cases.
Further Troubleshooting
If none of the above steps resolve the “no HDD” error, there are a few other things you can try before seeking professional help:
Try connecting the hard drive to a computer to see if it is detected. This will confirm whether the issue is with the hard drive itself or something else.[1]
Reset the camera/DVR back to factory default settings. Sometimes corrupted settings can cause problems detecting the hard drive.[2]
Upgrade the firmware again, even if you already tried this before. Newer firmware versions may fix HDD detection issues.[3]
If all else fails, you may need professional assistance. A technician can test individual components like the hard drive, cables, and DVR board to isolate the problem. They can then replace any faulty parts to get your system recording again.
As a last resort, you may need to replace the entire DVR/camera if the issue is not resolvable. Be sure to choose a reliable brand and model and install it properly to avoid “no HDD” errors in the future.