Task Manager is a Windows utility that allows users to monitor system resources, view running processes, and manage applications. It provides an overview of computer performance and activity. Task Manager typically shows key components like CPU, memory, disk, and network usage.
However, sometimes the disk may not show up in Task Manager. When this happens, the disk storage device is not being detected by Windows. There are several potential reasons why a disk may not appear, which this guide will cover in detail.
Verify Disk is Properly Connected
One of the most common reasons a disk may not show up in Task Manager is because it has become physically disconnected. Before troubleshooting software issues, it is important to check that the disk is properly connected via its cables.
A hard drive requires both a power cable and a data cable to function. The power cable connects from the hard drive to the power supply, providing electricity to operate. The data cable, typically SATA or IDE, connects from the hard drive to the motherboard allowing data transfer. If either cable is loose, damaged, or disconnected, the hard drive will not be detected by the operating system.
To verify the disk is properly connected, open the computer case and check that both the power cable and data cable are securely attached at both ends, to the hard drive and motherboard. If disconnecting and reconnecting the cables does not resolve the issue, try swapping the cables for new ones in case the existing cables are faulty. Proper physical connections are the first step in diagnosing a disk not detected in Task Manager.
For more information, see this guide on resolving ATA/SATA hard drive detection issues: How to Fix ATA/SATA hard drive not detected in BIOS
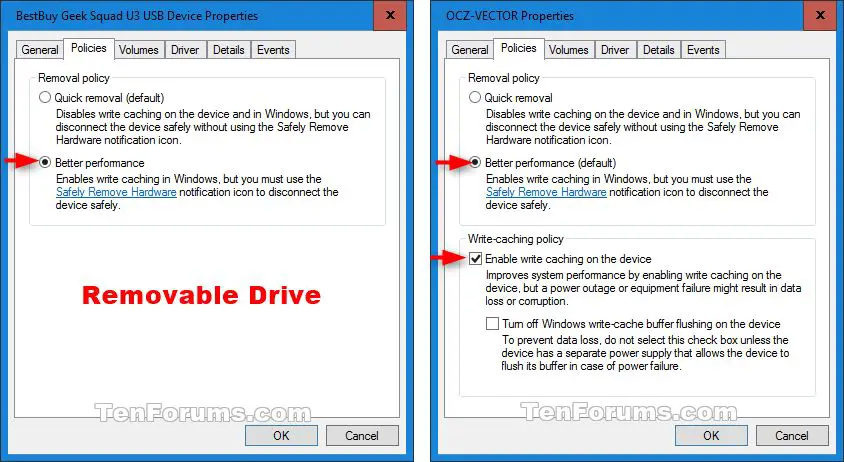
Check Disk Drivers
Having the latest disk drivers is important for your computer to properly communicate with connected disks and access data. Outdated or corrupt disk drivers can prevent disks from being detected, cause slow performance, or lead to crashes.
To update your disk drivers on Windows 10 or 11, open the Device Manager by right-clicking on the Start menu and selecting it. Expand the Disk drives section and right-click your disk drive. Select Update driver. Windows will automatically search for and install the latest driver software. You can also visit the disk drive manufacturer’s website to download the latest drivers.
Third party driver update utilities like DriverDoc can scan your hardware and identify outdated drivers. DriverDoc’s database contains over 8 million device drivers so it can find even obscure disk drivers. Updating disk drivers this way ensures you always have the most recent stable driver versions.
Keeping your disk drivers up-to-date will help maximize disk performance and stability. Outdated drivers are a common reason disks may not show in the Task Manager or File Explorer.
Enable View Option
Disk usage is not shown by default in the Windows Task Manager. To enable viewing disk usage in Task Manager, you need to go to the View menu and check the “Show disk” option.
Specifically, follow these steps:
- Open Task Manager by pressing Ctrl+Shift+Esc or right-clicking the taskbar and selecting “Task Manager.”
- Click the “More details” option at the bottom to expand Task Manager.
- Go to the View menu at the top and click “Show disk.”
This will add a disk usage section that displays the current disk activity for each drive. If the drive does not show up still, continue troubleshooting with the other solutions covered here.
According to this SuperUser post, the disk view option is disabled by default in Windows Server 2012 and later versions, so enabling it is necessary to see disk usage.
Verify Disk is Initialized
Disk initialization is the process of preparing a new disk drive for use so that Windows can read and write data to it. A brand new disk drive will show up as “Unknown” and “Not Initialized” in Disk Management until it is initialized. There are two options for initialization – Master Boot Record (MBR) and GUID Partition Table (GPT).
MBR is the older method and is best suited for disks under 2TB in size. GPT is newer and supports larger disk sizes. To initialize a disk, open Disk Management, right click on the disk and choose Initialize Disk. Select either MBR or GPT depending on your needs. This will erase any existing data on the disk drive so be sure to back up first if needed. Initialize an unallocated disk to prepare it for partitioning and formatting before data can be stored.
According to this article, disk initialization will erase any existing data on the drive. However, data recovery software may still be able to retrieve deleted files after initializing. Be very careful before initializing a disk that contains important data.
Check Disk Status
Disk Management is a useful built-in Windows tool to check the status and health of disks. To open Disk Management, right-click the Start button and select “Disk Management”. This will show all disks connected to your computer.
In Disk Management, check the disk status in the lower pane. A healthy disk will show as “Online”. An unhealthy or failing disk may show as “Offline” or “Failed”.
You can also view more detailed disk health information by right-clicking the disk and selecting “Properties”. In the Properties window, select the “Tools” tab to see S.M.A.R.T. status and perform error checking scans.
According to Milesight, Disk Management allows you to check disk status, add network disks, and configure disk properties. It is a useful first step in diagnosing disk visibility issues.
Change Drive Letter
Drive letters in Windows are assigned to physical disks and partitions when they are connected and initialized. The default drive letter configuration assigns letters starting from C: for hard drives and D: onwards for additional partitions and external drives.
To change the drive letter assigned to a disk in Windows 10 and 11:
- Open File Explorer and right-click on This PC or Computer.
- Click “Manage” and then click “Disk Management” in the Computer Management window.
- Right-click on the disk partition you want to change the drive letter for and select “Change Drive Letter and Paths.”
- Click “Change” and select the new drive letter you want from the dropdown.
- Click “OK” to confirm the drive letter change.
This will immediately change the drive letter assignment. Any running programs that rely on the previous drive letter may be disrupted or report errors until they are restarted.
Drive letters can also be changed from the command prompt using the assign command. For example:
assign X: D:
This will change the current D: drive to X:. Drive letters can be removed by assigning a blank.
Sources:
https://learn.microsoft.com/en-us/windows-server/storage/disk-management/change-a-drive-letter
https://www.journalofaccountancy.com/issues/2018/jul/how-to-change-drive-letters-in-windows.html
Update BIOS
The BIOS (Basic Input/Output System) is firmware used to initialize the system hardware components and boot the operating system when a computer is turned on. The BIOS controls low-level functions like accessing the disk drives, keyboard, display, and other devices (Intel, https://www.intel.com/content/www/us/en/gaming/resources/how-to-update-bios.html). Updating the BIOS can help resolve issues if your disk drive is not being detected properly.
To update the BIOS, first find the latest version available for your motherboard from the manufacturer’s website. Downloading the BIOS update file and follow the instructions provided. Typically, you will need to copy the update file to a USB flash drive, reboot into the BIOS setup utility, and select the option to flash or update the BIOS. Take care when updating the BIOS as any interruptions could cause the update to fail and make the system unable to boot (PCWorld, https://www.pcworld.com/article/516379/how-to-update-your-bios.html).
Updating to the latest BIOS version can help improve compatibility with storage devices and fix bugs that may prevent disk drives from being detected properly. However, updating the BIOS unnecessarily can also introduce new issues, so only update if you are having problems detecting disks that are confirmed to be connected and powered on.
Format Disk
If none of the previous troubleshooting steps reveal the disk in Task Manager, formatting the disk may be necessary as a last resort. Formatting completely erases all data on the disk and allows you to start fresh with a newly formatted volume.
To format a disk on Windows, open Disk Management, right-click on the disk you want to format, and select Format. This will launch the Format dialog box. Here, you can enter a Volume Label to name the disk and select the File System (typically NTFS or FAT32). Make sure to back up any important data first, as formatting will erase everything on the disk.[1]
On Mac OS X, open Disk Utility, select the disk, click Erase, provide a name and format, then click Erase to format the disk. This will erase all data but create a freshly formatted volume.[2]
Formatting the disk essentially resets it to a blank state, which should make it visible again in Task Manager. This resolves disk visibility issues caused by file system corruption or other problems. Just be absolutely certain you have backups before formatting, as all data will be deleted.
[1] “How to Format a Hard Drive in Windows.” Lifewire, 23 Apr. 2022, https://www.lifewire.com/how-to-format-a-hard-drive-2626077. Accessed 15 Feb. 2023.
[2] “How to Format a Hard Drive | Windows & Mac.” AVG, 8 Oct. 2021, https://www.avg.com/en/signal/how-to-format-hard-drive. Accessed 15 Feb. 2023.
Conclusion
In summary, there are a number of potential reasons why a disk may not show up in Task Manager. The most common causes are the disk is not properly connected or the required drivers are not installed. Other possibilities include the disk is not initialized or assigned a drive letter, the BIOS needs to be updated, or the disk needs to be formatted before it can be recognized.
The key is to methodically go through the potential solutions outlined here. Checking the physical connections and cables is an easy first step, followed by verifying the disk drivers are up to date. Enabling the “Show hidden devices” view option in Task Manager can also help troubleshoot the issue. While frustrating, the problem of a disk not appearing in Task Manager is usually solvable with a systematic approach.